
M365 Download Users Exchange Mail in PST Format
You need to be able to M365 Download Users Exchange Mail in PST format. There can be many reasons. You need to archive a user’s mail so you can remove the account and reuse the licensing or maybe you need a copy of the user’s mail for legal reasons.
Whatever the case, this guide will show that it is easy to M365 Download Users Exchange Mail in PST Format. Follow the steps below to get you started.
Setting Up eDiscovery Managers and Administrators
First, you need to determine who can do this. You will have eDiscovery Administrators and Managers. The only difference is that Managers can create cases and only see their cases while Administrators can create cases and see all cases.
NOTE: you can only use Microsoft Edge to do this. Other browsers will result in an error when you try to download the PST file. You must use Microsoft Edge to download exports.
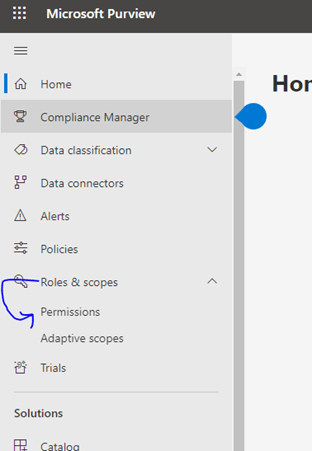
- Go to https://compliance.microsoft.com/
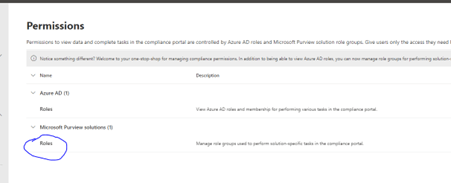
- Go to Roles and Scopes / Permissions:
- Go to Roles:
- Click “eDiscovery Manager” and then edit.”
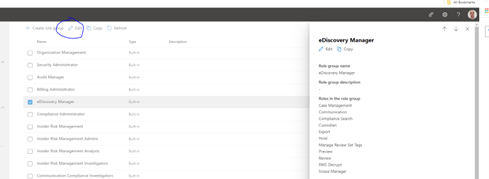

- A wizard will start, and you first pick the managers. They can create cases but only look at their own cases.

- Next you pick the eDiscovery Administrators. They can create cases as well, but they can also look at all managers’ cases as well.
- Then Click Save
M365 Download Users Exchange Mail to PST
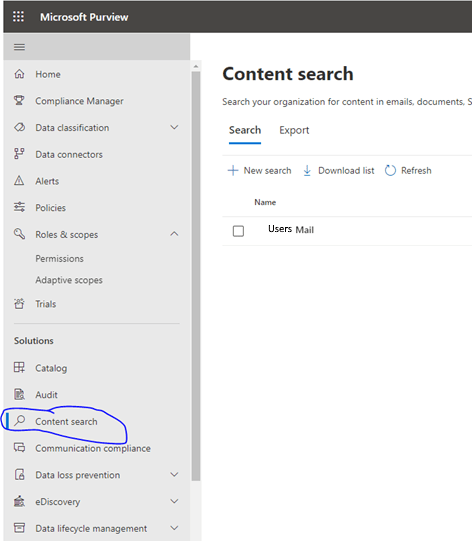
- While still in the compliance portal, go to the content search.
- In the right pane you can look at previously conducted searches (Your own if you are a manager, all if you are an administrator) or create a new search.
- Clicking new search or review an already created search will bring you through a wizard:
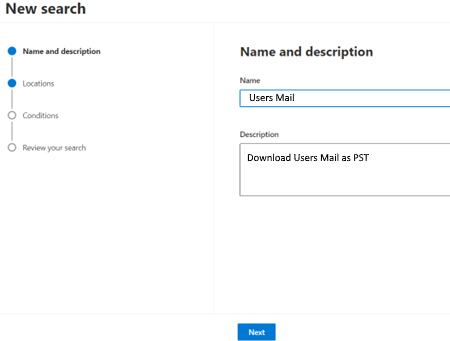
- Click Next.
- Toggle the “Exchange Mailboxes” and “Choose Users Groups and teams”.
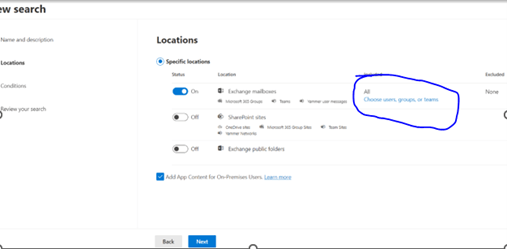
- Search for the user you want to get the PST from and click Done and then next.

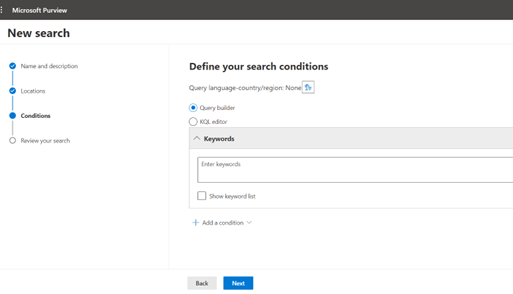
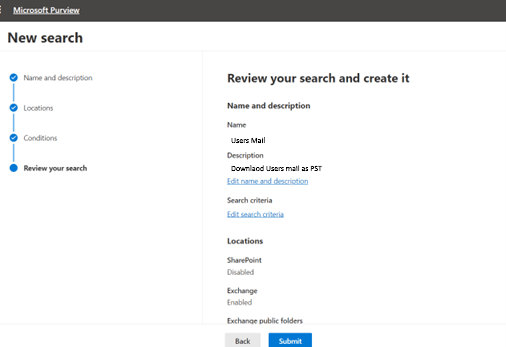
- Click next on the query builder screen:
- Click Submit:
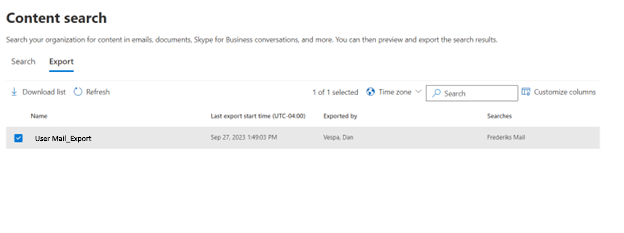
- Once it has been submitted you will be brought back to the main content search screen. Its status will be listed as “Submitted”. When it is ready for download, it will change to “Completed”. From there you can go back into the case:
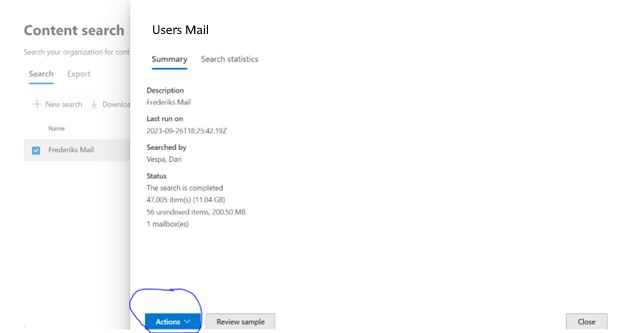
- Click the actions dropdown and choose “Export Results.”:
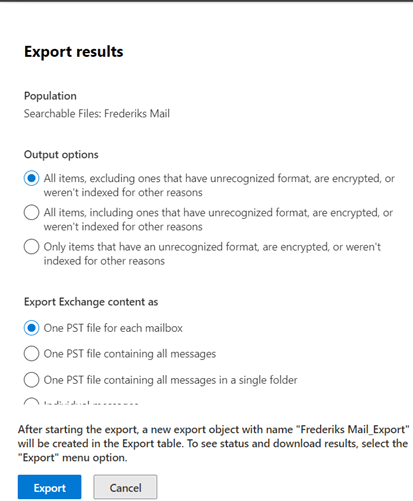
- Choose your options and click Export.
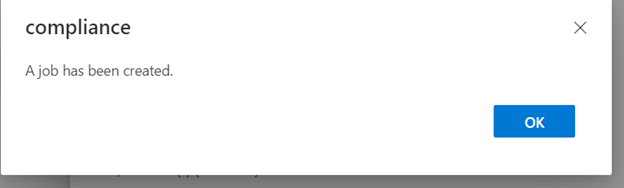
- A job will be created. Click Ok.
- The Export Job will be listed in the Export Tab of the Content Search Pane:
- Click the Export and a menu will pop up:
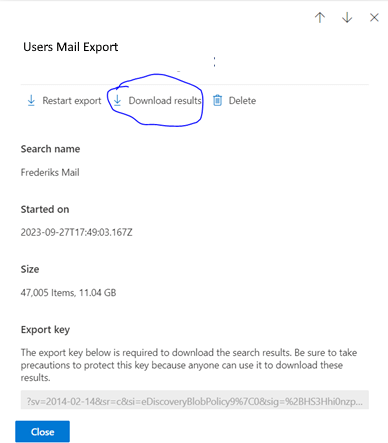
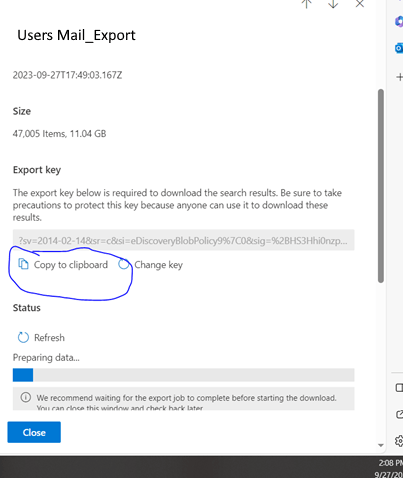
- When the export is ready for download the download result button will be displayed. Click on it. It will download an eDiscovery Export Tool to download. Once it is downloaded you will get this warning:
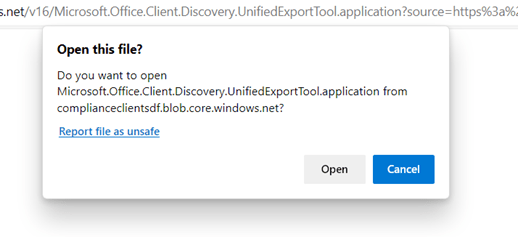
- Click Open
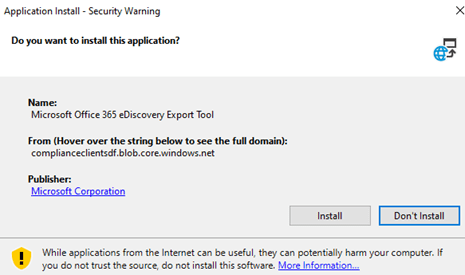
- Click install. The Export Tool will open, and you will be require to paste an export key and choose a file download location.
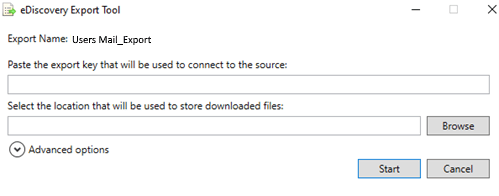
- Go back to the Content Search Export screen and copy the export key from your Search.
- Paste it into the appropriate text box. Also, choose a location for the download and click start.
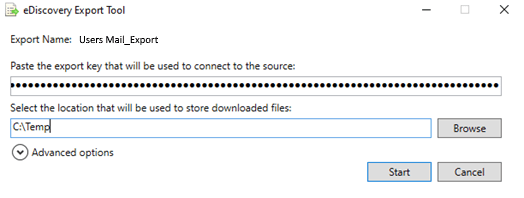
- Once the download is complete you will have an Exported PST file from the user. You are done!
This is one of the many ways you can use Outlook. Now that you know how to M365 Download Users Exchange Mail in PST format you will be well on your way to efficient performing this process.
Setting Up Locate Device in Endpoint for Android
So, you want to set locate device in endpoint for your Android devices. Enrolling them in Endpoint is not enough!! There are several considerations and prerequisites that need to be set up first. I will show you how to do this.
Step 1 – Create a Group for Enrolled Devices
You have probably already done this. Creating a dynamic device or user group based on membership rules is the best way to set up Locate Device in Endpoint for success. Once the group is created, enroll a device based on the membership rules. Then you can go to step 2 create a configuration profile.
Step2 – Create a Configuration profile for Locate Device in Endpoint
Here we create a configuration profile that enables locate device for enrolled devices.
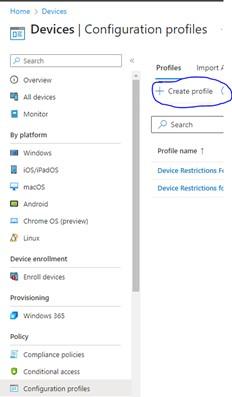
- In Endpoint, go to Home/Devices/Configuration Profiles and click “Create Profile”:
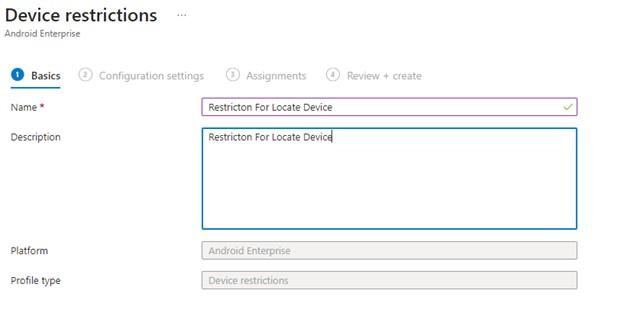
- On the create a profile choose “Android Enterprise” from the first dropdown and “Device Restrictions” from the profile type.

- Give the configuration a name and description and click next:
- On the screen, click the “General” Tilde and scroll down to “Fully Managed and Corporate owned Device Profiles” and find “Locate Device” and click the slider to allow:

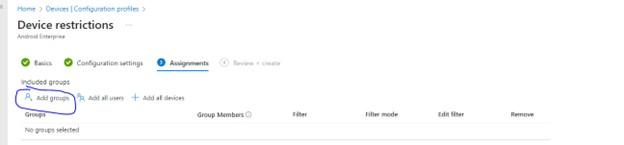
- Click next. On the next screen you will be asked to add group to the configuration. Add the group your created in step one to apply the configuration profile to:
- Click next and then create. You have your configuration policy.
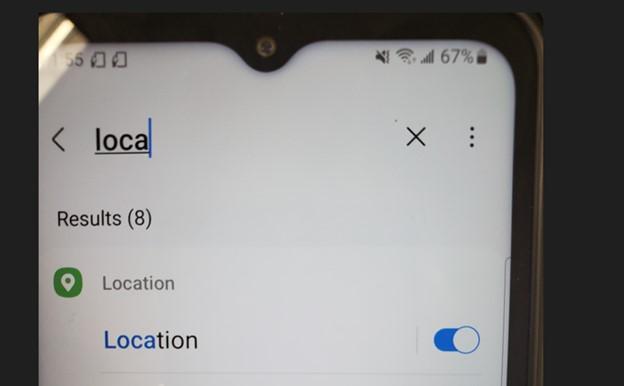
Step3 – Ensure Location Services are Enabled on Enrolled Android Device
Location Services should be enabled by default on the enrolled android device, but it needs to be on for locate device in Endpoint to work properly, On the Android device go to Settings / Location and make sure the location settings are toggled on.
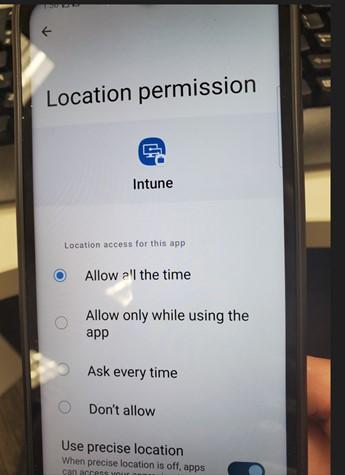
Step4 – Ensure App Permissions are Set for Intune
You need to make sure the Intune App is set to use location service every time.
- Do this while still in the location settings from the step above and tap app permissions.
- Scroll Down to the Intune app:

- And make sure the app is set to “Allow All the Time”. Also, make sure the “use Precise Location” is toggled on:
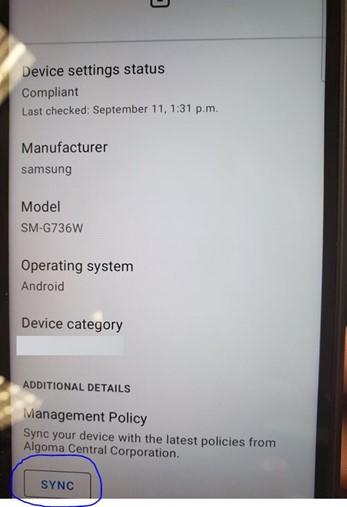
Step5 – Manually sync Policies in Android Intune App
You can probably wait for the configuration policy to get pushed out to the device but if you want to see if Locate in Endpoint works properly, go to the Intune app and manually kick off a sync:
Putting Locate in Endpoint all Together
Now that you have properly configured your device to Locate in Endpoint, when you decide to do this:

You will get something like this:
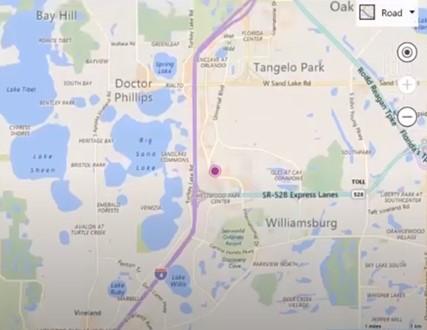
Instead of this:
