
Configuring Location Services in Intune

You have set up an enrollment profile that uses Location Services in Intune for your Android devices. Great. It can be very useful when you need to locate a lost or stolen device in Microsoft Intune Admin.
Here’s the thing though, if you do not allow the Intune app permission to access the devices’ location all the time, it won’t work.
Follow these steps.
Steps to Configure Location Services in Intune
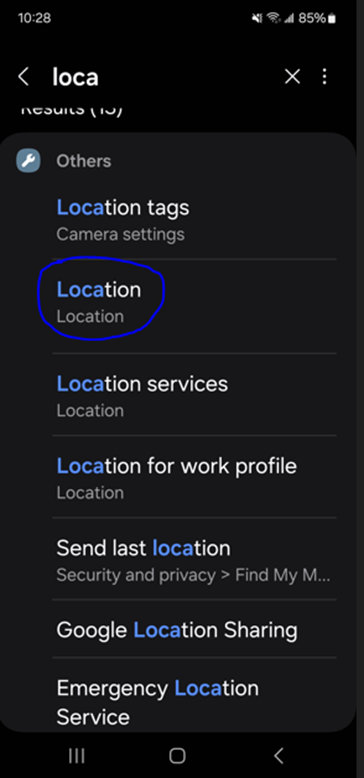
- Swipe down from the top of the phone screen and tap settings in the top right of the screen.
- Search for location:
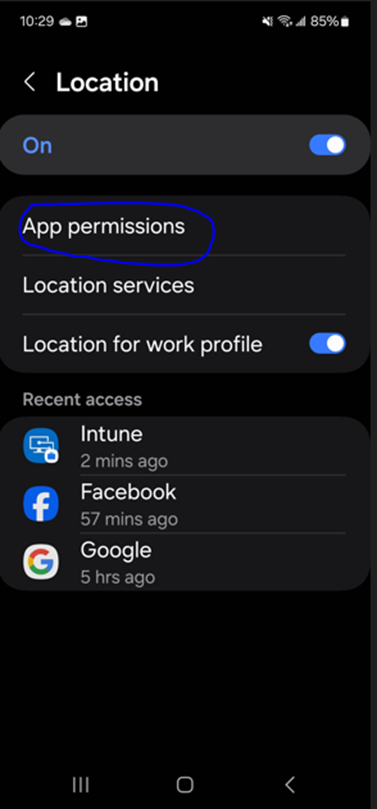
3. Once in Location, tap “App Permissions”:
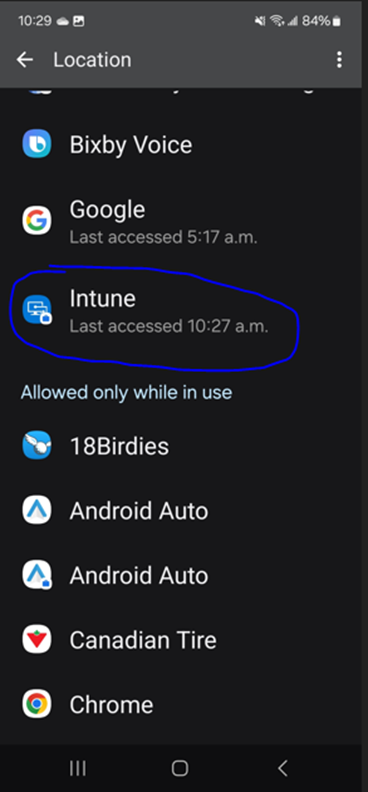
4. Once in App permissions, scroll down until you see the Intune app. Since it is among the apps not allowed to access location data, it will be further down the screen. When you find it, tap it.:
5. In the Intune App permissions screen, make sure “Allow all the time” is chosen. Then tap the back arrow.
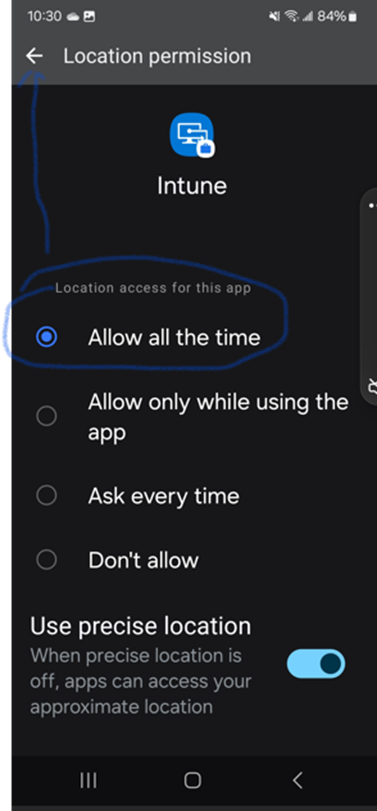
Locations services are now configured for your phone. It would be foolish to choose “allow only while using this app” or “Ask Every time”. Nobody knows when or how they are going to have their phone lost or stolen LOL.
One Consideration when Configuring Location Services
When I configured a usage policy for a group of mobiles, I had another group of mobiles excluded from this policy. They had to be configured slightly differently. The problem was location services were not enabled in their policy. Never assume it will always work. I had to go into the second policy and enabled it.
Follow these steps to Location Services on Intune and you will be good to go!
One Way to Stop Auto-Archiving Outlook

So, you are stuck in the old ways of Outlook, and you feel the need to Auto-Archive your emails when you think that your storage is being all user up. What if I could show you how to Stop Auto-Archiving Outlook.
If you are using Outlook through an M365 subscription you have a minimum of 50GB Storage for your email. Depending on your license you could have up to 100 GB storage. I don’t know about you but that is a lot.
Back in the day 2-10 GB storage was considered a lot, so you would have to use Auto Archive a lot. I would try not to use it at all if you can. It really is a pain as it creates another storage location for your mail, and I like to keep it all in one place.
How to Stop Auto-Archiving Outlook
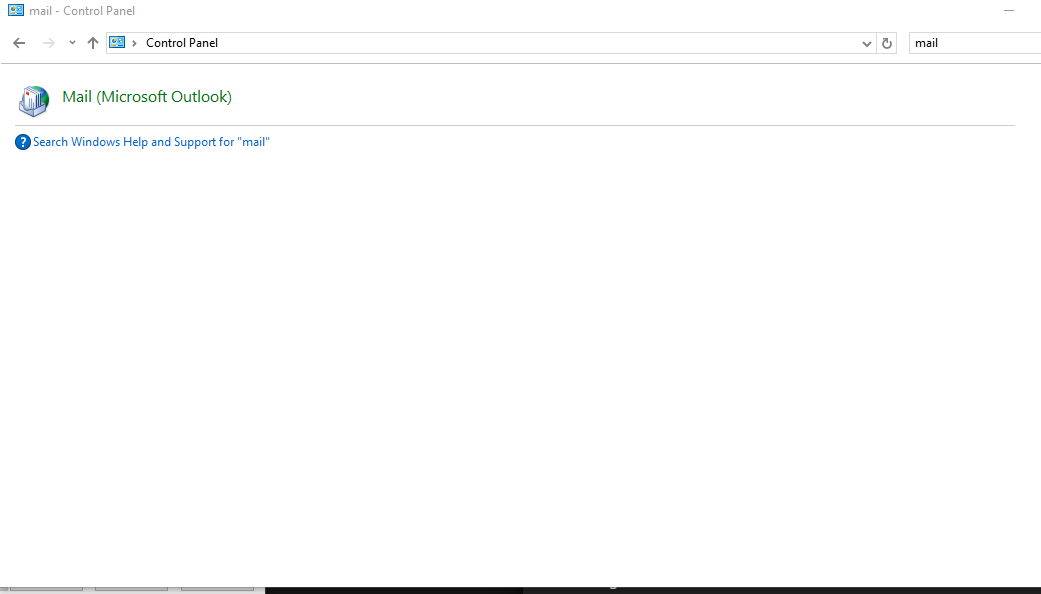
Go to the control panel and search for mail:
When you click mail, go to your account settings:

Double click your account, it will take you to your cache settings:
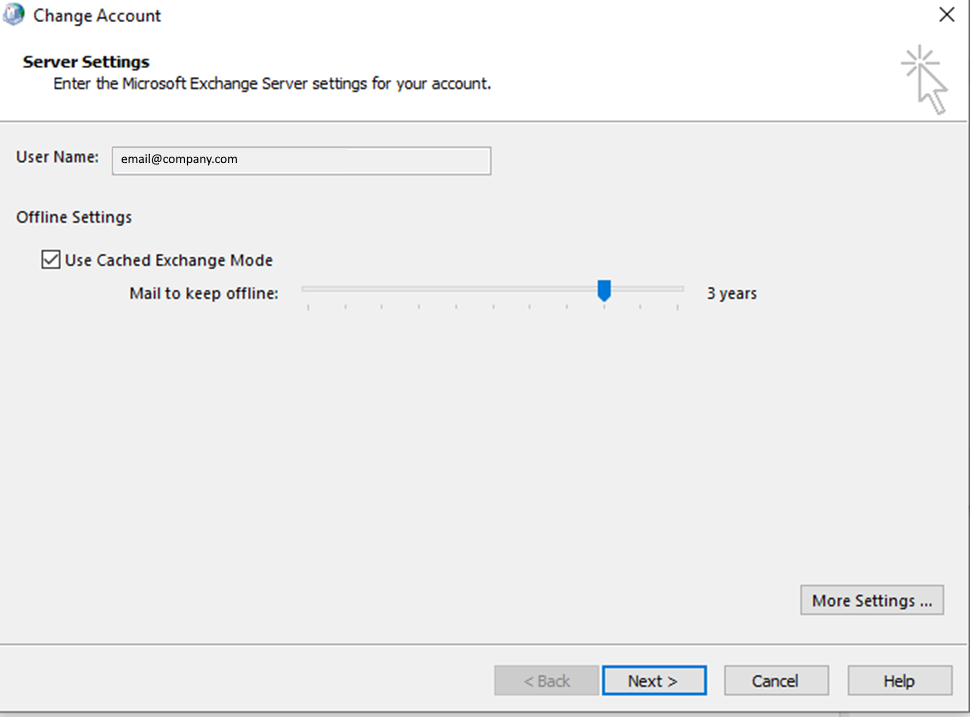
In this example I am keeping 3 years of mail cached. Anything older will be in the cloud, accessible by going to https://outlook.office.com/mail/ . This will reduce the size of the mail being stored on your computer.
Benefits of Not Auto-Archiving Outlook
The benefits are twofold:
- It reduces the storage space on your computer. This is helpful if you are using a device with limited storage space (Surface Tablet or any computer with a smaller hard disk)
- You only have one storage location for all your mail. If you need to retrieve mail from outside your cached timeframe all you must do is go to the cloud.
What you can see here is that users forget that Outlook is always updating and Auto-Archive is an ooutdated concept. Storage is no longer the precious commodity it once was!