
2 Ways to Revoke a M365 Users Sign-in

Why Revoke a Sign-in?
Need to revoke a M365 Users Sign-in? Maybe it is for one one user or many users. A good example is for a security breach. Another example is when a user leaves the company and you want to make sure their are no cached logins for any device they might be signed into as you disable their account. Maybe you are changing something on the network and maybe you want to get a baseline of the change. There could be a lot of reasons.
Another good reason is to re-enforce MFA on your users when they sign-in. Either way, I can show you two very good ways how to make sure your users can have their M365 sign in revoked. It will log them out every single service they have a connection to.
It can be a lot more than you think. For example, when I tested it on myself, it took a good two days for me to get through all the devices I was signed into to get re-signed in! There was Outlook, Teams, the admin portal, and a reMarkable tablet I was testing, to name a few.
I will show you two ways on how to do this. The first way will be through the admin portal and the second way will be using PowerShell. Using PowerShell is a great way to revoke a M365 Users Sign-in for many users through the use of a script.
Revoke a M365 Users Sign-in Using the M365 Admin Portal
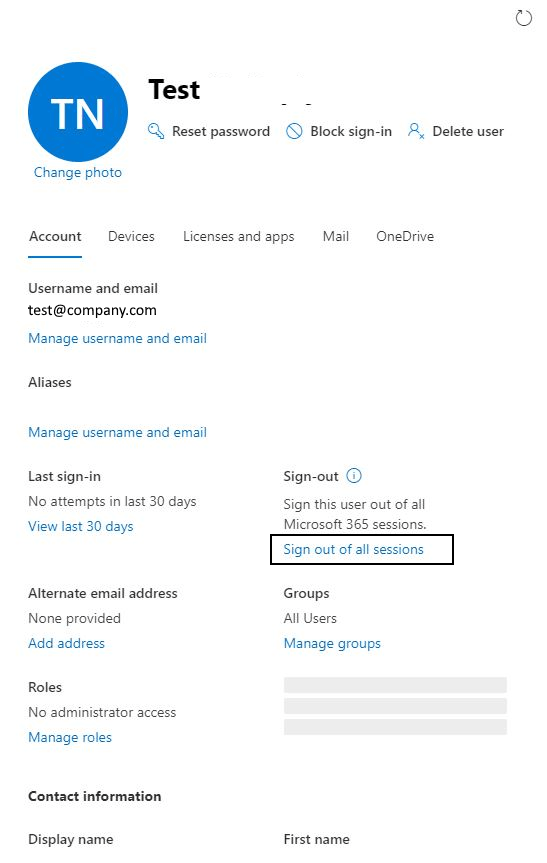
In this case all you have to do is login to you Microsoft admin portal and go to active Users in the left hand pane of the page. Click on the user you want to revoke all sign-ins for other right side and click on “Sign-Out of all sessions”.
If you need to do this for only a few users, this is a good way to go. If you have many more to sign out, this is not a very efficient way. Thank goodness there is PowerShell…..
Revoke a M365 Users Sign-in Using PowerShell
The best feature of using PowerShell is its ability to automate pretty much any task you need to accomplish in M365. I have written several articles about it. In this case, you would need to run the Get-AzureADUser command with the revoke-azureaduserallrefreshtoken. As mentioned in the previous section if you need to do this for a few users you can also use this PowerShell command. However, if you need to run it for many users or your whole organization, you would need a CSV list of your users and a script that can loop through the list running the Get-AzureADUser command.
An example of the command is as follows:
Make sure you are connected to the Azure AD module the run the command
Get-AzureADUser -SearchString <M365username or email> | revoke-azureaduserallrefreshtoken
If you need to run this command for many users, this example script will help:
#Declare Variables
$CSVPathUPN = “C:\Files\Users.csv”
Connect-AzureAD
#Run Script
Write-Host Signing out all users….
#Try import UPN CSV file
try {
$UPNUsers = import-csv $CSVPathUPN -ErrorAction stop
}
catch {
throw “Error importing CSV: $($_.Exception.Message)”
break
}
foreach ($UPNUser in $UPNUsers) {
$Uname = $UPNUser.UPName
$Dname = $UPNUser.displayName
Get-AzureADUser -SearchString $Uname | revoke-azureaduserallrefreshtoken
Write-Host Signing Out $Dname ….
}
Write-Host Done Signing Out All Users…
The above script takes a CSV file with field headings UPName and displayName, loads them into variables $Uname and $Dname and runs the the “for each” loop and runs the revoke command for each user in the list.
Easy Peesie.
So now you have 2 ways to revoke a M365 users sign-in depending on your situation.
Happy IT’ing
Dan
Enrolling an Android Device in Endpoint MDM Part 2
This is how you can be enrolling an android device in Endpoint with corporate-owned, fully managed user device. These are the following steps to get an Android device enrolled with screenshots. If you need a refresher on how do enroll a device with a personal device with a work profile, please check out Part 1.
Prerequisites to Enrolling an Android Device in Endpoint
Like mentioned above, the proper profile must be set-up.
Getting the QR code
A profile has been set up to enroll devices (Android only now) with a QR code. The code is located here:
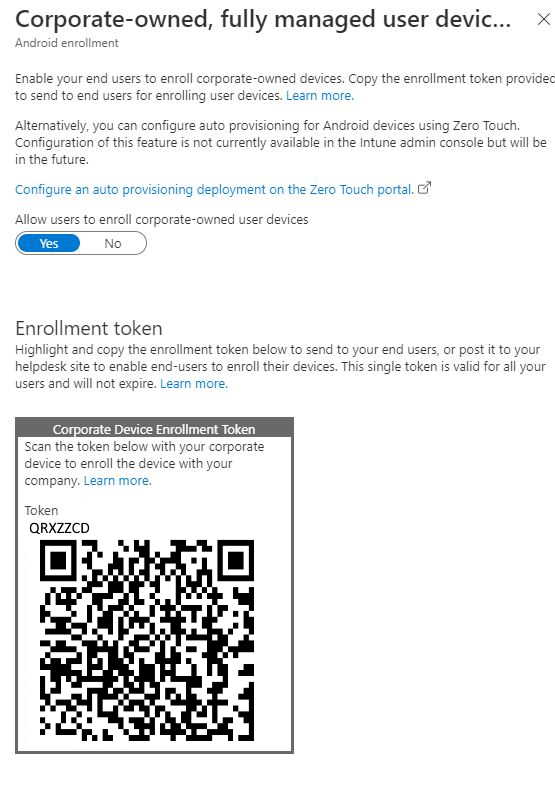
Since this profile is different then the others it shows up different. One the setting is toggled on you will see a QR code similar to what you see above.
Here is the QR Code:

You can print this code out and have it ready when you need to enroll a mobile device.
Enrolling a Mobile Device
The mobile device you are enrolling must be set to factory defaults. If it is a brand-new phone this has been done already. If it is a phone that has never been enrolled in Endpoint Manager, it needs to be factory reset. If the phone is already enrolled in Endpoint Manager and you need to redeploy it to another user, also need to wipe the phone and re-enroll. The Device Name and Management Name field in the portal need to be changed to reflect the new user (See Renaming the Device and Description in Endpoint Manager)
- To begin enrolling, at the first screen you see when the phone is turned on, tap continuously in the center of the screen until you see the QR code scanner. Samsung S10 and above the QR code scanner is built in. If the phone is lower than an S10 you will have to install QR Code scanning software first. Scan the QR code mentioned above. The process will begin.
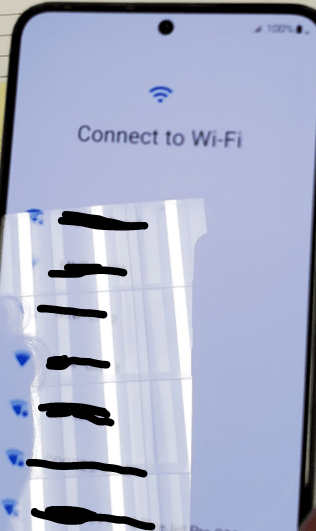
- Next you will be asked to connect to Wi-Fi. Connect
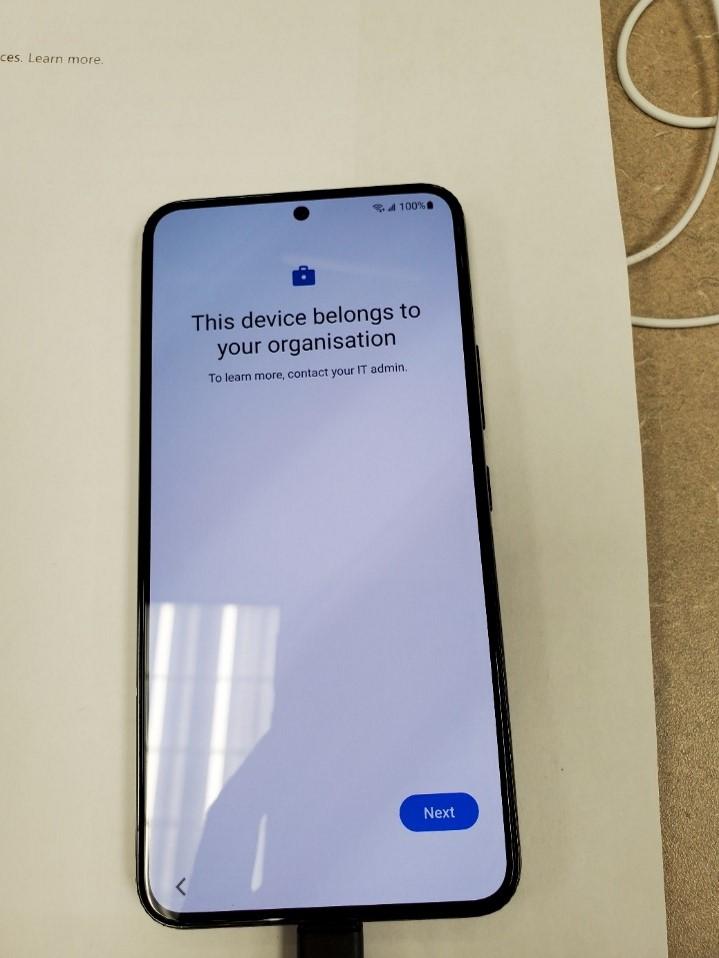
- Tap Next
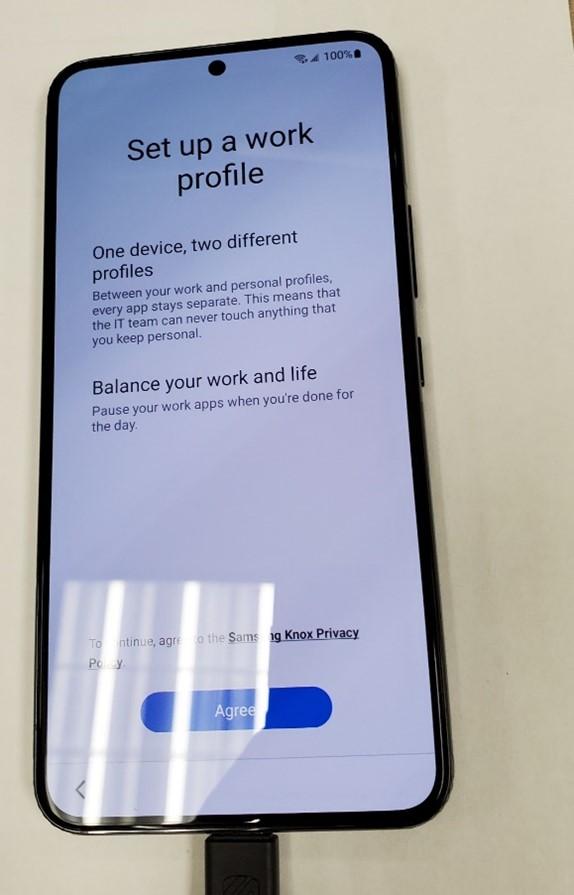
- Tap agree,
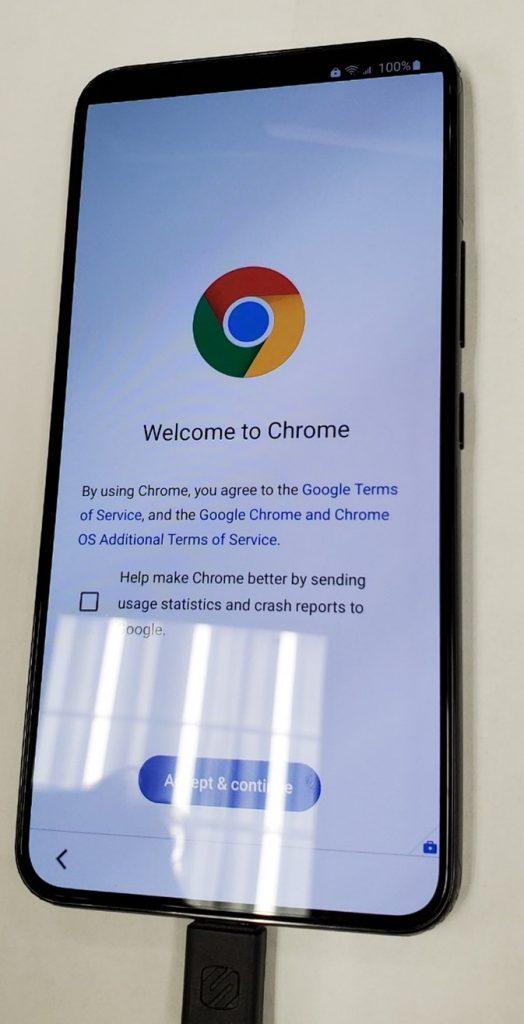
- Uncheck the check box and Tap “Agree and Continue”.
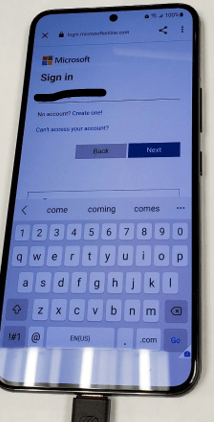
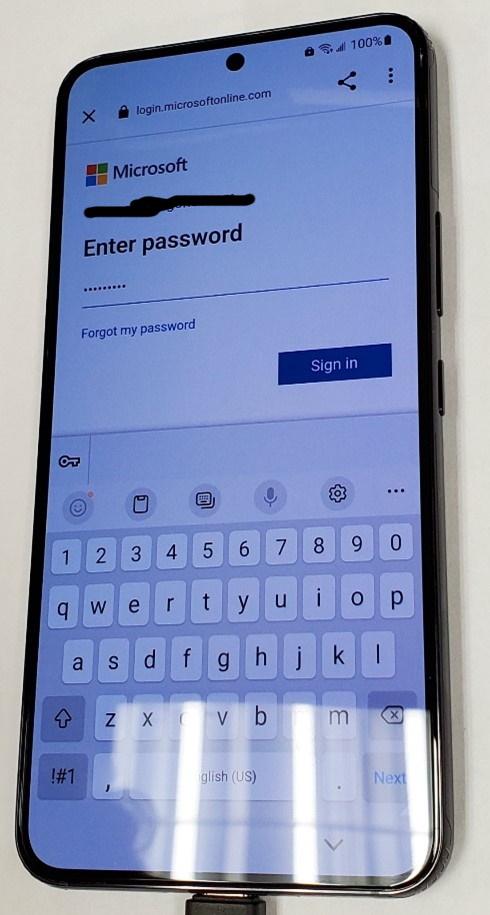
- Sign the user in.
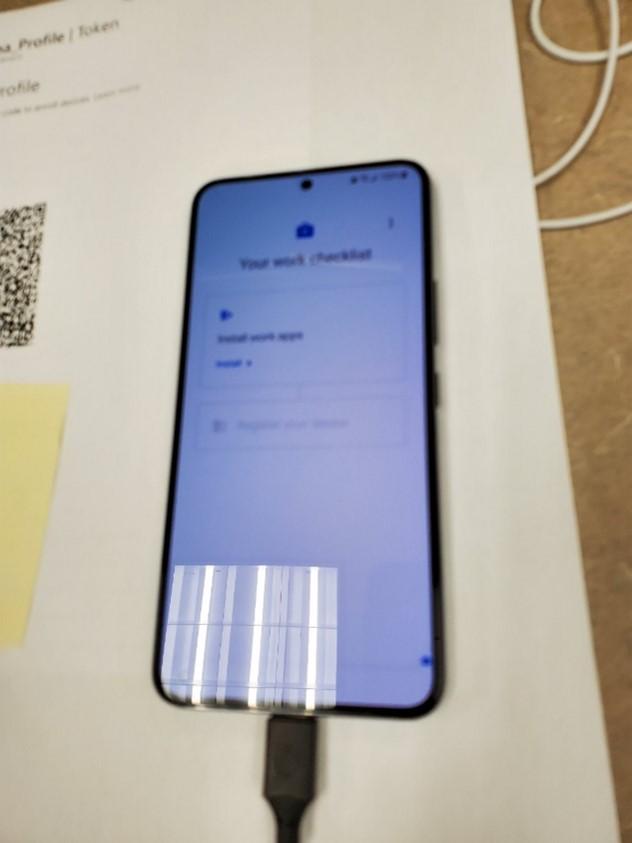
- Once you have signed in the user, tap “Install Apps”
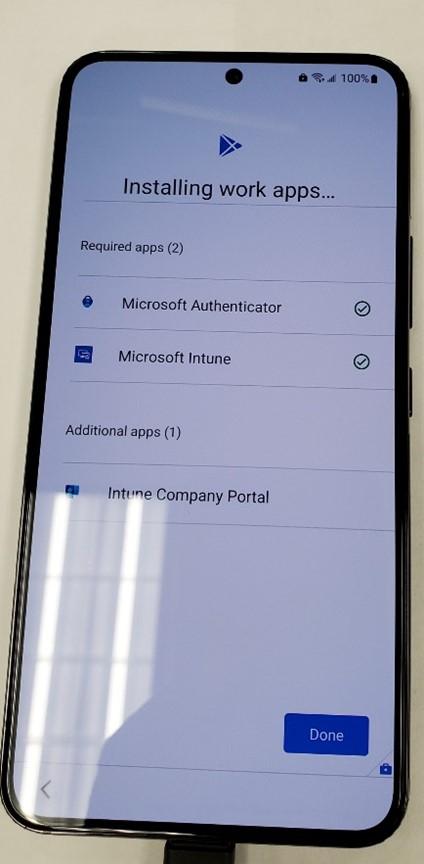
- The following Apps are installed. Outlook for mobile and Teams will be installed after due to a configured and applied App Configuration Policy. Tap done.
- Tap “setup” to register the device.

- Tap “sign in” to for Intune.
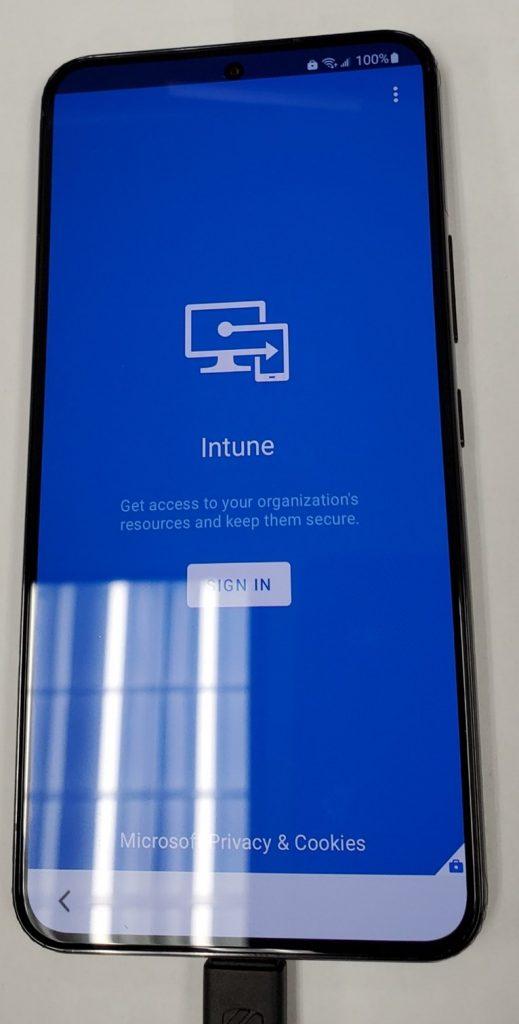
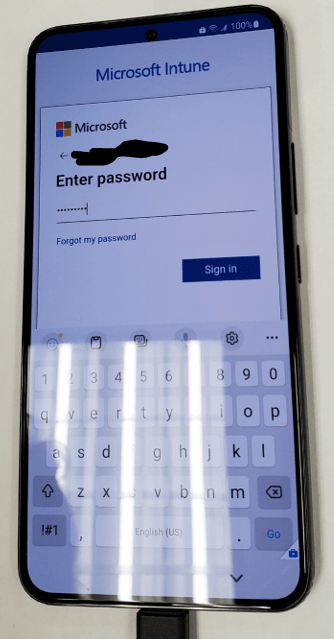
- Sign in with the users’ credentials again.
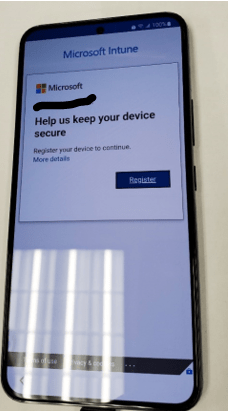
- Tap “Register”.
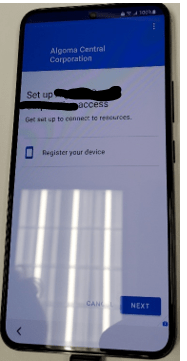
- Tap “Next”
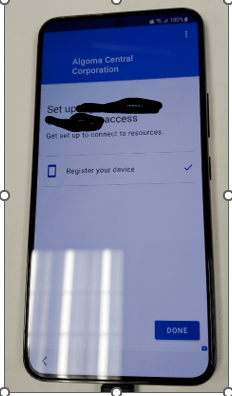
- Tap “Done”.
- Tap “Next”.
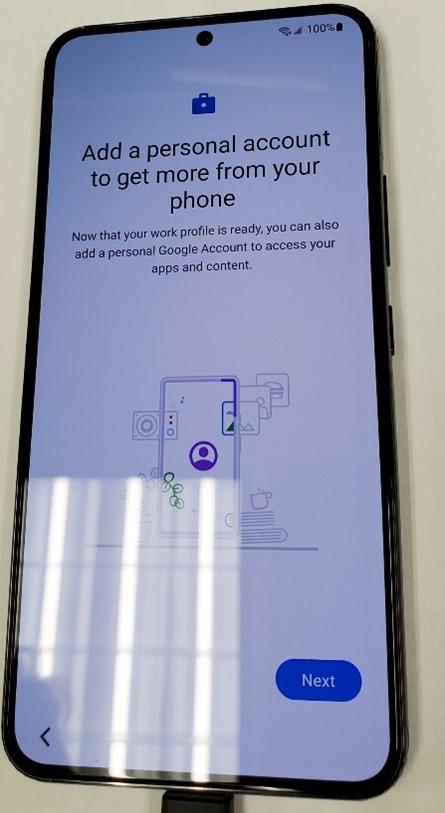
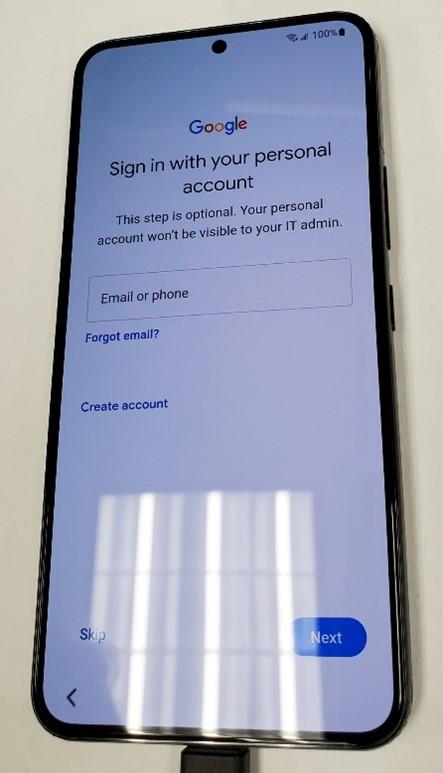
- If you want to add the users Google Account, you can do it here. If not, Tap “Skip”.
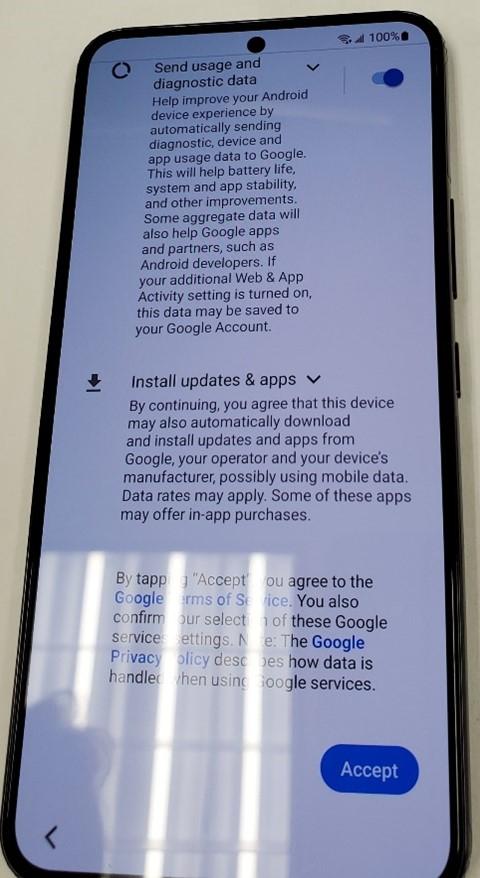
- Swipe up and tap “Accept”.
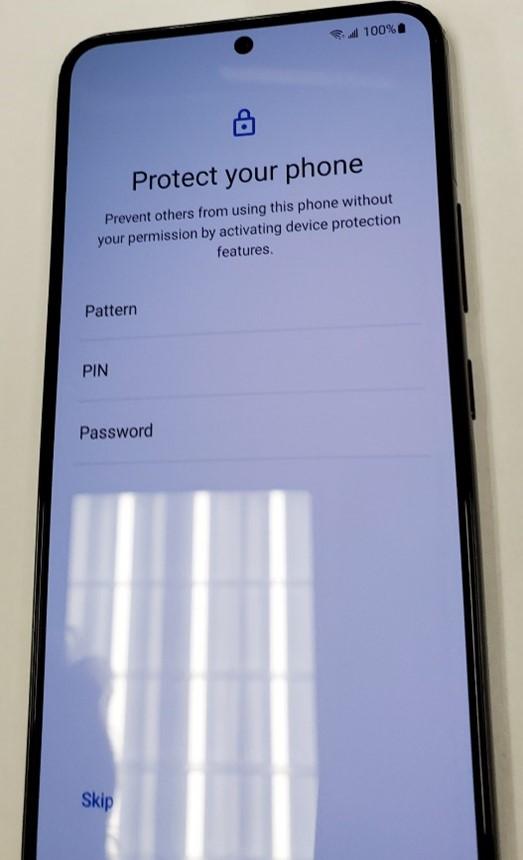
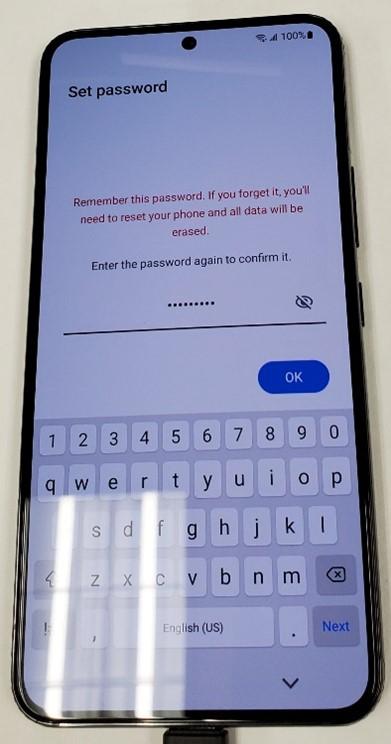
- Give the phone a passcode. I would use password as it is more secure.
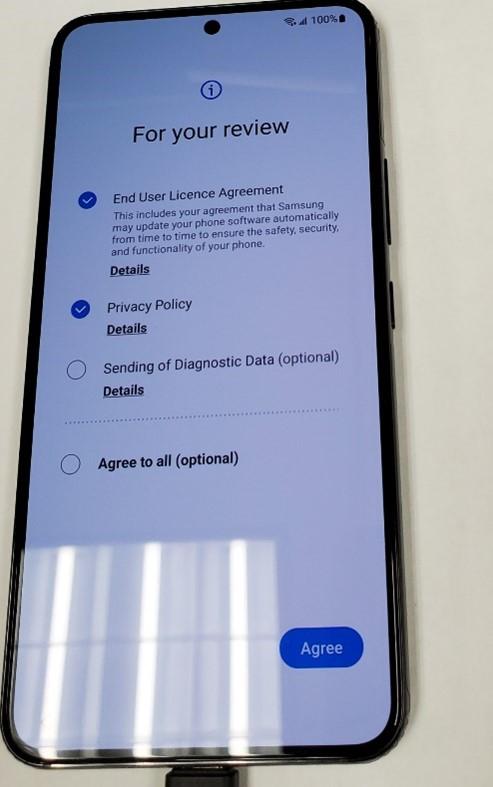
- Check the first two radio buttons and tap “Agree”.

The phone is now set up in endpoint manager.
Renaming the Device and Description in Endpoint Manager
The device is now in endpoint manager. To view the Android devices that are enrolled go here in Endpoint Manager:
It looks like this:
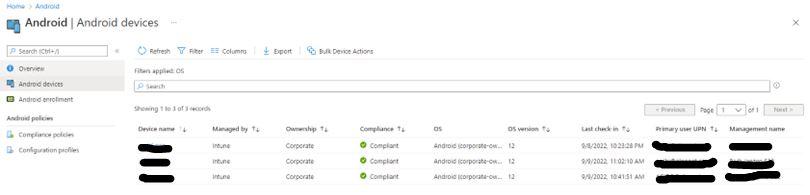
The two fields you need to change are the Device name and Management name. When the device is first registered the fields are auto generated. Change them so it is easier to read and distinguish who the device belongs to. I changed the Device Name to <userId>_model_number (i.e., abc123_S22). Change the Management Name to <User_Full_Name> <Model Number> (i.e., John Doe S22)
Common Tasks Performed in Endpoint Manager
With the Corporate Owner with Work profile enable you can perform the following tasks:

Retire – Good for when person leaves company but wants to take the phone. It removes all company data and email profiles assigned through Intune but leaves personal data.
Wipe – For Mobile devices it resets the phone back to factory defaults. Good for a lost or stolen devices
Delete – Removes the device from Endpoint but does not remove company data
Remote Lock – Locks the phone. Good for when phone is lost but the user may know where it is.
Reset Work Profile Passcode – Locks the Work Profile on the phone. A temp password is generated in Endpoint manager that allows for the workspace to be unlocked. DOES NOT reset the passcode of the device. You still need to let the user know to NOT change the assigned device passcode.
Play Lost Device Sound – Good for when user misplaces phone but is sure it is nearby. The lost alert sound can be played from one to 5 minutes on the phone while the user looks for it.
I will be writing an article on how to deploy apps to the device very soon. Stay tuned for that!!
Happy IT’ing
Dan