
Teams Meeting Settings in a Couple of Clicks
Here is a quick way to set your Microsoft Your Teams Meeting Settings in a couple of clicks. Keep these Teams settings handy so you will be able to set up meetings in the future quickly.
When you create a New Meeting in Teams you can choose options for the meeting. However, if the meeting is large (up to 300 attendees) you will want to customize the meeting even more. you need to go into “More Options”. From there, you will be able to set the following settings. Security, Audio and Video, Engagement, Roles, Recording and Transcript.
Security
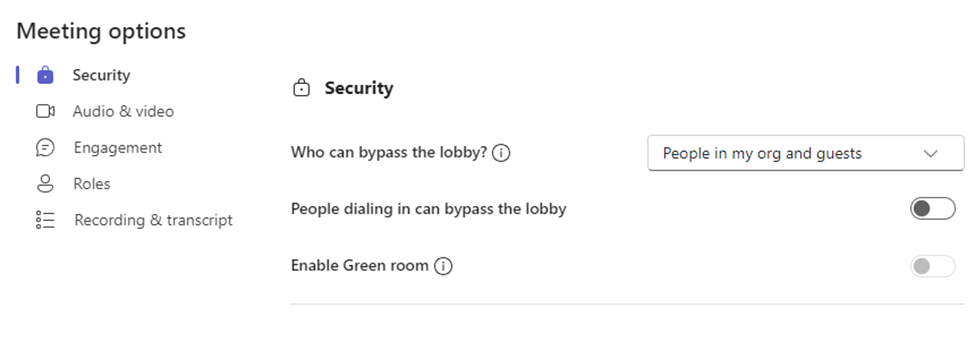
In this option you can specify who can directly enter the meeting. The lobby is sort of a waiting room and if you don’t set it, the organizer of the meeting (the one who created it or people they have specified as co-organizers) will have to manually admit everyone into the meeting.
The green room is like the lobby, but it lets the user test their audio and video before that are admitted.
Audio and Video
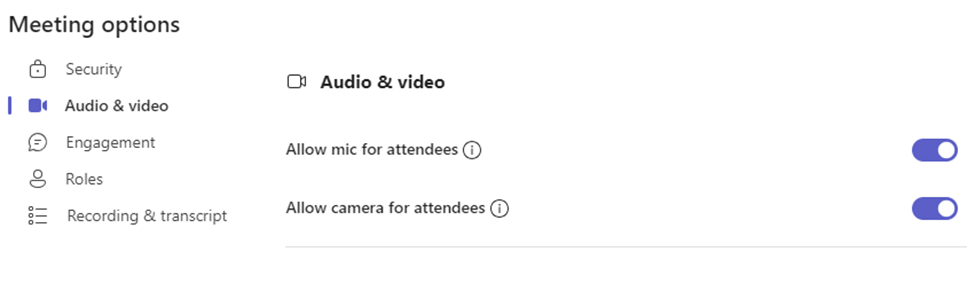
Thes settings can be switched on or off depending on your need. For large meetings it is better to have video and mic switched off to save bandwidth and prevent interruptions to the meeting.
Set Your Teams Meeting Settings Engagement
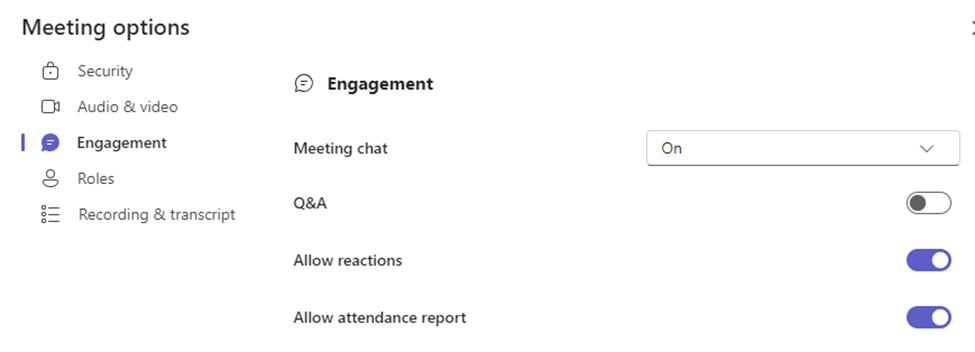
Thes settings have to do how the users interact with the meeting. You can turn the chat future on or off. Enable Q & A. This is a good feature because it allows you to moderate questions before they show in the meeting, and you can allow replies as well. Allow reactions is just if you want attendees to react to the meeting with emoji’s provided by Teams. The Attendance report toggle is used if you want users’ attendance to the meeting recorded. Something you might want to do in a large meeting.
Set Your Teams Meeting Settings Roles
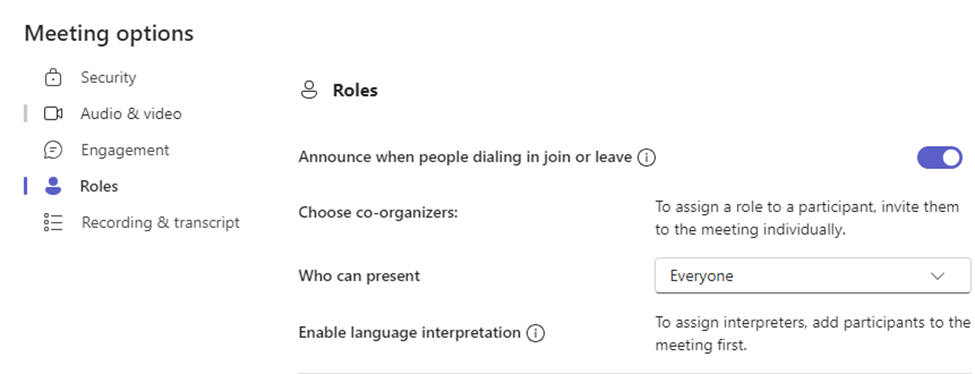
In larger meetings various users will have different roles in the meeting. The user who creates the meeting is the Organizer. They will be the one more than likely setting all the settings in the meet. Unless they choose some Co-Organizers. To do so all the organizers must do is change the role of one of the participants to Co-Organizer.
Enable language interpretation is a feature whereby you can assign a participant to translate the meeting in real time into another language.
Before you can assign anyone the role of Co-Organizer, Presenter or Language interpreter you must make them a participant first and assign one of the roles.
Like Organizers, participants can control their video and mic.
Recording and Transcript
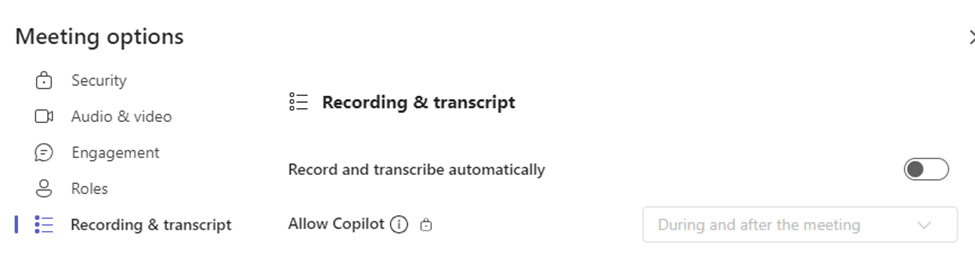
Here you can enable automatically recording the meeting, but I wouldn’t. It records everything. So, you have basic setup and a lot of noise before the meeting recorded which would need to be edited afterwards. It’s a pain. Have one of the Organizers manually record the meeting when it starts and stop recording when it ends so it is a nice clean recording. Allow Copilot in enable this feature into your meeting, It may help automate some of your tasks in the meeting.
This is how you Set Your Teams Meeting Settings in a couple of clicks. I would keep this info handy any time you need to set up a large team meeting. At least you won’t be running around setting things up when the meeting has already started. You will be prepared!
Export OneNote in One Step
I can show you how to Export OneNote in one step. You have a file in OneNote but not every user you need to share with has OneNote. You may have created this file or it was shared with you by another user in. In the case of it being a file being shared with you You Need Read / Write Access to the OneNote File
I also show you how to do this in another article.
How To Export OneNote in One Step
If the file is shared with you go here. Open it in the online version of One Drive By clicking on the link in your email:
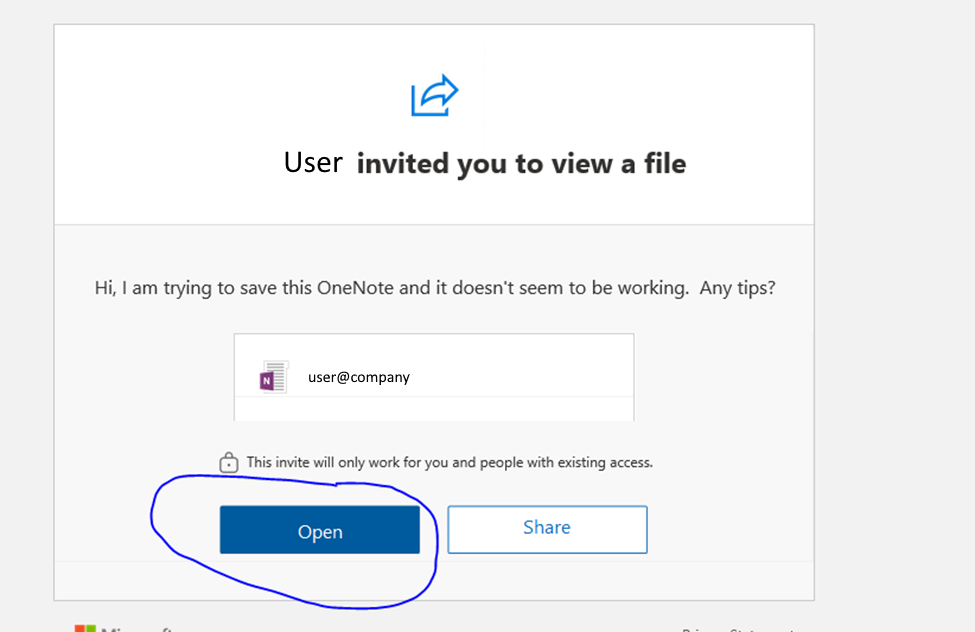
It will open:

If you created the file , you can skip the first step. Click the Dropdown on the top right called “Edit” and choose “Open in Desktop App. It will open in the desktop version of OneNote:
Click File on the top left and choose export:
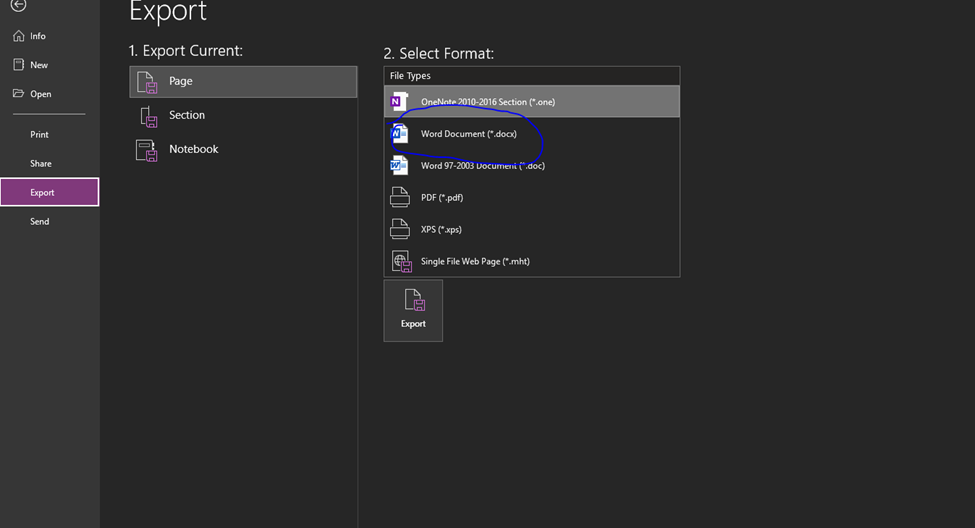
In this example the I Export OneNote in One Step to the computer locally as a word document. Now you are able to send the document to anyone who doesn’t have OneDrive as an application. They might have it but barely use it or are more comfortable with other formats other than OneNote.
Either way, it is an easy way to Export to OneNote in One Step.
By using this method you will be able to easily export OneNote content into various formats you desire either with a OneNote document you created or a OneNote document that was shared with you.
Forwarding in Microsoft Teams in 3 Steps
You may have a need where a group of users need for forwarding in Microsoft Teams using a shared account. You would like this group to quickly and efficiently configure this.
The problem is you do not want the users to login directly to Microsoft Teams and you don’t want them to have direct access to the Teams admin portal. I am here to show you how to accomplish this in two steps.
Enable Forwarding in Microsoft Teams by setting PIM
First, the shared account you want the group to set forwarding needs to be able to have access to configure call settings. The account needs to have the Team Communications Administrator Role assigned to them. This will allow the account to configure and disable forwarding as needed.
Create a PowerShell Script
You will need a PowerShell Script that makes use of Set-CsUserCallingSettings command. It will require you to login to Teams through PowerShell as the forwarding account, issue the call settings configuration and then disconnect from teams. Logging in will require you to have an encrypted password file.
Read/Write Access the Scripts Folder
To enable forwarding in Microsoft Teams you can have this stored on your files server if you still use AD or in SharePoint if you don’t. Regardless, the user account will need Read/Write (and in the case of AD Execute, too).
Enable Forwarding in Microsoft Teams – Putting it All Together
You can use the information listed above to enable forwarding in Microsoft Teams or I can send you the scripts to do it. Just buy me a coffee and I will send it to you. I also have other time savers that my readers have enjoyed, like a CSV to ICS converter and a Teams Contact Generator.