
Use the Managed Folder Assistant to Archive Users Mail
Oh no! A user has come to you and has complained they are running out of storage space in their Outlook. What? You exclaim… you are on Exchange Plan 2 and have 100 GB of storage space. How is that possible? This is an opportunity to Archive Users Mail.
I have been in this game long enough to tell you that users have been using email storage space as file storage space for decades. It really makes file server administrators happy, but it pisses off the email server admins. Hey, aren’t we supposed to be on the same team?
Since there isn’t an Exchange Online Plan 3 (LOL) you are tapped out at 100 GB. What to do…what to do…
Well luckily you can take advantage of the Exchanged Managed Folder Assistant (MFA). This is not to be confused with Multi Factor Authentication. We IT types love our acronyms (sic). It is a simple process, but you do have to get a few things set up. Lucky I am here to show you.
Configure Your MRM Retention Policy to Archive Users Mail
- Sign in to the Microsoft Purview portal: Access the portal at https://compliance.microsoft.com/ and sign in with your administrator credentials.
- Navigate to MRM Retention policies: Go to Data lifecycle management > Exchange (legacy) > MRM Retention policies.
- Create a new policy: Click + New policy.
- Name the policy: Give your new policy a descriptive name, such as “Company Archive and Delete Policy”.
- Add retention tags: Click + Add tag.
- Select tags: Choose the relevant retention tags from the list, including custom tags you’ve previously created.
- Review and submit: Review your policy settings and click Next to submit and apply the new policy.
I set the policy to Archive Users Mail older than 3 years and to delete any emails after 7. Seven years is a standard policy and if your are holding on to emails older that 7 years, well that’s on you.
Enable Online Archive for the User
Online Archiving is not enabled by default for users. It takes a lot of time and processing for this so only users that require it should be enabled. It is the best way to Archive Users Mail. But we do it only when a user requests it. All we must do is go to their mailbox in EAC and enable archiving with the policy we configured above. This setting is located in the “other” tab of the users mailbox properties. It is done like this:

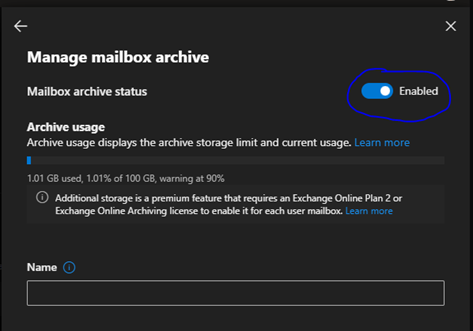
Notice the Name is Blank. Leave it so. It just populates it as “<Last Name>, <First Name> – Online Archive” after you enable and save configuration.
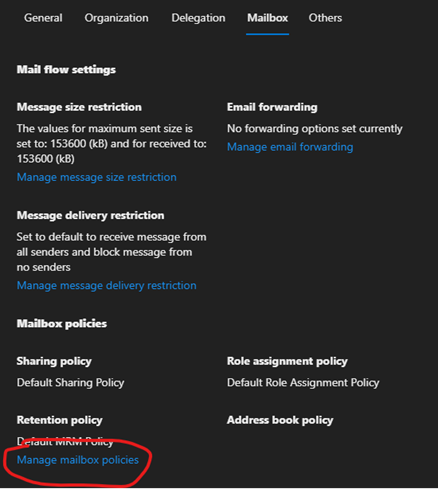
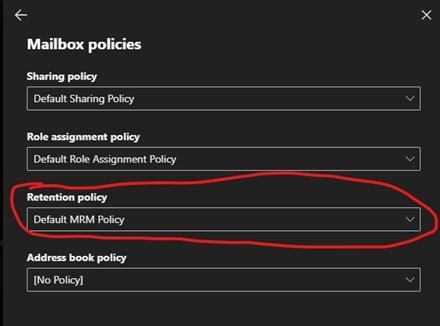
Apply Policy for the User
In order for Online Archiving to work properly you need to create a retention policy for your tenant. After yo do that, just apply it to the user after you have created an Archive for them. This setting is located in the “mailbox” tab of the users mailbox properties. It is done like this: :
Wait or Force Synchronization
Now you can wait for the synchronization to occur to Archive the Users Mail in Outlook. It will eventually mount as an archive mail store just like local archiving but it is online. So, it will be available to any outlook you run with you logged in. This is a definite benefit to local auto-archive.
However, it could take a few hours to a few days and in some cases a few weeks to finish the initial synch. This is dependent on several factors. Like, size of mailbox, network traffic, speed, a how fast or slow the M365 cloud is operating at any given moment. There is an easy way to kick it off. Here’s how you do it:
Login into Exchange Online in PowerShell, then execute this command:
start-managedfolderassistant -identity mailboxname
Where mailbox name is the user who you set up the Managed Folder Assistant for. Before you know it you will see the Online Archive start to populate in the users Outlook! Also, if you subscribe to an M365 backup solution, it will get backed up to the cloud with the original mail store of the user. One last thing to note is the online archive can grow to a size of 1.5 TB. If they need more than that…..I GIVE UP!
Temporarily Sign in as a User in M365

As an M365 administrator you have your security set up. You have your devices enrolled and you have even made sure MFA has been set up for the much-needed security required in today’s IT Landscape. But how do you Temporarily Sign in as a User?
Why Temporarily Sign in as a User
You may need to set up a device for them that may require you to log in as them. Some say this is not good practice and I agree if you can do it another way, it is great, but sometimes you do not really have a choice.
Besides, you must be an administrator to set this up and you are the only one who knows the temporary passcode. Let’s begin:
How to Do it
I already mentioned that you must be an administrator. Simply go into Entra and look up the user you need to log in as.
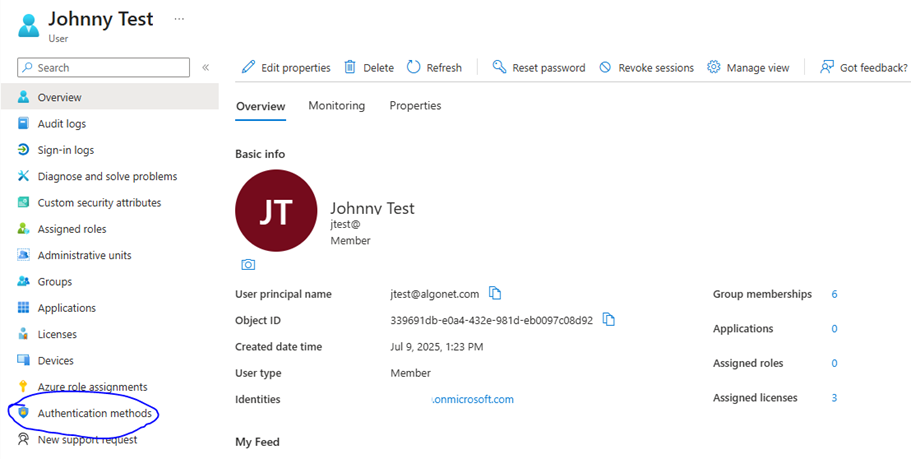
Go to the users Overview and Authentication Methods and Click Add Authentication Method.
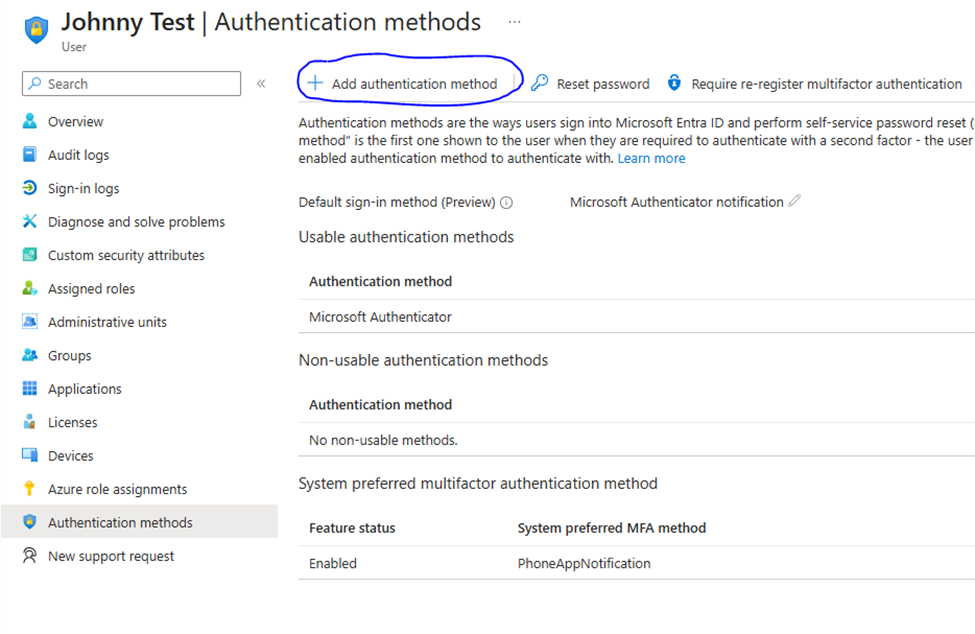
Choose Temporary Access Pass from the dropdown list:

Options When You Temporarily Sign in as a User
From here you can configure a few things. Namely, you can specify how long the TAP is good for (Activation Duration), If you can use the TAP multiple times (One-Time Use) and if you would like a time delay before you start using it (Delayed Start Time).
When you are done configuring the settings, click Add.
When you are done, you are taken to this screen:
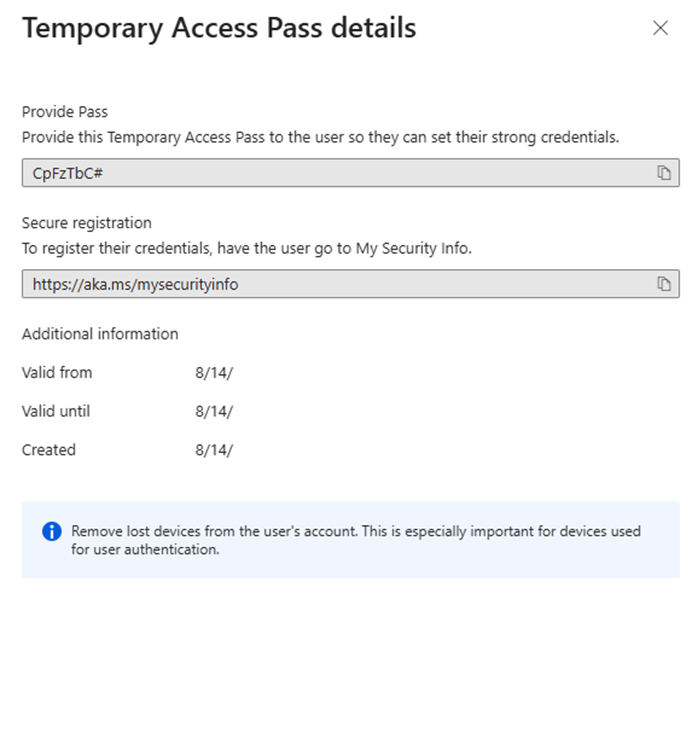
The temporary password is provided above. Copy it to a notepad document or like so you will have it ready to use. When you log on as the use you will be presented with a password screen like this:
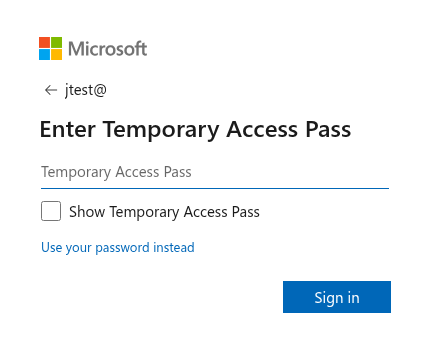
Enter the TAP that you copied from above and voila, you have access to the user account for set up purposes. It even bypasses MFA. So, you don’t have to constantly bug your users for MFA push numbers!
Why Use this to You Temporarily Sign in as a User
This is a very good question. Sometimes you can’t avoid it. Enrolling a device in Intune comes to mind. Whatever, the case, it will save you a lot of time in setting up the device and you will be non-intrusive to the user in doing so.