
Sharing with OneDrive online is very easy and versatile. It is very similar to other file sharing services like Dropbox and Google Drive. Since you already use M365 it is only natural that you use OneDrive.
Accessing OneDrive Online
The easiest way to share with OneDrive is online. For access this way, go to Office.com with your favorite browser and login. Once you get to your portal screen, click the menu icon in the top left and choose OneDrive:

You will be brought to your “My Files” page:
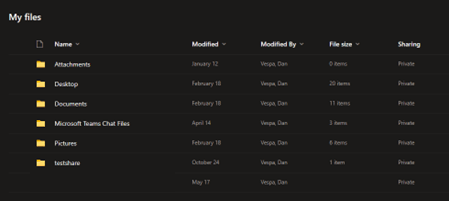
From here, you can create files and folders for use and sharing. Files will need to be uploaded from your local computer to a folder you share in OneDrive.
Uploading to OneDrive
Click “Add New”
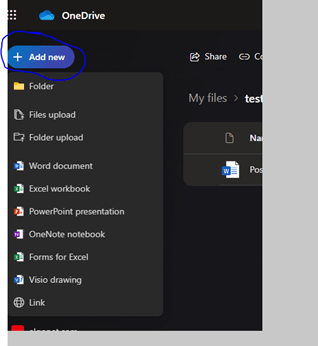
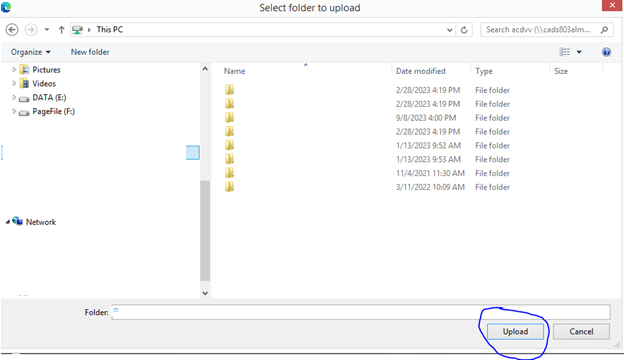
And choose which file or folder you wish to upload to OneDrive:
Setting File Access in OneDrive
If you are collaborating with others, Use “Can Edit” permissions on the share. Use “View-Only “permissions if you would like users to only view and not edit the contents of the documents are sharing. Alternatively, you can prohibit downloading and print of the document or folder content when in “View-Only” by blocking downloads.
Highlight the File / Folder you wish to share as read-only and click the dots (…) beside it. Chose “Share”:
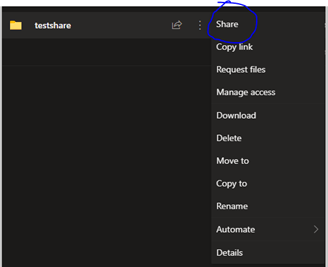
Next, we will set up who will have access, what kind of access (read-only in this case) and whether to block downloading or printing. Clicking on “Anyone with link can edit” will expand the sharing menu to show all options:

Becomes:
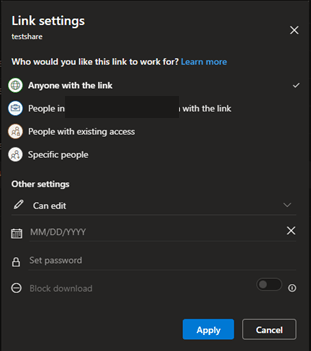
If you choose “Anyone with the link” as an option, the Other Settings you can pick are the following:
- Read-only or Edit
- The date the link expires
- Setting a password for the link
- Block Download – This prevents downloading or printing. It is ONLY available when access is set to READ-ONLY
Sharing with OneDrive Online
For sharing with People within Algoma or Specific People (Outside the organization), People with existing access or Specific people, it is almost identical except you will not be able to set an expiry date on the link or set a password. In Other Settings, you can do the following:
- Read-only or Edit
- Block Download – This prevents downloading or printing. It is ONLY available when access is set to READ-ONLY
Click “Apply” and then you are presented with the next Window that allows you to send the link. You can do these one of two ways. You can provide email addresses in the address field and then click send. The email address is searched from the directory and your contacts. Email addresses that are not in those sources must be fully typed in (i.e. user@domain.com). Or you can copy the link by clicking copy and pasting it into an email that have already been created and send it that way.
i.e.
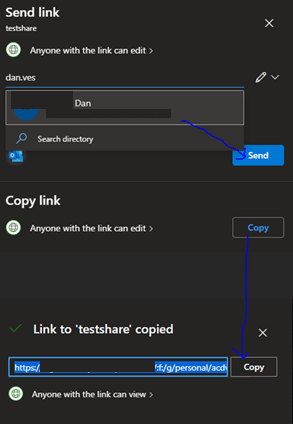
Dan
I am an Senior IT professional with several years experience in the field. I have supported thousands of users over the years. The organizations I have worked for range in size from one person to thousands of people. I have performed support from Help Desk, Network / Cloud Administration, Network Support, Application Support, Implementation and Security.