

So, you would like to Activate Entra PIM Roles with PowerShell? Doing it through the admin portal is a manual procedure and it takes forever!! I couldn’t agree more. I couldn’t take it anymore so I thought to myself, “You should be able to do this in PowerShell”. You can do a lot of things, so why not do this?
Read on and I will show you who to create and run this script that can start your day off quicker. But first, what are Entra PIM Roles?
Entra PIM Roles Explanation
As Microsoft states, Privileged Identity Management (PIM) is a service in Microsoft Entra ID that enables you to manage, control, and monitor access to important resources in your organization. These resources include resources in Microsoft Entra ID, Azure, and other Microsoft Online Services such as Microsoft 365 or Microsoft Intune. The following video explains important PIM concepts and features.
Simply put, if your organization is big enough and takes security seriously, it won’t give Global Admin access to just anyone. It is like giving a kid keys to the candy store! Instead, it is better to be more granular with your organization’s admin access. If you need only user admin, exchange admin and team’s admin access, then that’s all you should have. However, if you have several more roles, going to the roles page and manually activating them can be time consuming. Fortunately, there is a way to do it through PowerShell. Let me show you how….
Activate Entra PIM Roles with PowerShell: Prerequisites
Before you do this, you will need the following:
- You need to be licensed to at least MS Entra ID P2 or Enterprise Mobility + Security (EMS) E5 license.
- You need to have the MgGraph Module installed in PowerShell
- Your PIM Role administrator must assign you your PIM Roles (i.e Teams Administrator, Exchange Administrator etc.)
What the Script Does
Simply put, the script will iterate through a Role list you have created as a CSV file and activate each role you need to be activated for your workday. As your job changes you modify the CSV file for what roles have been added or taken away from your position. It will take about as long to active your PIM as it did before but there is absolutely no manual clicking involved. It is all automatic, leaving you to start other tasks during your day while it is running in the background.
Activate Entra PIM Roles with PowerShell: The Script
Make sure your roles.csv file is in the same directory as the script. Here is an example of its format:
The script looks like this:
$CSVPath = ".\roles.csv"

Connect-MgGraph -NoWelcome

$context = Get-MgContext

$currentUser = (Get-MgUser -UserId $context.Account).Id


##Try import CSV file

try {

    $Roles = import-csv $CSVPath -ErrorAction stop

}

catch {

    throw "Error importing CSV: $($_.Exception.Message)"

    break

}


# Get all available roles

$myRoles = Get-MgRoleManagementDirectoryRoleEligibilitySchedule -ExpandProperty RoleDefinition -All -Filter "principalId eq '$currentuser'"


 foreach ($Role in $Roles) {


$CurRole = $Role.role


#Get Role

$myRole = $myroles | Where-Object {$_.RoleDefinition.DisplayName -eq $CurRole}


write Activating $CurRole


#Setup parameters for activation

$params = @{

    Action = "selfActivate"

    PrincipalId = $myRole.PrincipalId

    RoleDefinitionId = $myRole.RoleDefinitionId

    DirectoryScopeId = $myRole.DirectoryScopeId

    Justification = "Needed for work"

    ScheduleInfo = @{

        StartDateTime = Get-Date

        Expiration = @{

            Type = "AfterDuration"

            Duration = "PT8H"

        }

    }

   }


# Activate the role

New-MgRoleManagementDirectoryRoleAssignmentScheduleRequest -BodyParameter $params

}


Write All Done!

Disconnect-MgGraph
For a continued explanation of this go here. I hope this quick tip can speed up your day. I know it did mine a bit…
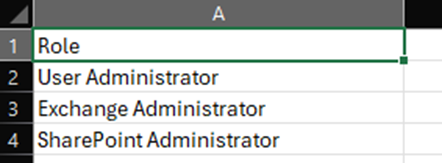
Unfortunately, there are a few roles that you get an error and will have to manually activate. For me, it is my company’s firewall that is the issue. The only info about it I dug up here. The issue has been around for over a year and is still not fixed. The roles I had issue activating through the script are as follows:
User Administrator
Exchange Administrator
Share Point Administrator
Security Administrator
Intune Administrator
Conditional Access Administrator
But when I went through an internet connection without out a restrictive firewall I was able to active all roles through PowerShell
If you want to learn how to Deactivate the roles with PowerShell, Go here.
Dan
I am an IT professional with over twenty five years experience in the field. I have supported thousands of users over the years. The organizations I have worked for range in size from one person to hundreds of people. I have performed support from Help Desk, Network / Cloud Administration, Network Support, Application Support, Implementation and Security.