
Managing calendar permissions with PowerShell on Microsoft 365 / Exchange Online will often require you to use PowerShell a bit. I can explain how to perform typical day-to-day admin tasks involving calendar permissions, using PowerShell.
Before managing permissions, you need to connect to Exchange Online through PowerShell. Once connected, you can view existing calendar permissions, add new permissions, edit existing calendar permissions, and remove calendar permissions.
Connect to Exchange Online via PowerShell
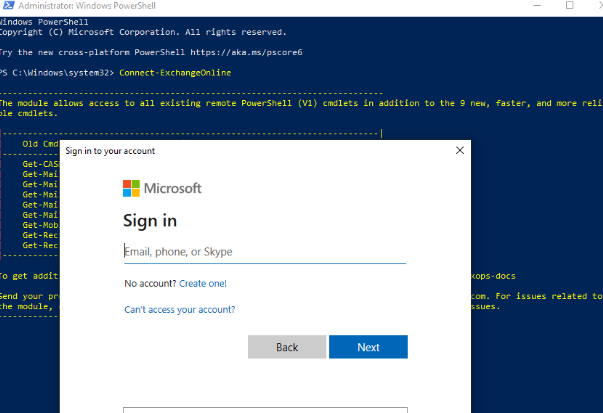
Connecting to Exchange Online via PowerShell requires just a few commands. Follow the instructions below to connect to Exchange Online from your PowerShell prompt.
- Launch PowerShell from Workstation
- Run the Following Four Commands in Order:
Set-ExecutionPolicy RemoteSigned -Force
$UserCredential = Get-Credential
$Session = New-PSSession -ConfigurationName Microsoft.Exchange -ConnectionUri https://outlook.office365.com/powershell-liveid/ -Credential $UserCredential -Authentication Basic -AllowRedirection
Import-PSSession $Session
The above script will prompt you for O365 credentials. When prompted, supply your credentials for the O365 tenant you are trying to manage.
If you know how to use PowerShell, you can easily write a script to automate this.
Viewing Calendar Permissions with PowerShell
Before setting / updating / removing permissions from an O365 calendar, it is a good idea to see what permissions currently exist on it so they can be set back to their original permissions if you make a mistake. To list the permissions on a calendar using PowerShell, run the Get-MailboxFolderPermission command in PowerShell after you have connected to Exchange Online.
Get-MailboxFolderPermission -Identity <user@company.com>:\Calendar
You would obviously replace john@contoso.com with the user whose calendar permissions you want to view. If you prefer, you can pipe the output to a CSV file as well by appending | Export-CSV c:\filepath\filename.csv to the command:
Get-MailboxFolderPermission -Identity <user@company.com>:\Calendar | Export-CSV c:\filepath\filename.csv
Replace filepath with the path to the file you are creating and filename with the name you want to give the CSV file.
Removing Calendar Permissions with PowerShell
Removing existing permissions from a calendar in O365 with PowerShell requires just a single command (Remove-MailboxFolderPermission). To run it, make sure you have connected to Exchange Online via PowerShell and then run the command below. In the example below, we are removing John’s access from Jen’s calendar:
Remove-MailboxFolderPermission -Identity <user@company.com>:\Calendar -User john@contoso.com
Adding Permissions to a Calendar with PowerShell
The Add-MailboxFolderpermission PowerShell command is used to add permissions to a calendar. You can only ADD permissions to a calendar for a user if there are not already permissions configured. If you need to UPDATE permissions that already exist, you would use the Set-MailboxFolderPermission command.
To clarify, let’s use the following example:
Jimmy is a new hire at Contoso. He has not yet been given any permissions to User’s calendar and now needs “Reviewer” access. Since he currently has no permissions to Jen’s calendar, you would use the command below to add his permissions to Jen’s calendar:
Add-MailboxFolderPermission -Identity <user@company.com>:\calendar -user <jimmy@company.com> -AccessRights Reviewer
If Jimmy already had permissions (i.e. Editor, Author, etc) to User’s calendar, running the Add-MailboxFolderPermission command would have generated an error indicating permissions already exist. In that case, you would use the Set-MailboxFolderPermission command instead (see below).
Changing Permissions on a Calendar in O365 with PowerShell
Changing permissions that already exist on the calendar in O365 requires a different command. Instead of running the Add-MailboxFolderPermission PowerShell command, you should run the Set-MailboxFolderPermission command when you need to update pre-existing permissions.
For example, if John already has Reviewer access to Jen’s calendar, you will use the command below to change the permissions to Editor:
Set-MailboxFolderPermission -Identity user@company.com:\Calendar -User jimmy@ company.com -AccessRights Editor
If you try to run the command above, it will fail if existing permissions are not already in place.
Available Calendar Permissions with PowerShell
There are 10 available roles that you can set on calendars. They are:
- Owner. Allows read, create, modify and delete all items and folders. Also allows managing items permissions
- PublishingEditor. Allows read, create, modify and delete items/subfolders.
- Editor. Allows read, create, modify and delete items.
- PublishingAuthor. Allows read, create all items/subfolders. You can modify and delete only items you create.
- Author. Allows create and read items; edit and delete own items.
- NonEditingAuthor. Allows full read access and create items. You can delete only your own items.
- Reviewer. Read only.
- Contributor. Allows create items and folders.
- AvailabilityOnly. Allows read free/busy information from calendar
- LimitedDetails. Allows view of the subject and location.
- None. No permission to access folder and files.
You may use any of the above roles when setting permissions on calendars in O365 with PowerShell.
Summary or Calendar Permissions with PowerShell
Managing calendars in M365 with PowerShell requires familiarity with four commands:
The Get-MailboxFolderPermission command is used to view existing permissions.
The Remove-MailboxFolderPermission is used to remove existing permissions.
Add-MailboxFolderPermission is used to add NEW permissions to a calendar and
Set-MailboxFolderPermission is used to modify EXISTING permissions on the calendar.
Dan
I am an IT professional with over twenty five years experience in the field. I have supported thousands of users over the years. The organizations I have worked for range in size from one person to hundreds of people. I have performed support from Help Desk, Network / Cloud Administration, Network Support, Application Support, Implementation and Security.