
Sync to Samsung Cloud Missing Intune Enrolled Device
Users are complaining about Sync to Samsung Cloud missing on their Samsung Notes App. You have set up either an Android Enterprise corporate owned fully managed (COBO) or an Android Enterprise corporate owned work profile (COPE) and deployed the Samsung Notes App to the devices….
Why are they not syncing?
What Sync to Samsung Cloud Missing Looks Like
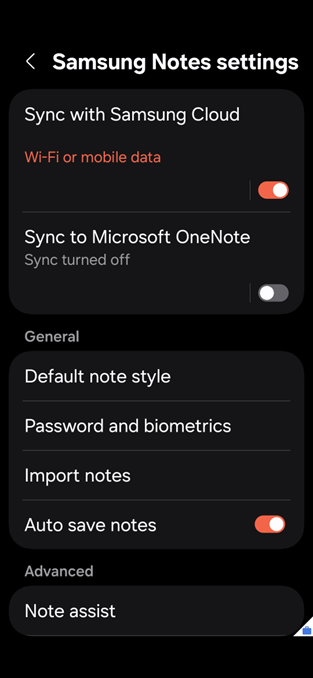
When you deploy this app through your Google Managed Play store as an approved app, for security purposes, the app does not allow syncing to a cloud (Who wants Microsoft info in the Samsung Cloud, right?). Ultimately, sync to Samsung Cloud is missing.
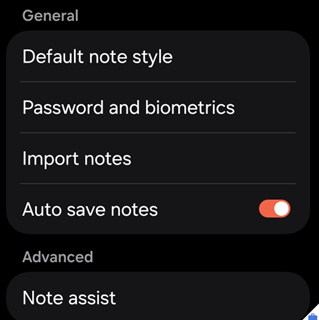
So, when you go into the settings of the Samsung Note this is what you see:
When your users want to see this:
Read below to see how you can fix sync to Samsung Cloud missing.
How to Enable Sync to Samsung Cloud on an Intune Enrolled Device
I have written an article on how to do this with Samsung Smart Switch and it essentially the same process, however, you need to enable the settings specific to Samsung Notes.
First you will need to create an app configuration. Go to Manage Apps / Configuration in the Intune portal and Select Create / Managed Devices. You will go through the wizard of creating an App Configuration.
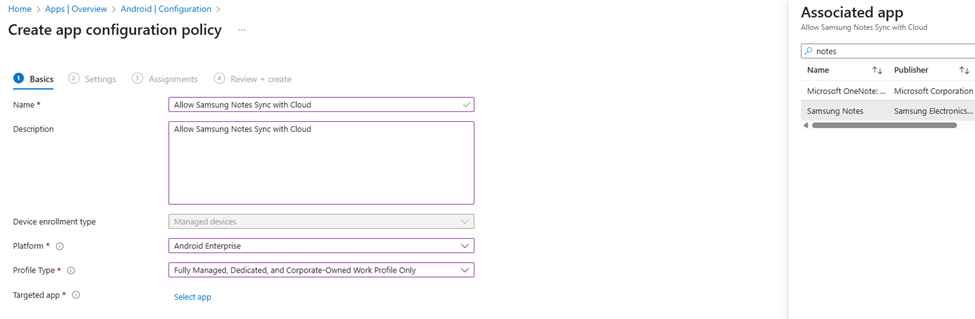
Give it a name and Description. In this case it could be “Allow Samsung Notes Sync with Cloud”, etc. Choose the platform as Android Enterprise and the profile types you want to apply it to are Fully Managed and Corporate Work Profile Only. You can Apply to all profile types if you want but this should take care of the profile types that matter. Select the target app as Samsung Notes from the Associated App fly-out on the right and then click next:
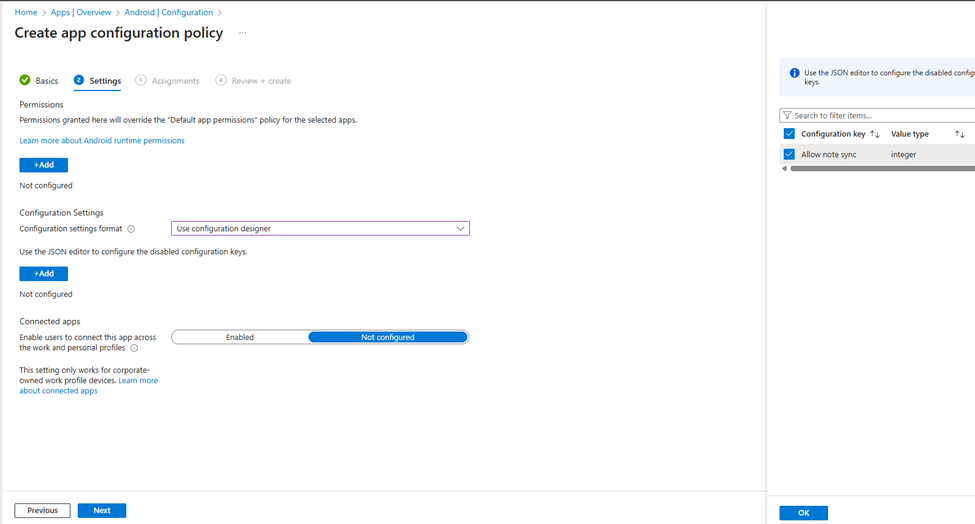
Next, you will be able to configure the setting so sync to Samsung cloud is missing goes away! In the next screen Choose “Use Configuration Designer “from the drop-down field and then click add. There is only one setting you can pick anyway. It is “Allow Note Sync” and you can check it from the configuration Fly out on the right. Click OK and then Next:
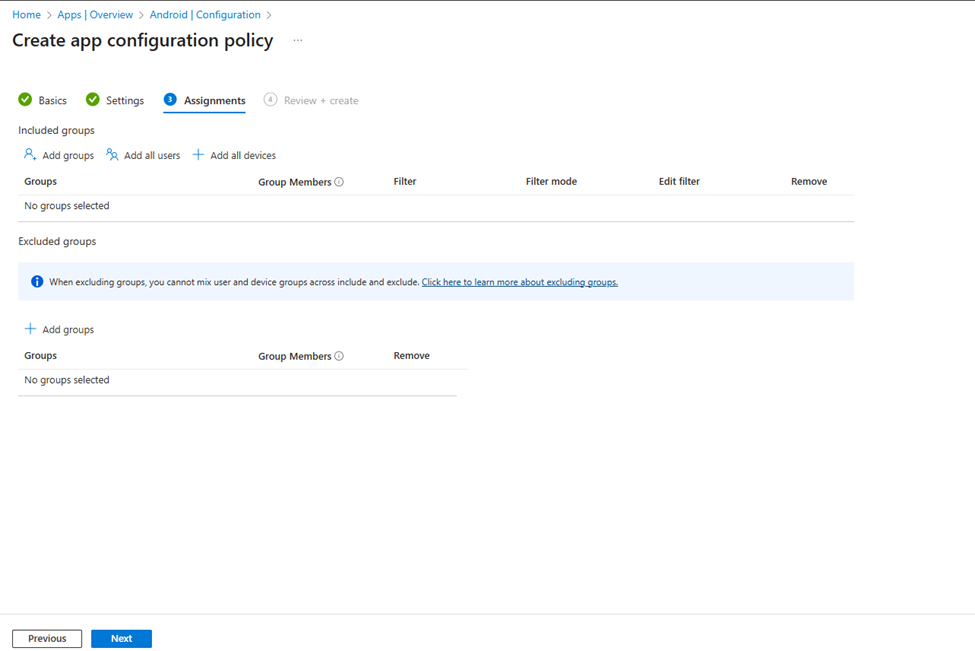
From Here you can add which Entra Device Group to include or exclude from this App Configuration:
All you have to do is click “Create” on the last screen and your App Configuration for Samsung Notes is created. The Device group you chose in the previous steps in the configuration setup will have the new configuration pushed out to their device as soon as they check in!
The Sync to Samsung cloud missing mystery is solved!
High Volume Emails in Exchange Online
It has been a bit since I posted. When you are in IT you are involved in a lot of projects apart from day to day work, but here is a good one I came across in my work. Dealing with High Volume Emails through Exchange online.
What Would Use High Volume Emails?
That s a very good question. In an organization you could have an individual who sends a lot of email from their inbox, a device like a scanner or copier that send to recipients through email to LOB Apps that send out email notifications as part of the apps process.
Microsoft has done what they can enabling sending High Volume Email email through Exchange but they have to be careful not to clog up the system. Especially if it gets compromised. They have default limits in place.
Exchange Sending limits
The following limits have been put in place for mailboxes by default. They are:
This is a rolling 24-hour limit on the total number of recipients a mailbox can send to.
- A typical limit is 10,000 external recipients per day.
- This limit includes both internal and external recipients.
- For trial tenants, the limit is 5,000 external recipients.
This is the maximum number of unique recipients an email message can have.
This limit is often set at 1,000 recipients per message.
This limits the number of emails a single mailbox can send per minute.
- The default is 30 messages per minute.
- Emails that exceed this limit are throttled and delayed.
Why These Limits Exist in High volume Email
- Preventing Bulk and Spam Email: Exchange Online is designed for email and collaboration, not for bulk commercial email campaigns. These limits help prevent abuse and maintain service quality for all users.
- Protecting Your Organization: The recipient rate limit is a safeguard against compromised accounts from being used to send large volumes of spam and potentially damaging your organization’s reputation.
What Happens When You Hit a Limit
- If you hit the recipient rate limit, you will receive Non-Delivery Reports (NDRs) for your undelivered messages.
- You’ll need to wait for the 24-hour period to pass before you can send more messages to that recipient group.
What can you do to Send High Volume Email?
Microsoft recommends using a specialized third-party provider for legitimate High Volume emails. Examples include Mailchimp or Constant Contact are built for sending high volumes of email and are much more suitable for marketing and bulk communications.
However there is a new service in preview by Microsoft you can try called High Volume Email. It looks to be in its infancy but it has some functionality. Let me lay it out for you.
First, you will need to go the new High Volume Email section in the Exchange Online Admin portal. From their, you will need to add an HVE Account. You can also use PowerShell to add an HVE account. Once you have done that, you can use the following info for you Device or App to send email:
| Printer/Application setting | Value |
|---|---|
| Server/smart host | smtp-hve.office365.com |
| Port | Port 587 |
| TLS/StartTLS | Enabled |
| Username/email address and password | Sign in with credentials of HVE account |
Limitations or High Volume Email
You still may need to go to third party services if the following limitations do not fit your needs:
High Volume email exchange is limited by sender reputation risks, strict rate limits for external recipients (e.g., 2,000 per day per tenant in Exchange Online), restrictions on sending to external domains, and requirements for updated authentication methods and potential application code changes.
So it looks like you have options!
Use the Managed Folder Assistant to Archive Users Mail

Oh no! A user has come to you and has complained they are running out of storage space in their Outlook. What? You exclaim… you are on Exchange Plan 2 and have 100 GB of storage space. How is that possible? This is an opportunity to Archive Users Mail.
I have been in this game long enough to tell you that users have been using email storage space as file storage space for decades. It really makes file server administrators happy, but it pisses off the email server admins. Hey, aren’t we supposed to be on the same team?
Since there isn’t an Exchange Online Plan 3 (LOL) you are tapped out at 100 GB. What to do…what to do…
Well luckily you can take advantage of the Exchanged Managed Folder Assistant (MFA). This is not to be confused with Multi Factor Authentication. We IT types love our acronyms (sic). It is a simple process, but you do have to get a few things set up. Lucky I am here to show you.
Configure Your MRM Retention Policy to Archive Users Mail
- Sign in to the Microsoft Purview portal: Access the portal at https://compliance.microsoft.com/ and sign in with your administrator credentials.
- Navigate to MRM Retention policies: Go to Data lifecycle management > Exchange (legacy) > MRM Retention policies.
- Create a new policy: Click + New policy.
- Name the policy: Give your new policy a descriptive name, such as “Company Archive and Delete Policy”.
- Add retention tags: Click + Add tag.
- Select tags: Choose the relevant retention tags from the list, including custom tags you’ve previously created.
- Review and submit: Review your policy settings and click Next to submit and apply the new policy.
I set the policy to Archive Users Mail older than 3 years and to delete any emails after 7. Seven years is a standard policy and if your are holding on to emails older that 7 years, well that’s on you.
Enable Online Archive for the User
Online Archiving is not enabled by default for users. It takes a lot of time and processing for this so only users that require it should be enabled. It is the best way to Archive Users Mail. But we do it only when a user requests it. All we must do is go to their mailbox in EAC and enable archiving with the policy we configured above. This setting is located in the “other” tab of the users mailbox properties. It is done like this:
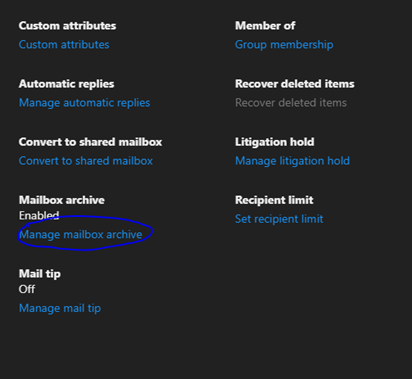
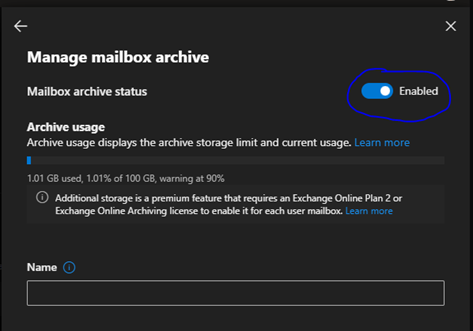
Notice the Name is Blank. Leave it so. It just populates it as “<Last Name>, <First Name> – Online Archive” after you enable and save configuration.
Apply Policy for the User
In order for Online Archiving to work properly you need to create a retention policy for your tenant. After yo do that, just apply it to the user after you have created an Archive for them. This setting is located in the “mailbox” tab of the users mailbox properties. It is done like this: :
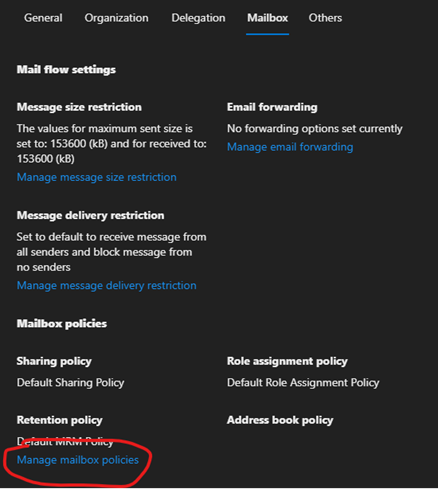
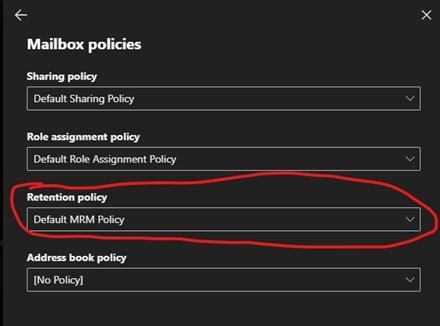
Wait or Force Synchronization
Now you can wait for the synchronization to occur to Archive the Users Mail in Outlook. It will eventually mount as an archive mail store just like local archiving but it is online. So, it will be available to any outlook you run with you logged in. This is a definite benefit to local auto-archive.
However, it could take a few hours to a few days and in some cases a few weeks to finish the initial synch. This is dependent on several factors. Like, size of mailbox, network traffic, speed, a how fast or slow the M365 cloud is operating at any given moment. There is an easy way to kick it off. Here’s how you do it:
Login into Exchange Online in PowerShell, then execute this command:
start-managedfolderassistant -identity mailboxname
Where mailbox name is the user who you set up the Managed Folder Assistant for. Before you know it you will see the Online Archive start to populate in the users Outlook! Also, if you subscribe to an M365 backup solution, it will get backed up to the cloud with the original mail store of the user. One last thing to note is the online archive can grow to a size of 1.5 TB. If they need more than that…..I GIVE UP!
Temporarily Sign in as a User in M365

As an M365 administrator you have your security set up. You have your devices enrolled and you have even made sure MFA has been set up for the much-needed security required in today’s IT Landscape. But how do you Temporarily Sign in as a User?
Why Temporarily Sign in as a User
You may need to set up a device for them that may require you to log in as them. Some say this is not good practice and I agree if you can do it another way, it is great, but sometimes you do not really have a choice.
Besides, you must be an administrator to set this up and you are the only one who knows the temporary passcode. Let’s begin:
How to Do it
I already mentioned that you must be an administrator. Simply go into Entra and look up the user you need to log in as.
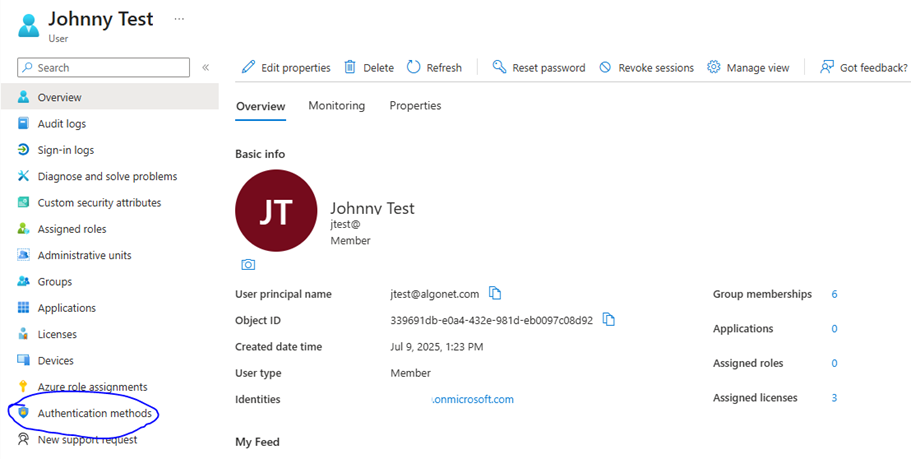
Go to the users Overview and Authentication Methods and Click Add Authentication Method.
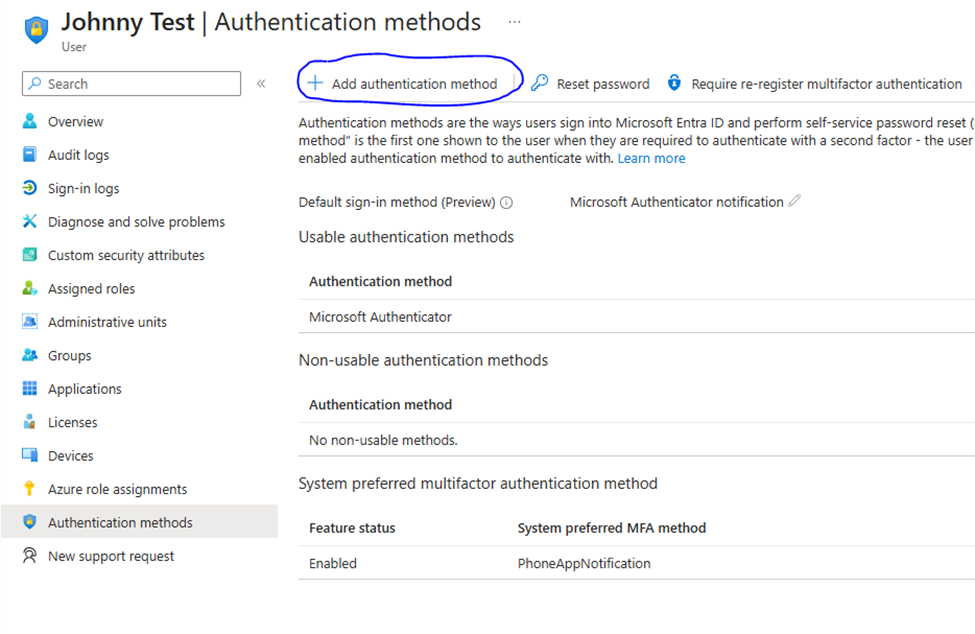
Choose Temporary Access Pass from the dropdown list:

Options When You Temporarily Sign in as a User
From here you can configure a few things. Namely, you can specify how long the TAP is good for (Activation Duration), If you can use the TAP multiple times (One-Time Use) and if you would like a time delay before you start using it (Delayed Start Time).
When you are done configuring the settings, click Add.
When you are done, you are taken to this screen:
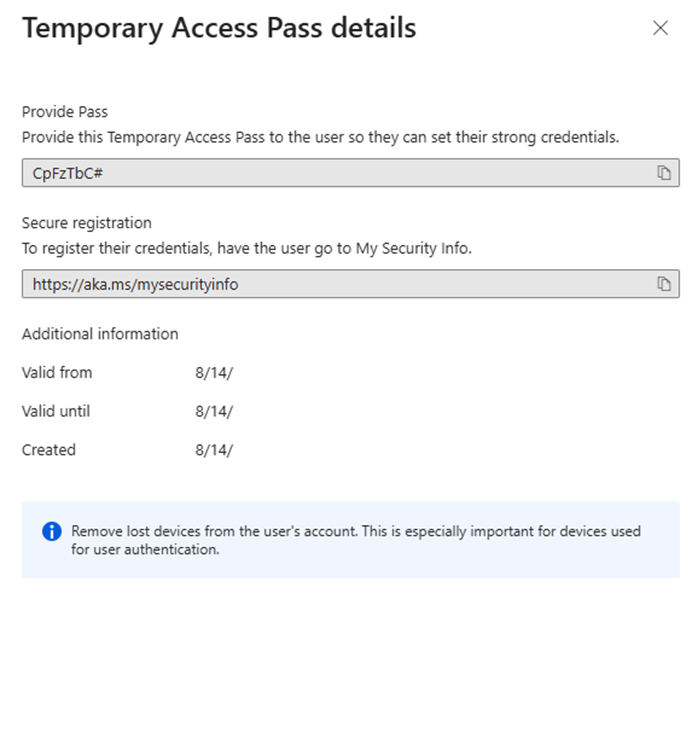
The temporary password is provided above. Copy it to a notepad document or like so you will have it ready to use. When you log on as the use you will be presented with a password screen like this:
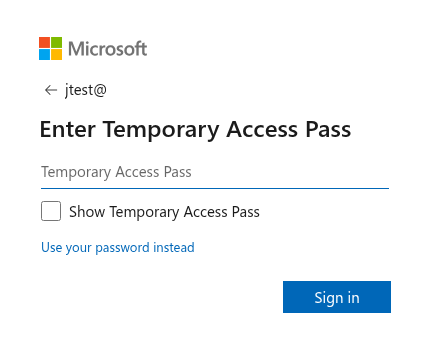
Enter the TAP that you copied from above and voila, you have access to the user account for set up purposes. It even bypasses MFA. So, you don’t have to constantly bug your users for MFA push numbers!
Why Use this to You Temporarily Sign in as a User
This is a very good question. Sometimes you can’t avoid it. Enrolling a device in Intune comes to mind. Whatever, the case, it will save you a lot of time in setting up the device and you will be non-intrusive to the user in doing so.
Why Microsoft Support Frustrates So Many Users (And What Needs to Change)

Microsoft is a tech giant with decades of experience and products that touch nearly every corner of the digital world—Windows, Office, Azure, Xbox, and more. So Why Microsoft Support Frustrates so many people? Even, despite its reach and resources, one recurring pain point continues to frustrate customers and IT professionals alike: Microsoft Support.
What has inspired me to write an article about this is the several experiences I have had with Microsoft over the years and how it has gotten progressively worse. The straw that broke the camel’s back was here.
It will go down in my support experience as the worst I have ever encountered!
So, let’s talk about why Microsoft Support often leaves users feeling stranded—and what could be done to fix it.
Automated Support – Why Microsoft Support Frustrates
One of the most common complaints is the heavy reliance on automation and chatbots. While AI-driven support can be helpful for basic questions, many users report going in circles with bots that don’t understand their issue, or that simply redirect them to irrelevant knowledge base articles.
I do not mind the email support option, but the bigger issue is that a lot of problems I experience are on the server side and MS support treats EVERYTHING like it is client-side. This is where the “Labyrinth” complaint comes to mind. This is one of the reasons why I don’t pick the phone option. The technician always wants to start a remote session and that is the last thing I need.
Most of the time, it is a user of mine that needs support and a remote session just isn’t feasible. I am not a user; I am a technician myself!
Support for Critical Services Isn’t Always… Supportive
Another reason why Why Microsoft Support Frustrates so much in terms of support is that Azure, Microsoft 365, and Dynamics 365 are mission-critical for many businesses. Yet, even for enterprise users, support responses can be delayed, vague, or incomplete. Time-sensitive issues sometimes take days to resolve, often bouncing between tiers or departments.
You can go to the service health page to see what’s going on. But it doesn’t tell you much. You really have to go to third-party sources like this one. This isn’t just frustrating, it’s a business risk.
Disjointed Experience Across Products
Need help with an Office 365 license, a OneDrive sync issue, and a problem with a Windows update? From the portal It looks like the company that sells tightly integrated solution, but it’s not. You’ll likely be shuffled across different support teams, each with limited knowledge of the others. The result is a fragmented experience that lacks the cohesion you need.
The Community Does More Than the Company
Ironically, some of the best “Microsoft support” doesn’t come from Microsoft. It comes from independent MVPs, IT forums, YouTube tutorials, and bloggers. While this speaks to the strength of the Microsoft community, it also underscores a weakness in official support infrastructure. I almost exclusively use these support channels to solve my M365 issues. Over the years I have become increasingly disillusioned with Microsoft Support.
Premium Support Comes at a Premium Price
Microsoft does offer higher tiers of support for enterprise users (e.g., Premier or Unified Support), but they’re costly and still not always timely. Small and mid-sized businesses often feel left behind, with limited access to real experts unless they pay more.
So, What Should Microsoft Do?
To be fair, supporting an ecosystem as vast as Microsoft’s is a herculean task. But if they’re serious about user satisfaction, here are a few ideas:
- Invest in human-first support, especially for issues automation can’t solve.
- Create centralized, cross-product teams that can tackle integrated problems holistically.
- Make diagnostics transparent and user-friendly, with clearer error messages and guided troubleshooting.
- Empower community contributors with better tools, faster bug escalations, and more collaboration.
Final Thoughts – Why Microsoft Support Frustrates
Microsoft’s products are powerful—but support is their biggest weakness. For a company so deeply embedded in the digital infrastructure of the world, improving the support experience isn’t optional, it’s essential.
Let’s hope they start listening to the people who depend on them most: their users. Nah….that would never work……
Resources in Exchange Don’t Respond to Meeting Requests
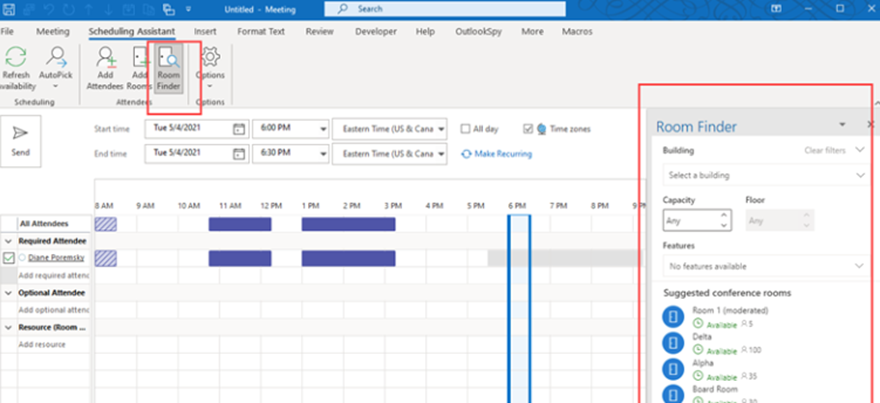
Your resource rooms have been working for as long as you remember. Why then, suddenly, do Resources in Exchange Don’t Respond to Meeting Requests? You set up these rooms ages ago and they just worked. It is supposed to be easy.
You didn’t change anything. And the wild goose chase begins……Of the things it could be I will go through two fixes that didn’t work and one that did for me.
Corrupt Free/Busy Data on Resource or Client Email Box
This could be a reason Resources in Exchange Don’t Respond to Meeting Requests and was suggested to me by Microsoft. It is a program called MFCMapi. It is like a registry editor for your Outlook profile. From here you can open the resource room profile (You will probably need to create one) and locate two free / busy files. They are called localFreeBusy and Sniffer. You need to delete them. The screenshots are below:


Basic Configuration Settings on Resource Not Correct
Once again, nothing has changed so why would I check this (I am looking at you Microsoft)? They suggested the following:
1. Check Room Mailbox Auto-Processing Settings
Run this in Exchange Online PowerShell:
powershell
Get-CalendarProcessing -Identity “RoomName” | fl AutomateProcessing,BookingWindowInDays,AllowConflicts,AllBookInPolicy,AllRequestInPolicy,AllRequestOutOfPolicy,BookInPolicy,RequestInPolicy,RequestOutOfPolicy
You want to see:
– AutomateProcessing : AutoAccept
– AllBookInPolicy : True (or the user should be listed in BookInPolicy)
If not, set it like this:
powershell
Set-CalendarProcessing -Identity “RoomName” -AutomateProcessing AutoAccept -AllBookInPolicy $true
2. Check Delegate Permissions
Ensure the delegate has Editor or Full Access to the user’s calendar, and that the room is being added as a required attendee.
Also, verify that the delegate is not using “Send As” or “Send on Behalf” in a way that bypasses room booking policies.
3. Test Direct Booking
Try having the delegate book the room directly (not on behalf of someone else). If it works, the issue is likely with how delegate bookings are processed.
4. Use Message Tracking Logs
If you’re an admin, run a message trace in the Exchange Admin Center to see if the room received the booking request at all. The messages were getting to the resource but the resource was not responding. It was stuck….
Advanced Configuration Settings on Resource Not Correct
Here is how it finally got Resources in Exchange Don’t Respond to Meeting Requests fixed.
At this point, it looked like a client-side issue. But Resources in Exchange Don’t Respond to Meeting Requests still! However, it was working on some users and not others. I was one of the affected users. Something changed and not by me or my colleagues….
Finally, I found this Article. It is an obscure article from about 4 years ago. The affected admin was having problems booking resource rooms and they were not auto accepting. It was different in that instead of allowing anyone to book a room, they were using delegates. However, the base issue was the same.
If you run “Get-CalendarProcessing <resource room name> | fl” you get all configuration settings. There are 46 of them in total. Near the bottom, there is a setting called “ProcessExternalMeetingMessages”. It was set to false. It needs to be set to True:
Set-CalendarProcessing <resource room name> -ProcessExternalMeetingMessages $True
Low and behold the message loop between the person / delegate booking a resource and the resource accepting were finally closed. Things started flowing again.
How do you know you have Resources in Exchange Don’t Respond to Meeting Requests
When this issue is evident users might complain of meeting reservations not showing up in room calendars, or worse, if it is an intermittent problem (in my case), users complain of double bookings. Basically, a user booked a room, and it was not marked off in the resource, therefore technically still available. A user who wasn’t exhibiting the issue would book the same time and it would reserve the room, hence the double booking! Frustrating the say the least.
Why am I Telling You This
It is important to know that what it takes to solve a seemingly simple problem can take a long time. For me it was reaching out to Microsoft several times. They were no help, but I didn’t give up on my relentless google search, trying to find the right phrase that would yield a result. You know how when you search for something on Google and a million search results come up? I only had about 2 dozen and the article that finally fixed my issue WAS THE LAST ONE.
I wrote an article about my experience with Microsoft Support. I have had a lot of them.
I am also going to open this post up to comments. Please let me know what your experiences have been. I would love to hear!
Enrolling an Android Phone the Correct Way

So, would you like to know the correct way to enrolling an Android Phone? If you read this article, you will save yourself a lot of time in the process. Apparently, my content as of late has low value (says Google) so I guess I better beef it up a bit (JSYK, Google is full of shit).
What you Need to Do First When Enrolling an Android Phone
I have Written other Articles On Enrolling Devices in InTune but things have changed a bit so here is an updated version.
If you are replacing a user’s phone with a new one, you will need the passcode of the phone as well as their windows credentials to enroll the device. I rarely ask for this information for a user but sometimes it cannot be helped (make sure you have your ID badge handy LOL). If it is a brand-new user, you already have their Windows credentials, and you can create the passcode. Other Items that are really important:
- Make sure the SIM card is installed.
- Access to Wi-Fi.
- Set up MFA. See steps below.
You Will Have to Temporarily Setup MFA for New Users
MFA is mandatory. If you are setting up a phone upgrade for a user, you can use the MFA that is already set up on their old phone. For new users, you will need to temporarily set up MFA on the authenticator app on your phone (I can show you how to remove it after). For new phones, open an Incognito Window in Chrome and go to https://aka.ms/mfasetup
(If a New User)- Sign in with the username and password:
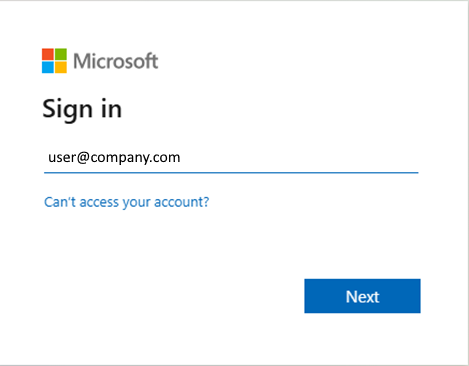
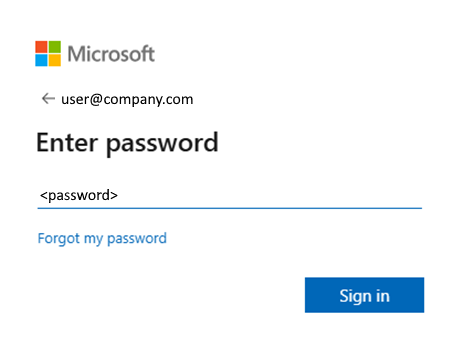
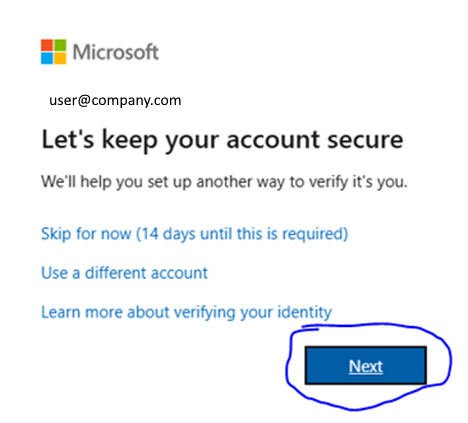
You will need to click next. You cannot enroll the phone without MFA.
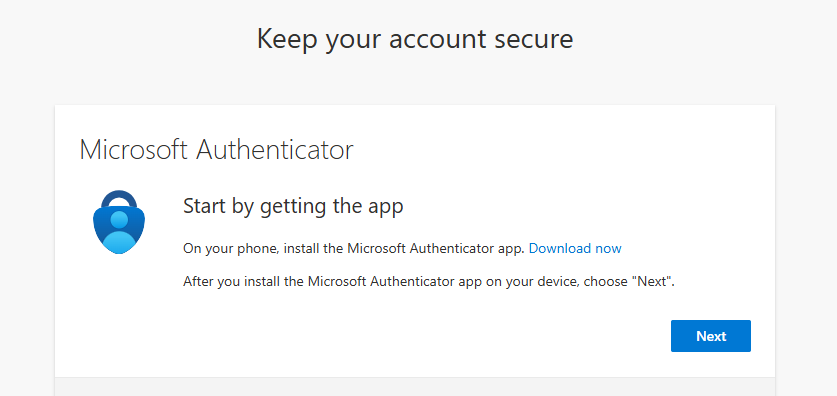
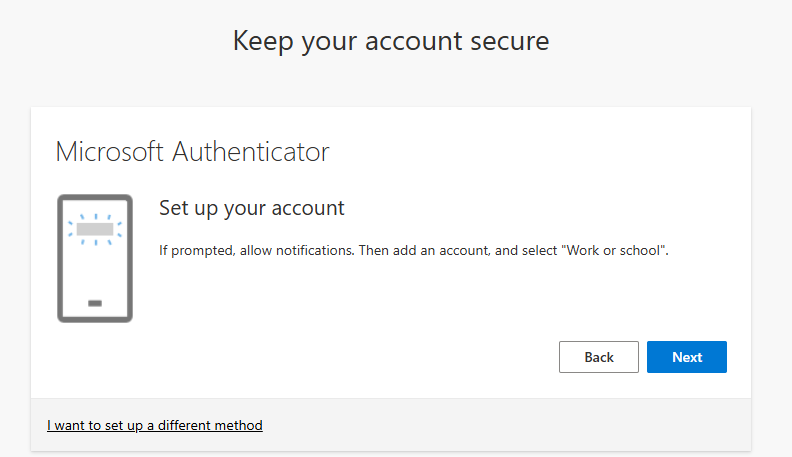
Click Next.
Leave the below screen up on your computer:
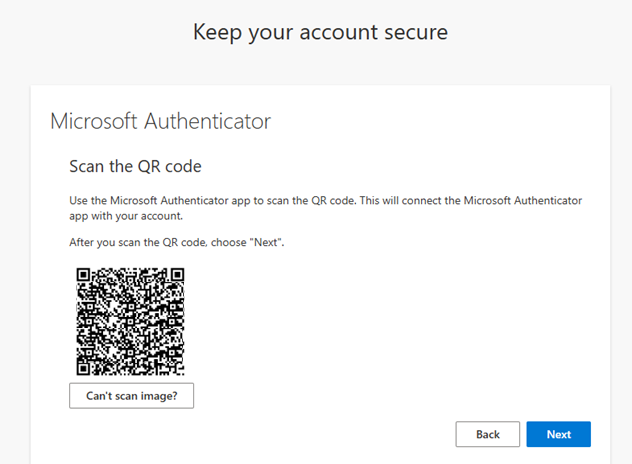
Go to your Authenticator App and click the “+” button to add the users account, then choose work or school. Then Scan the QR Code from your computer screen:
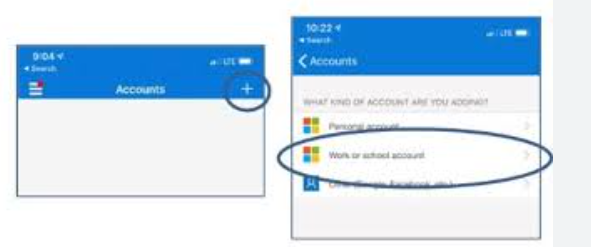
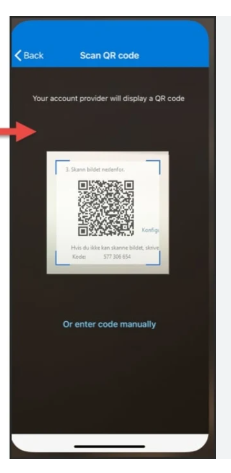
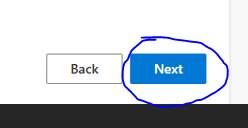
Click Next on your computer screen:
You will be given a test number on the screen:
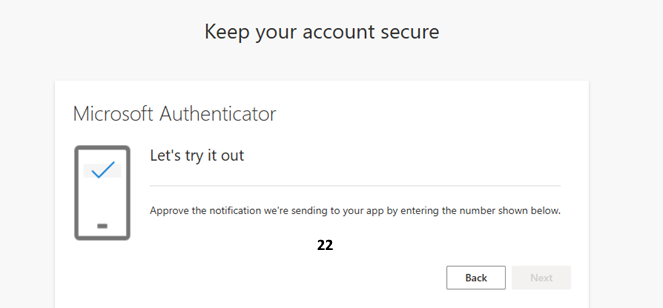
Enter the number into your phone:
Click Yes on the phone and then click Next on the computer screen:
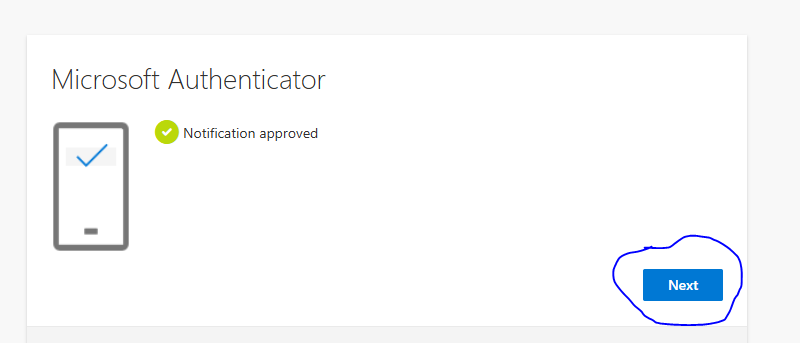
Click Next.
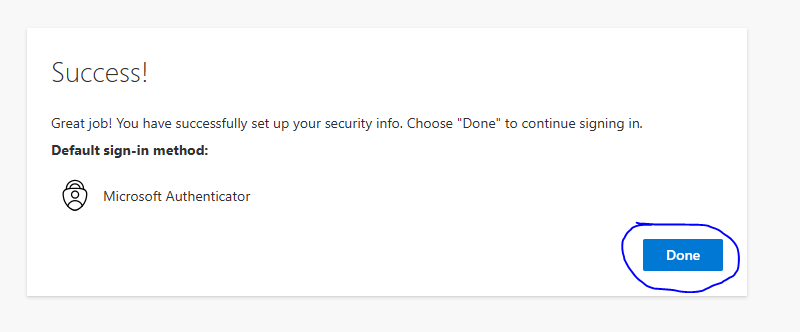
MFA is set up temporarily on your phone to help with the enrollment of the user’s phone, click done.
Get the QR code
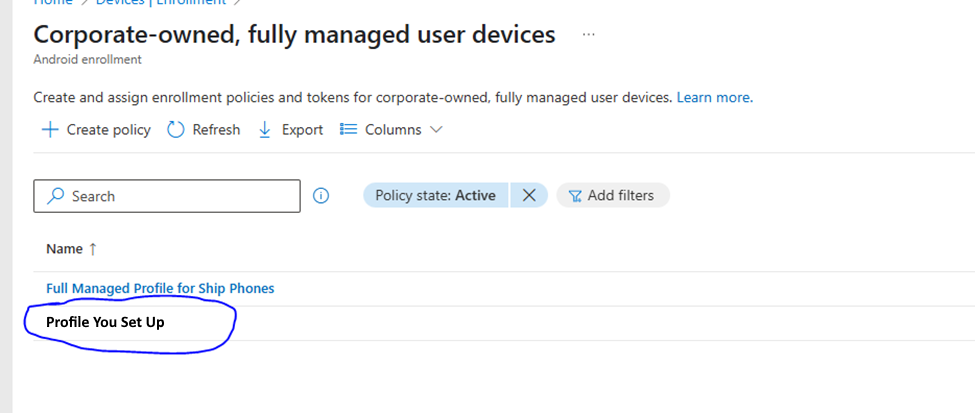
If you have gotten this far you have already set up a profile in Intune. Go to Devices / Android / Enrollment and pick the profile that you create to enroll the Android Device(s).
And then token. The QR Code will look something like this:
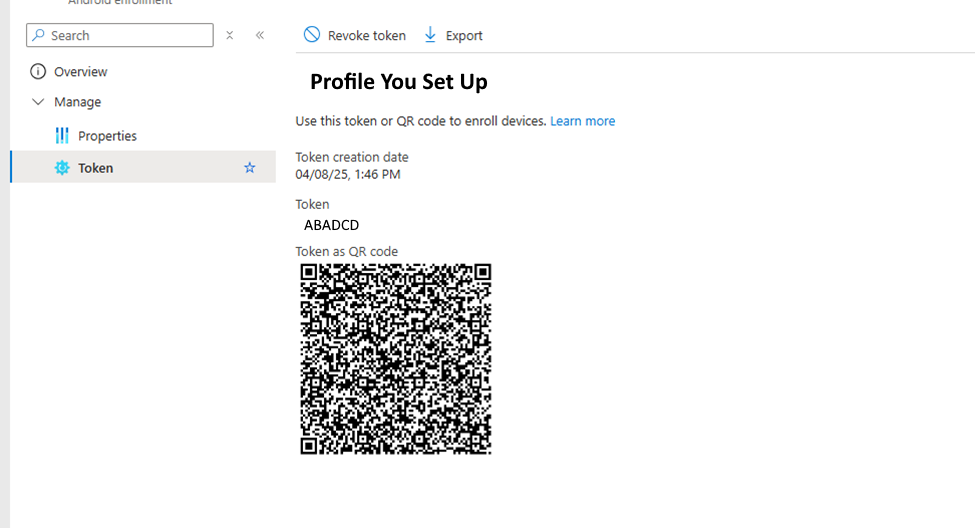
You can print this code out and have it ready when you need to enroll a mobile device.
Actually Enrolling a Mobile Device
The mobile device you are enrolling in must be set to factory defaults. If it is a brand-new phone this has been done already. If it is a phone that has never been enrolled in Endpoint Manager, it needs to be factory reset. If the phone is already enrolled in Endpoint Manager and you need to redeploy it to another user, you need to wipe the phone and re-enroll. You will have to look at the end of this article for information on how to do this. It is a multi-part series. You might want to check that article out too.
- To begin enrolling, at the first screen you see when the phone is turned on, tap continuously in the center of the screen until you see the QR code scanner (About 5 times). The process will begin.
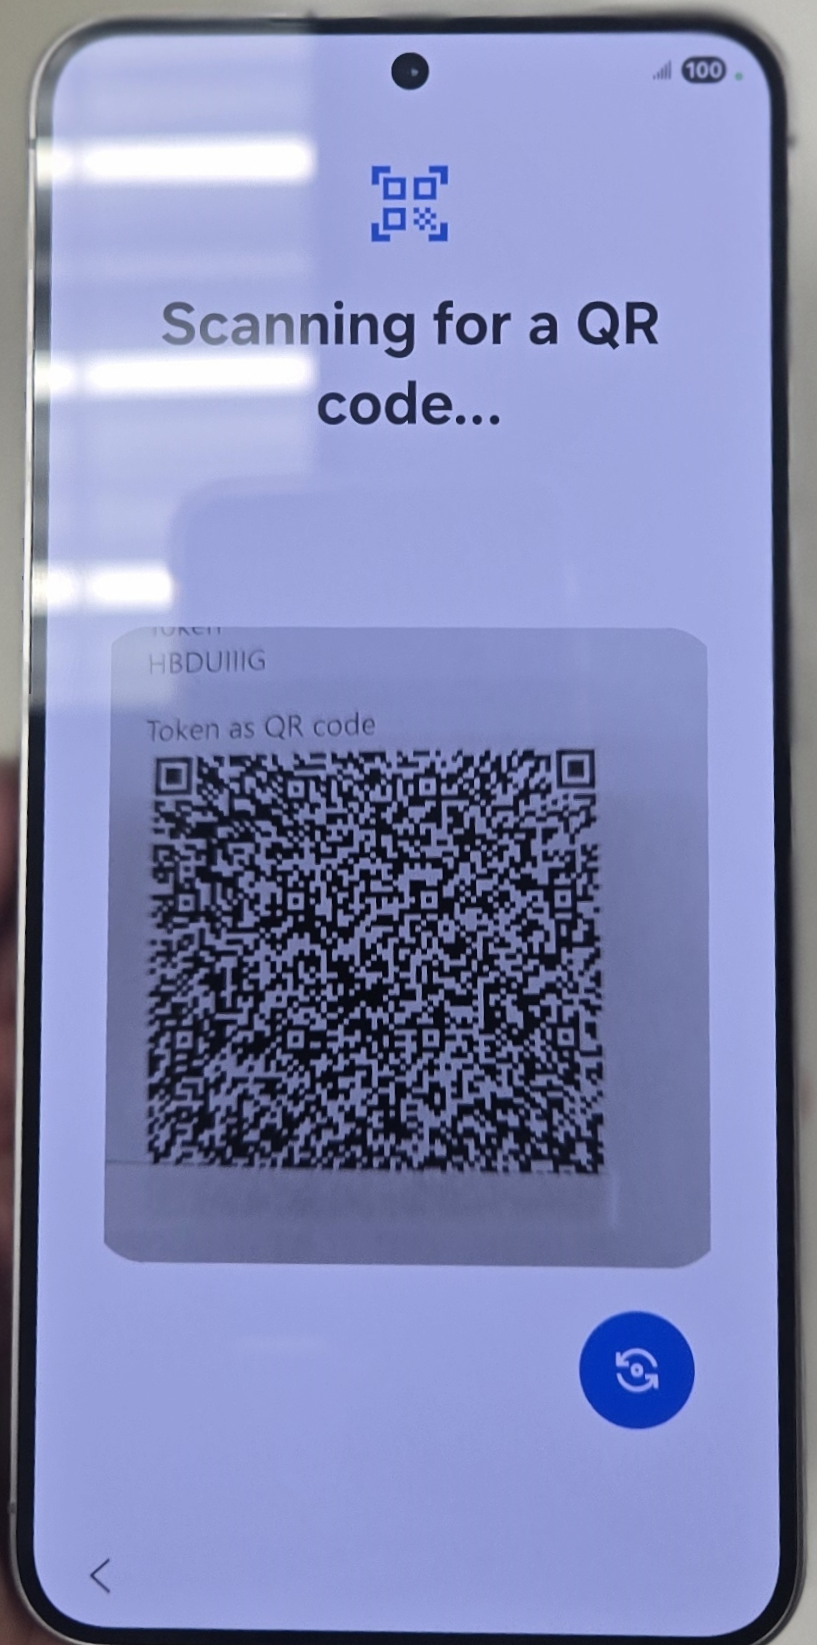
- Next you will be asked to connect to Wi-Fi. Connect the phone with its passphrase you are enrolling onto it.
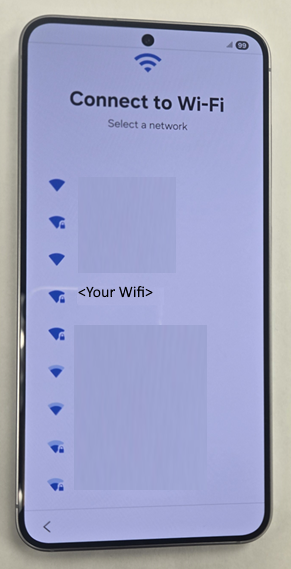
- Find Your Wifi and click connect.
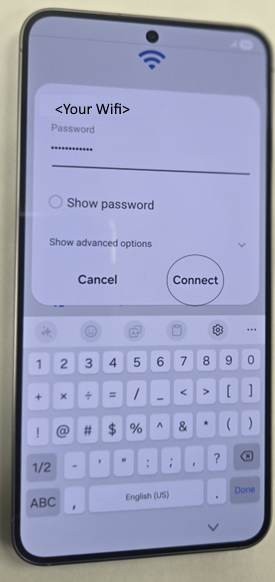
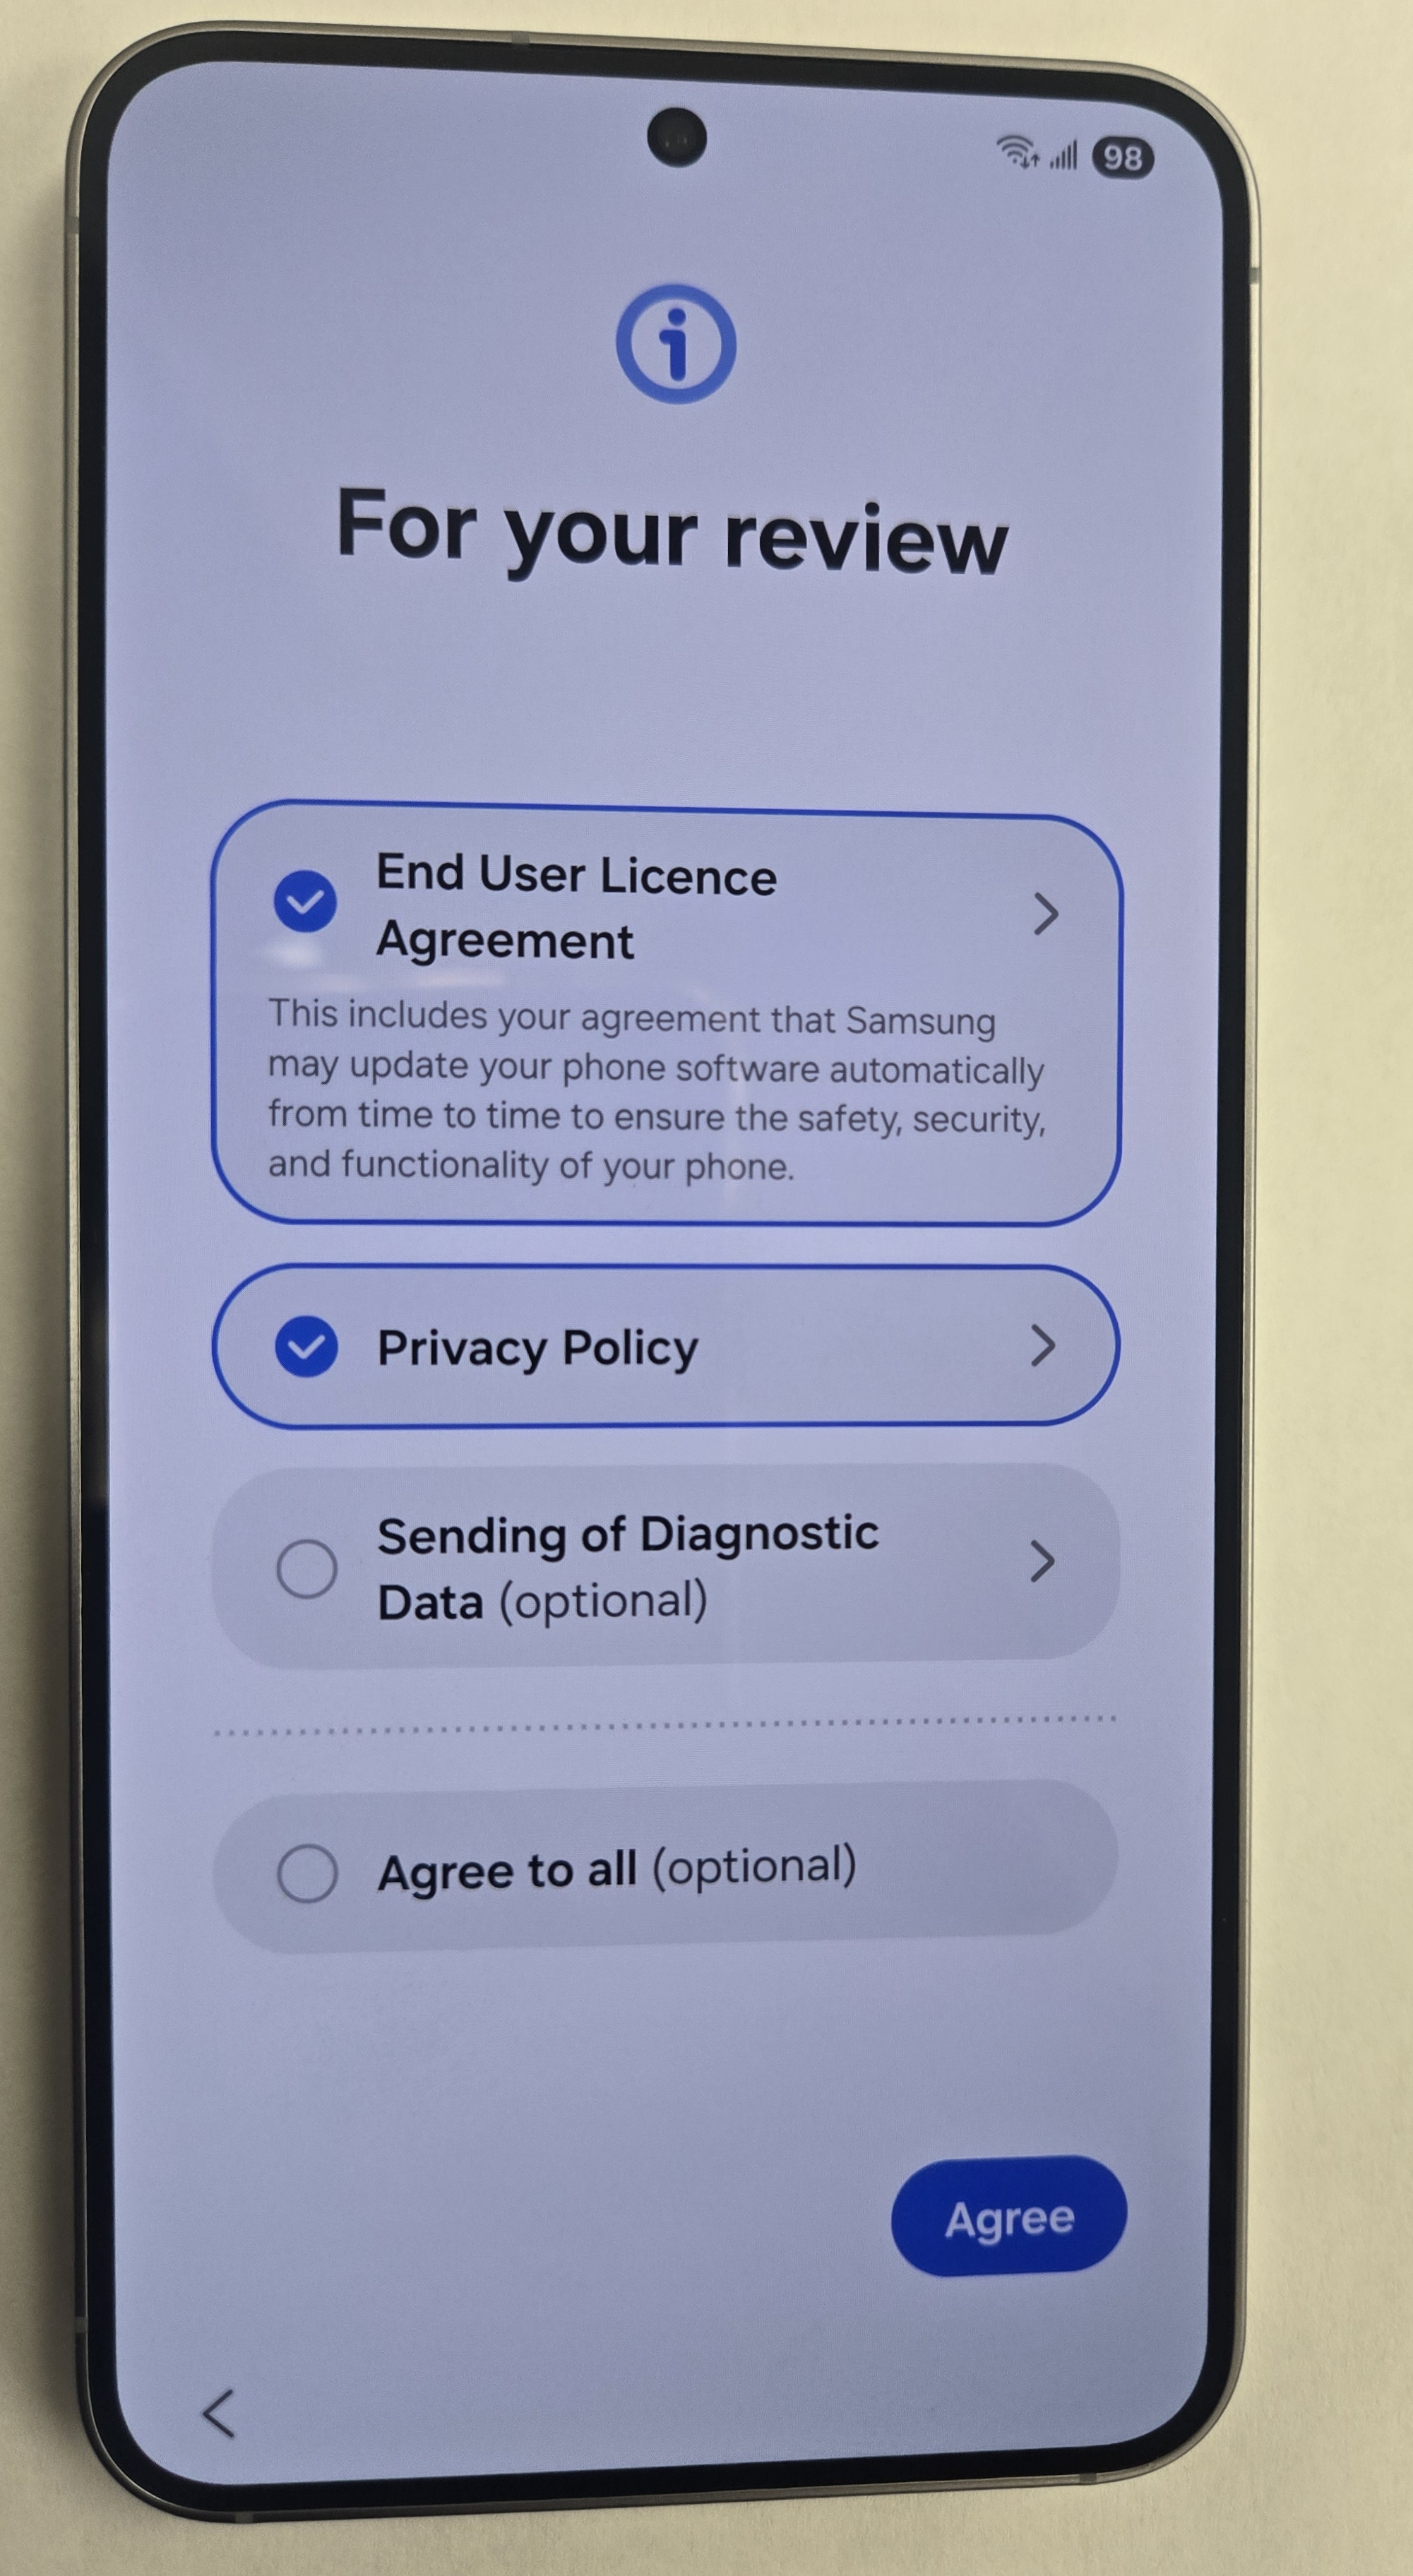
- Tap at least the first two check boxes and tap agree.
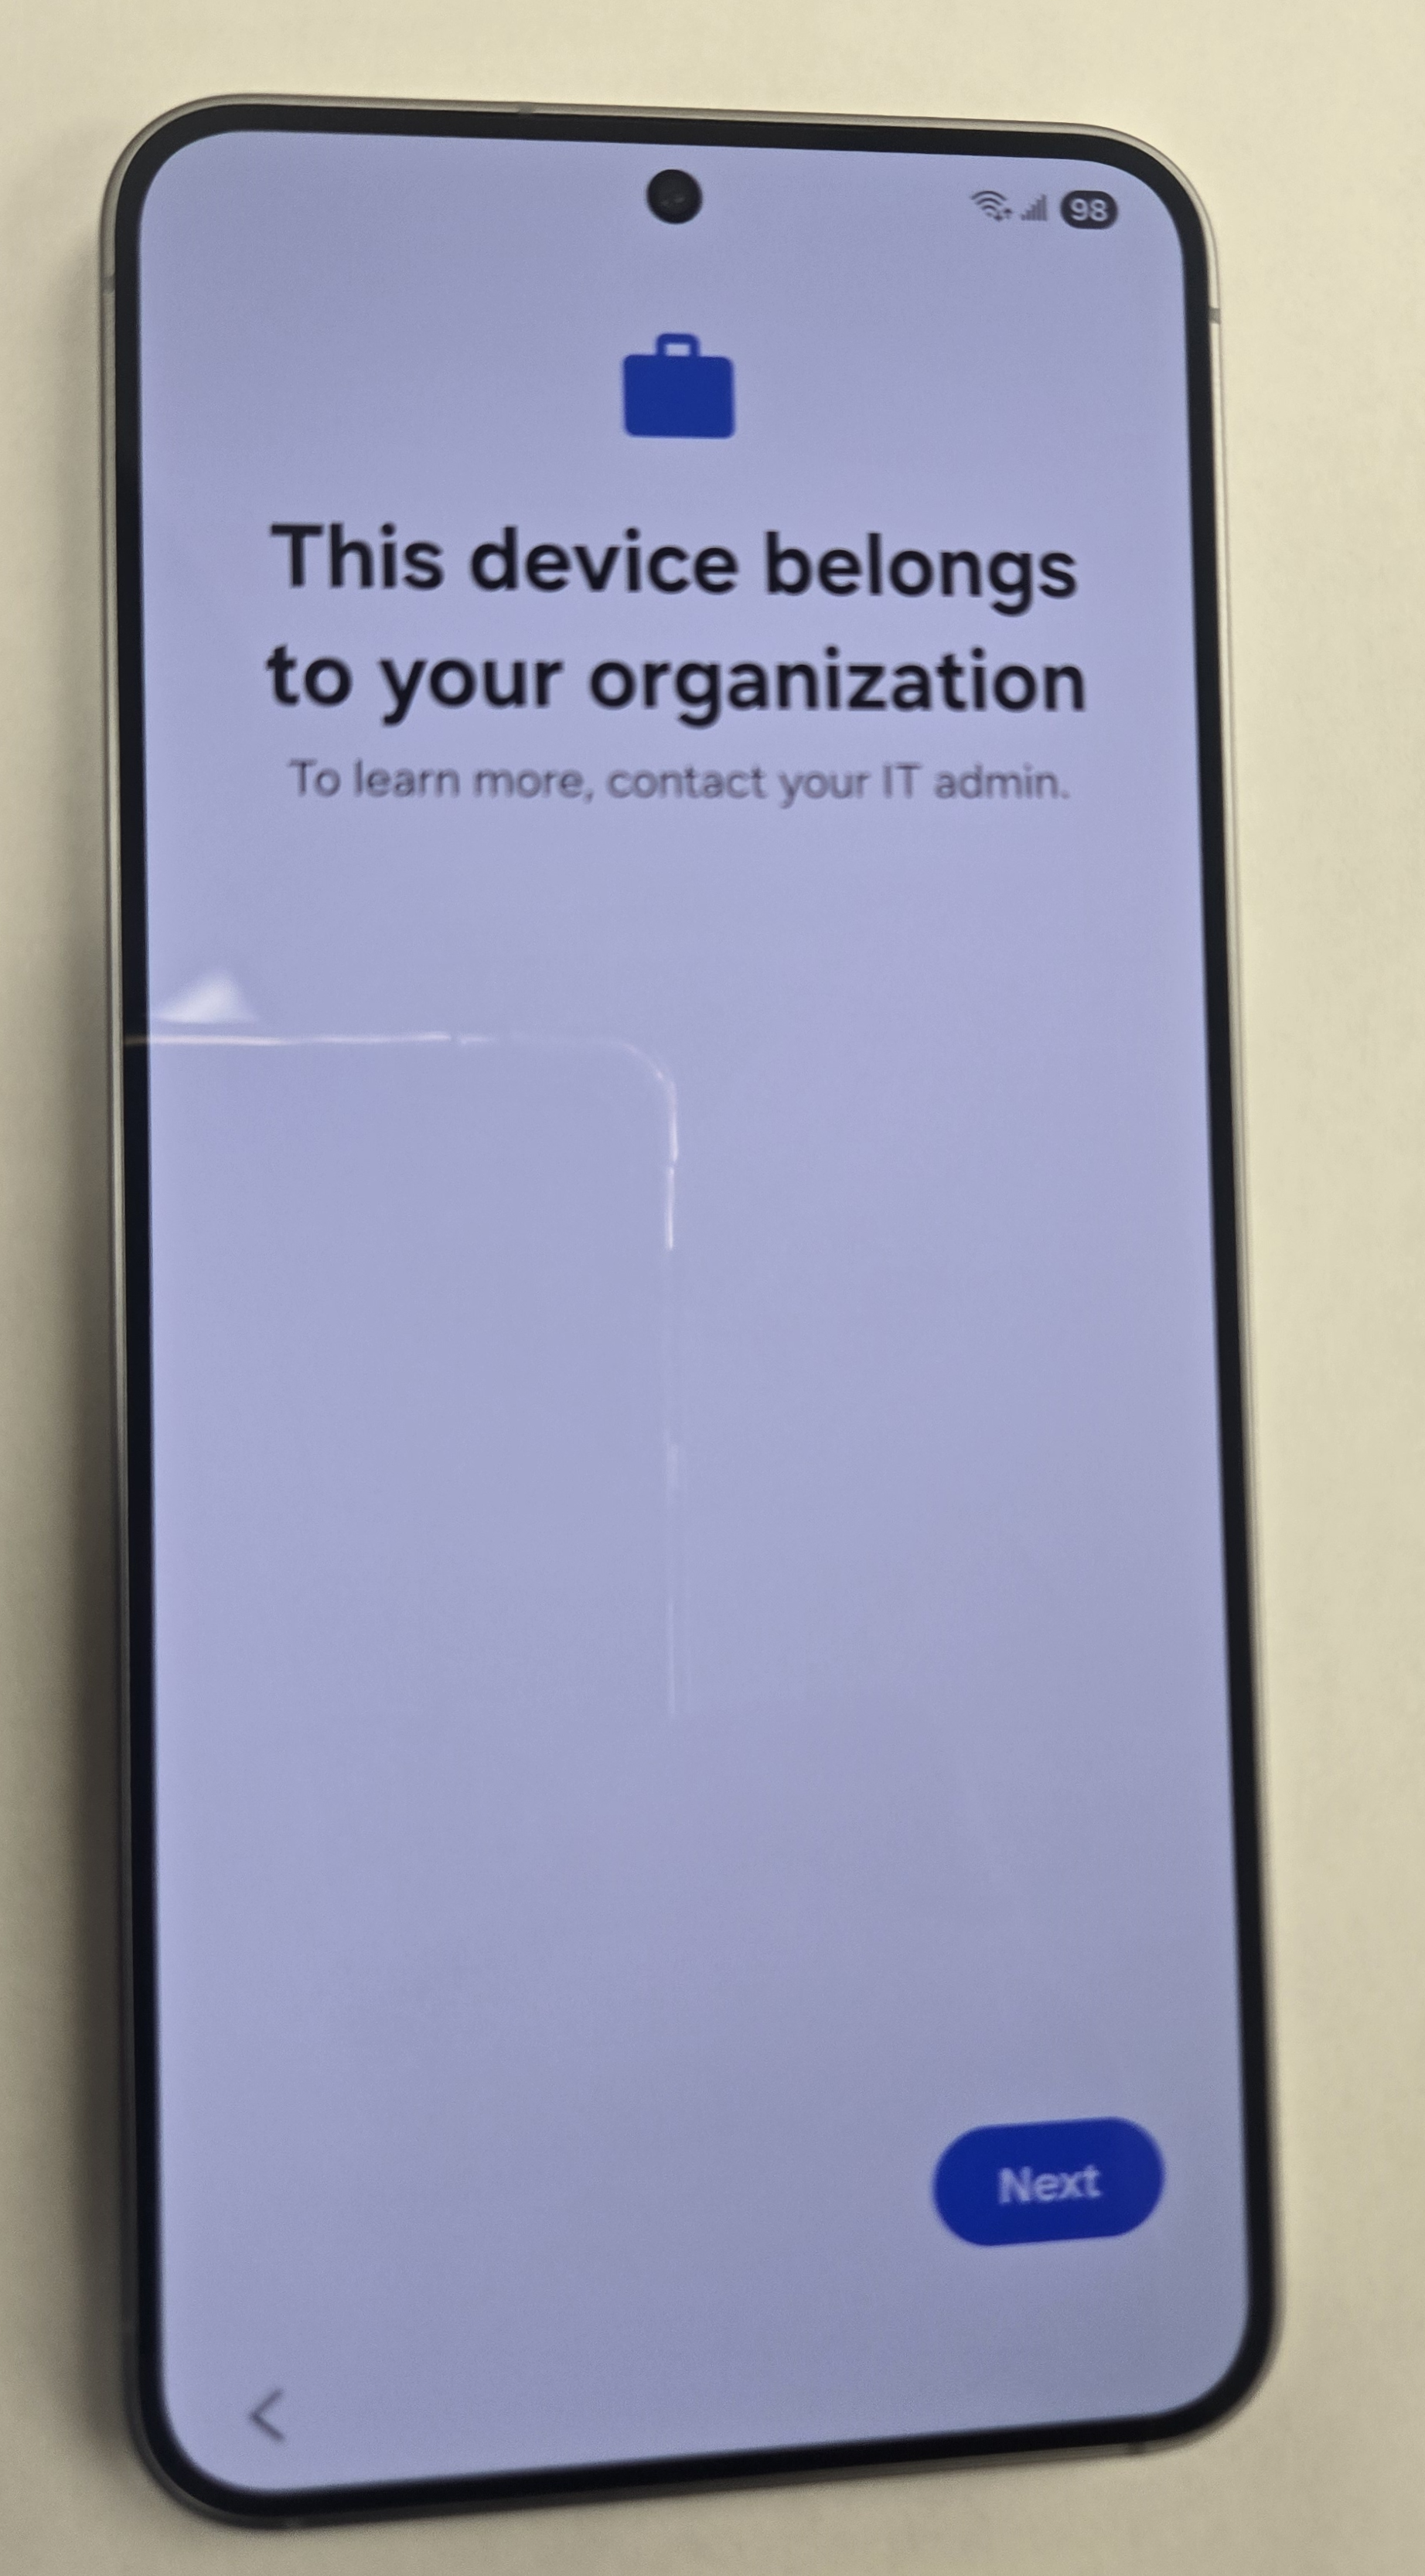
- Tap Next.
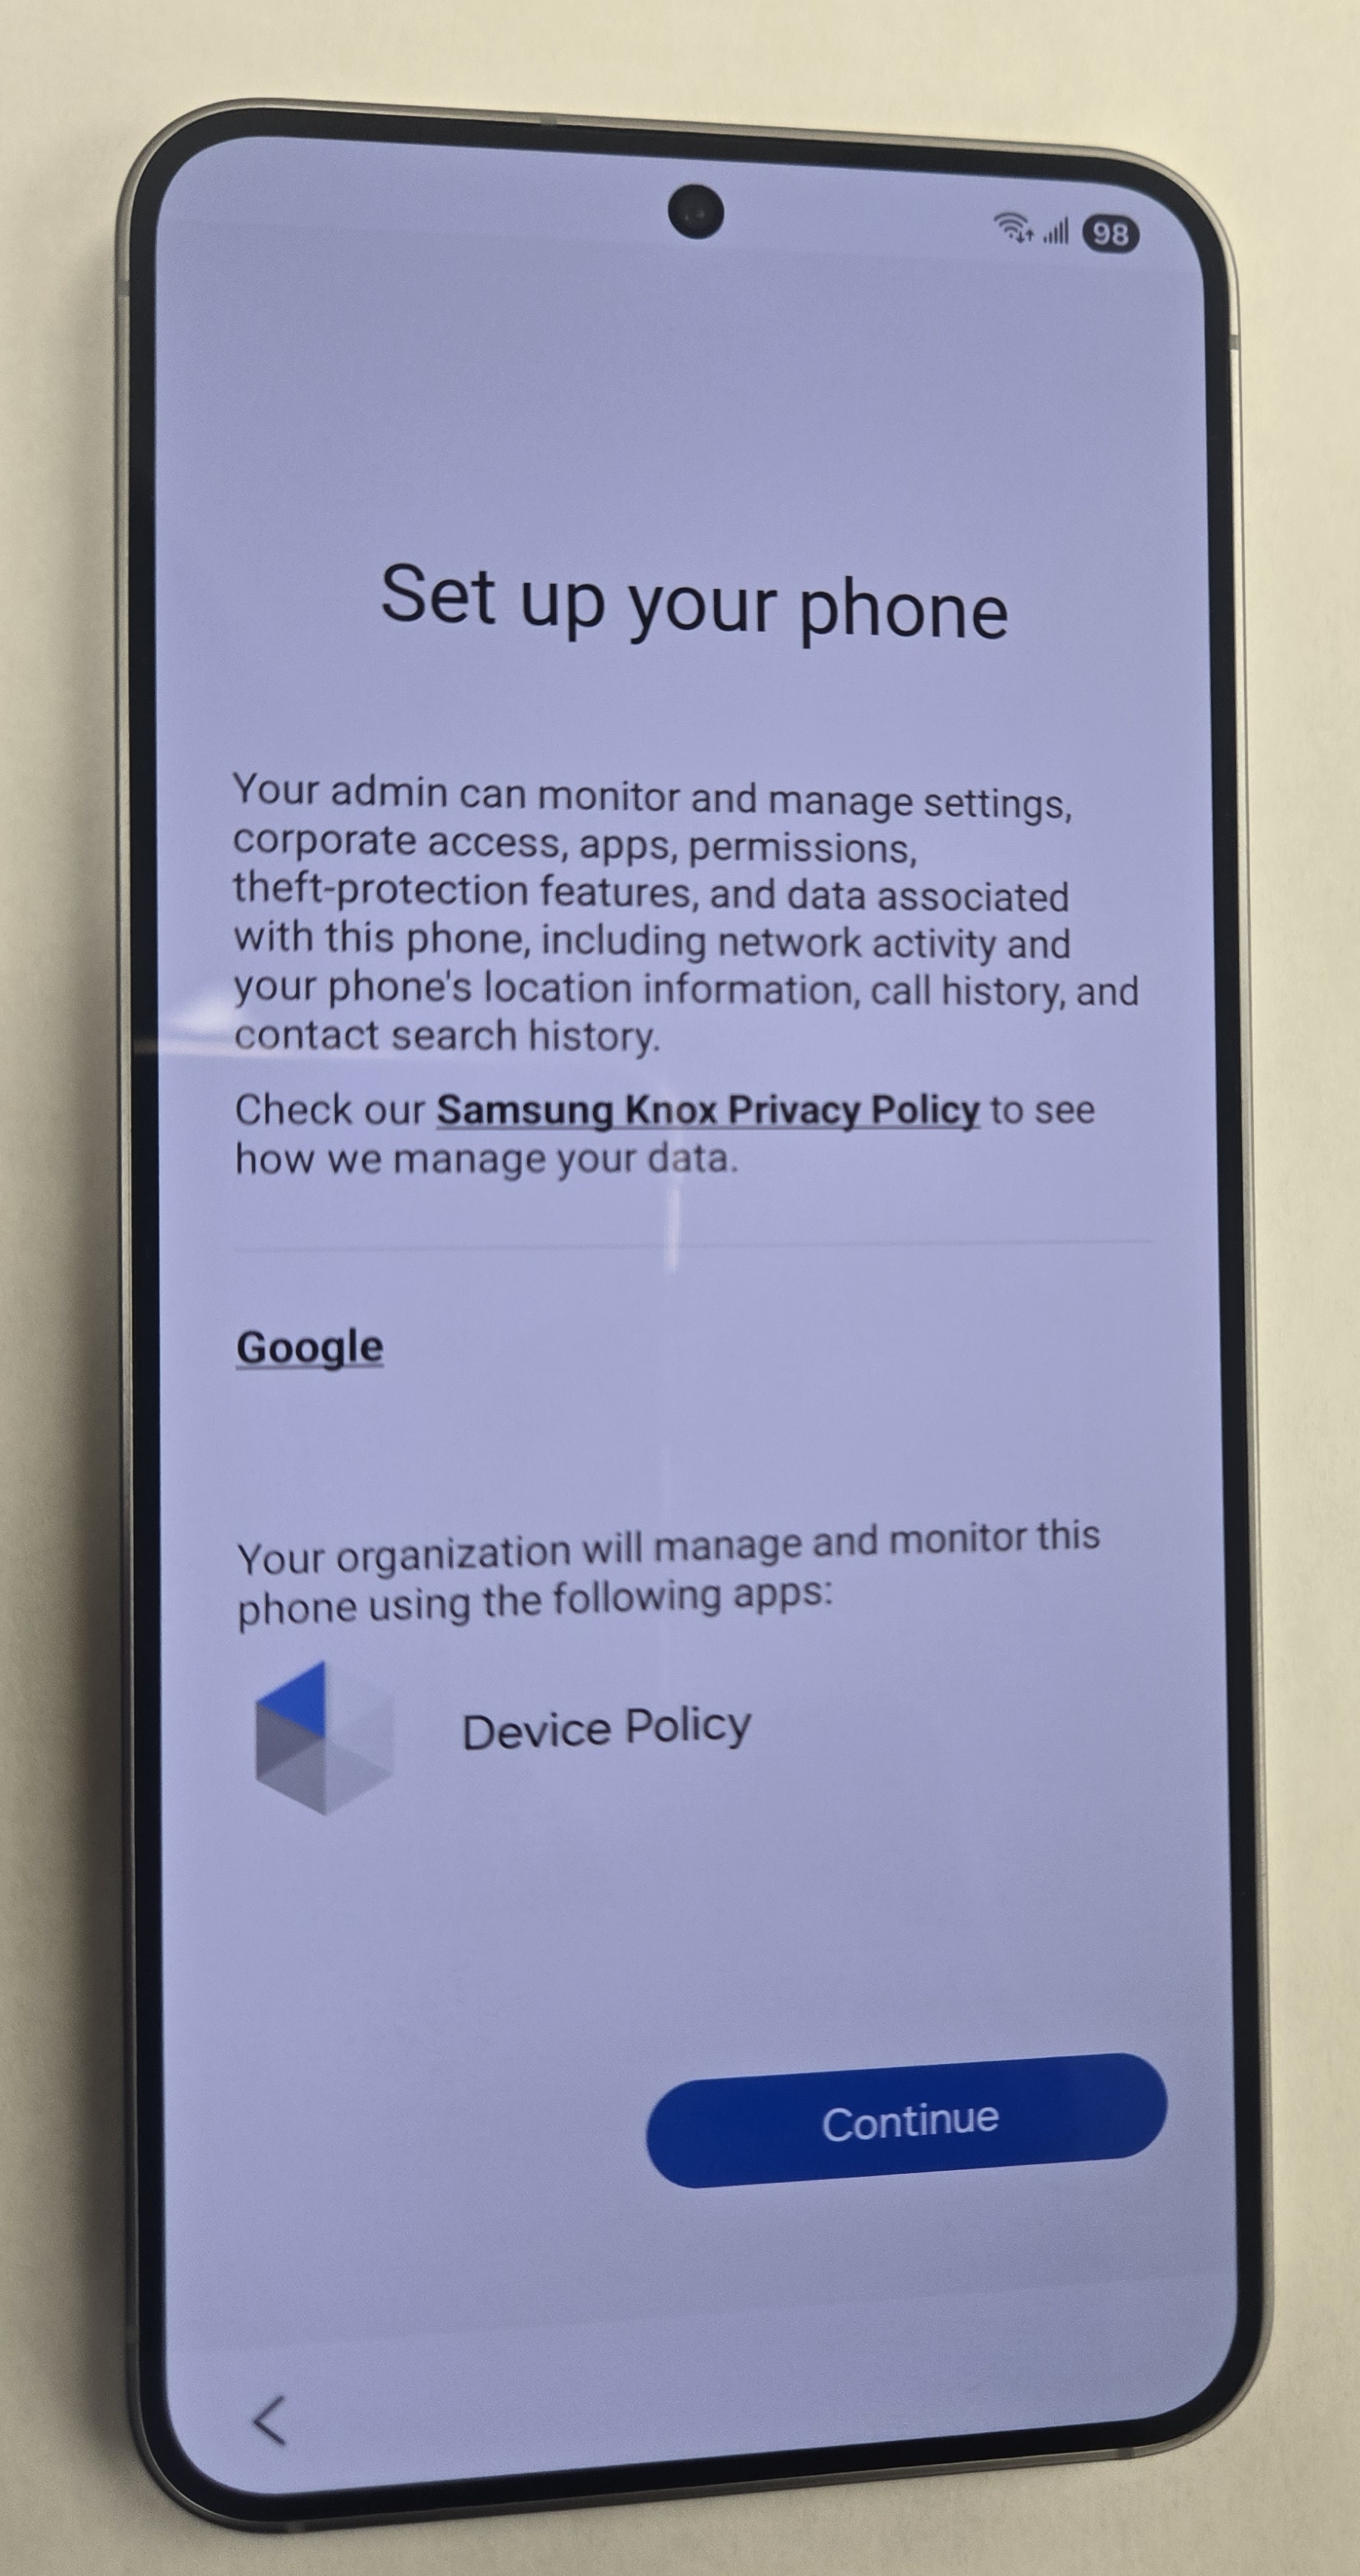
- Tap continue.
- Let this screen load.
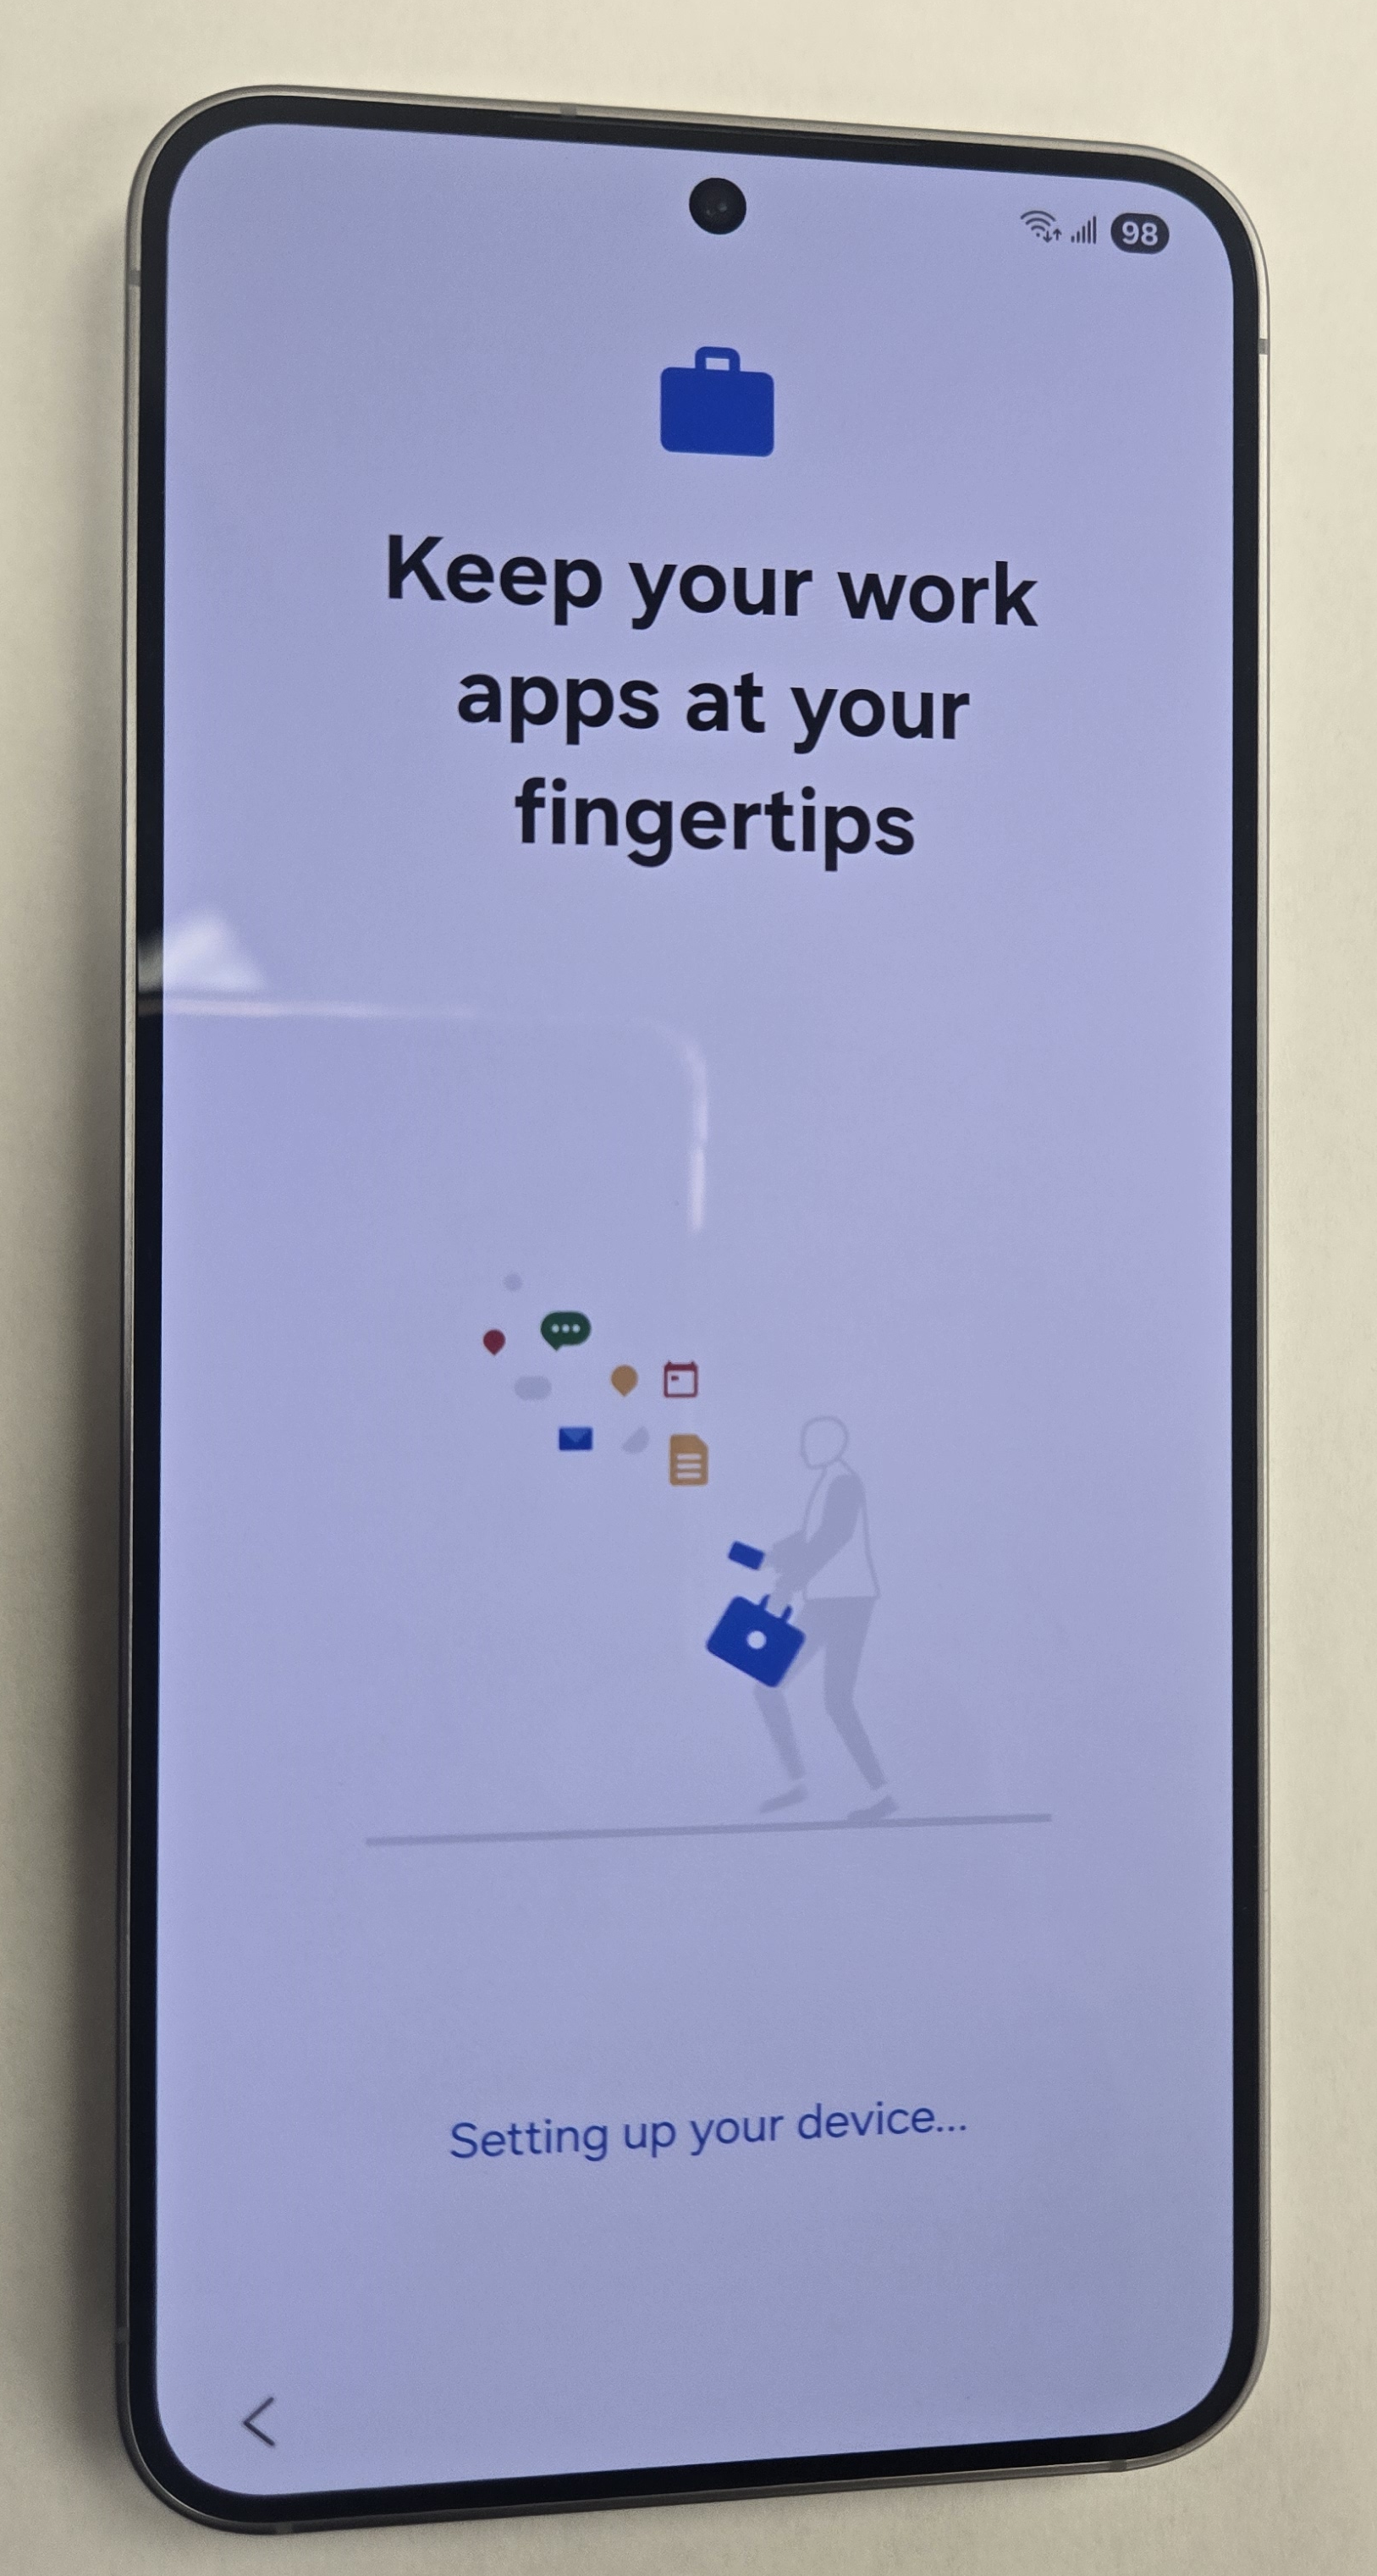
- Tap Next.
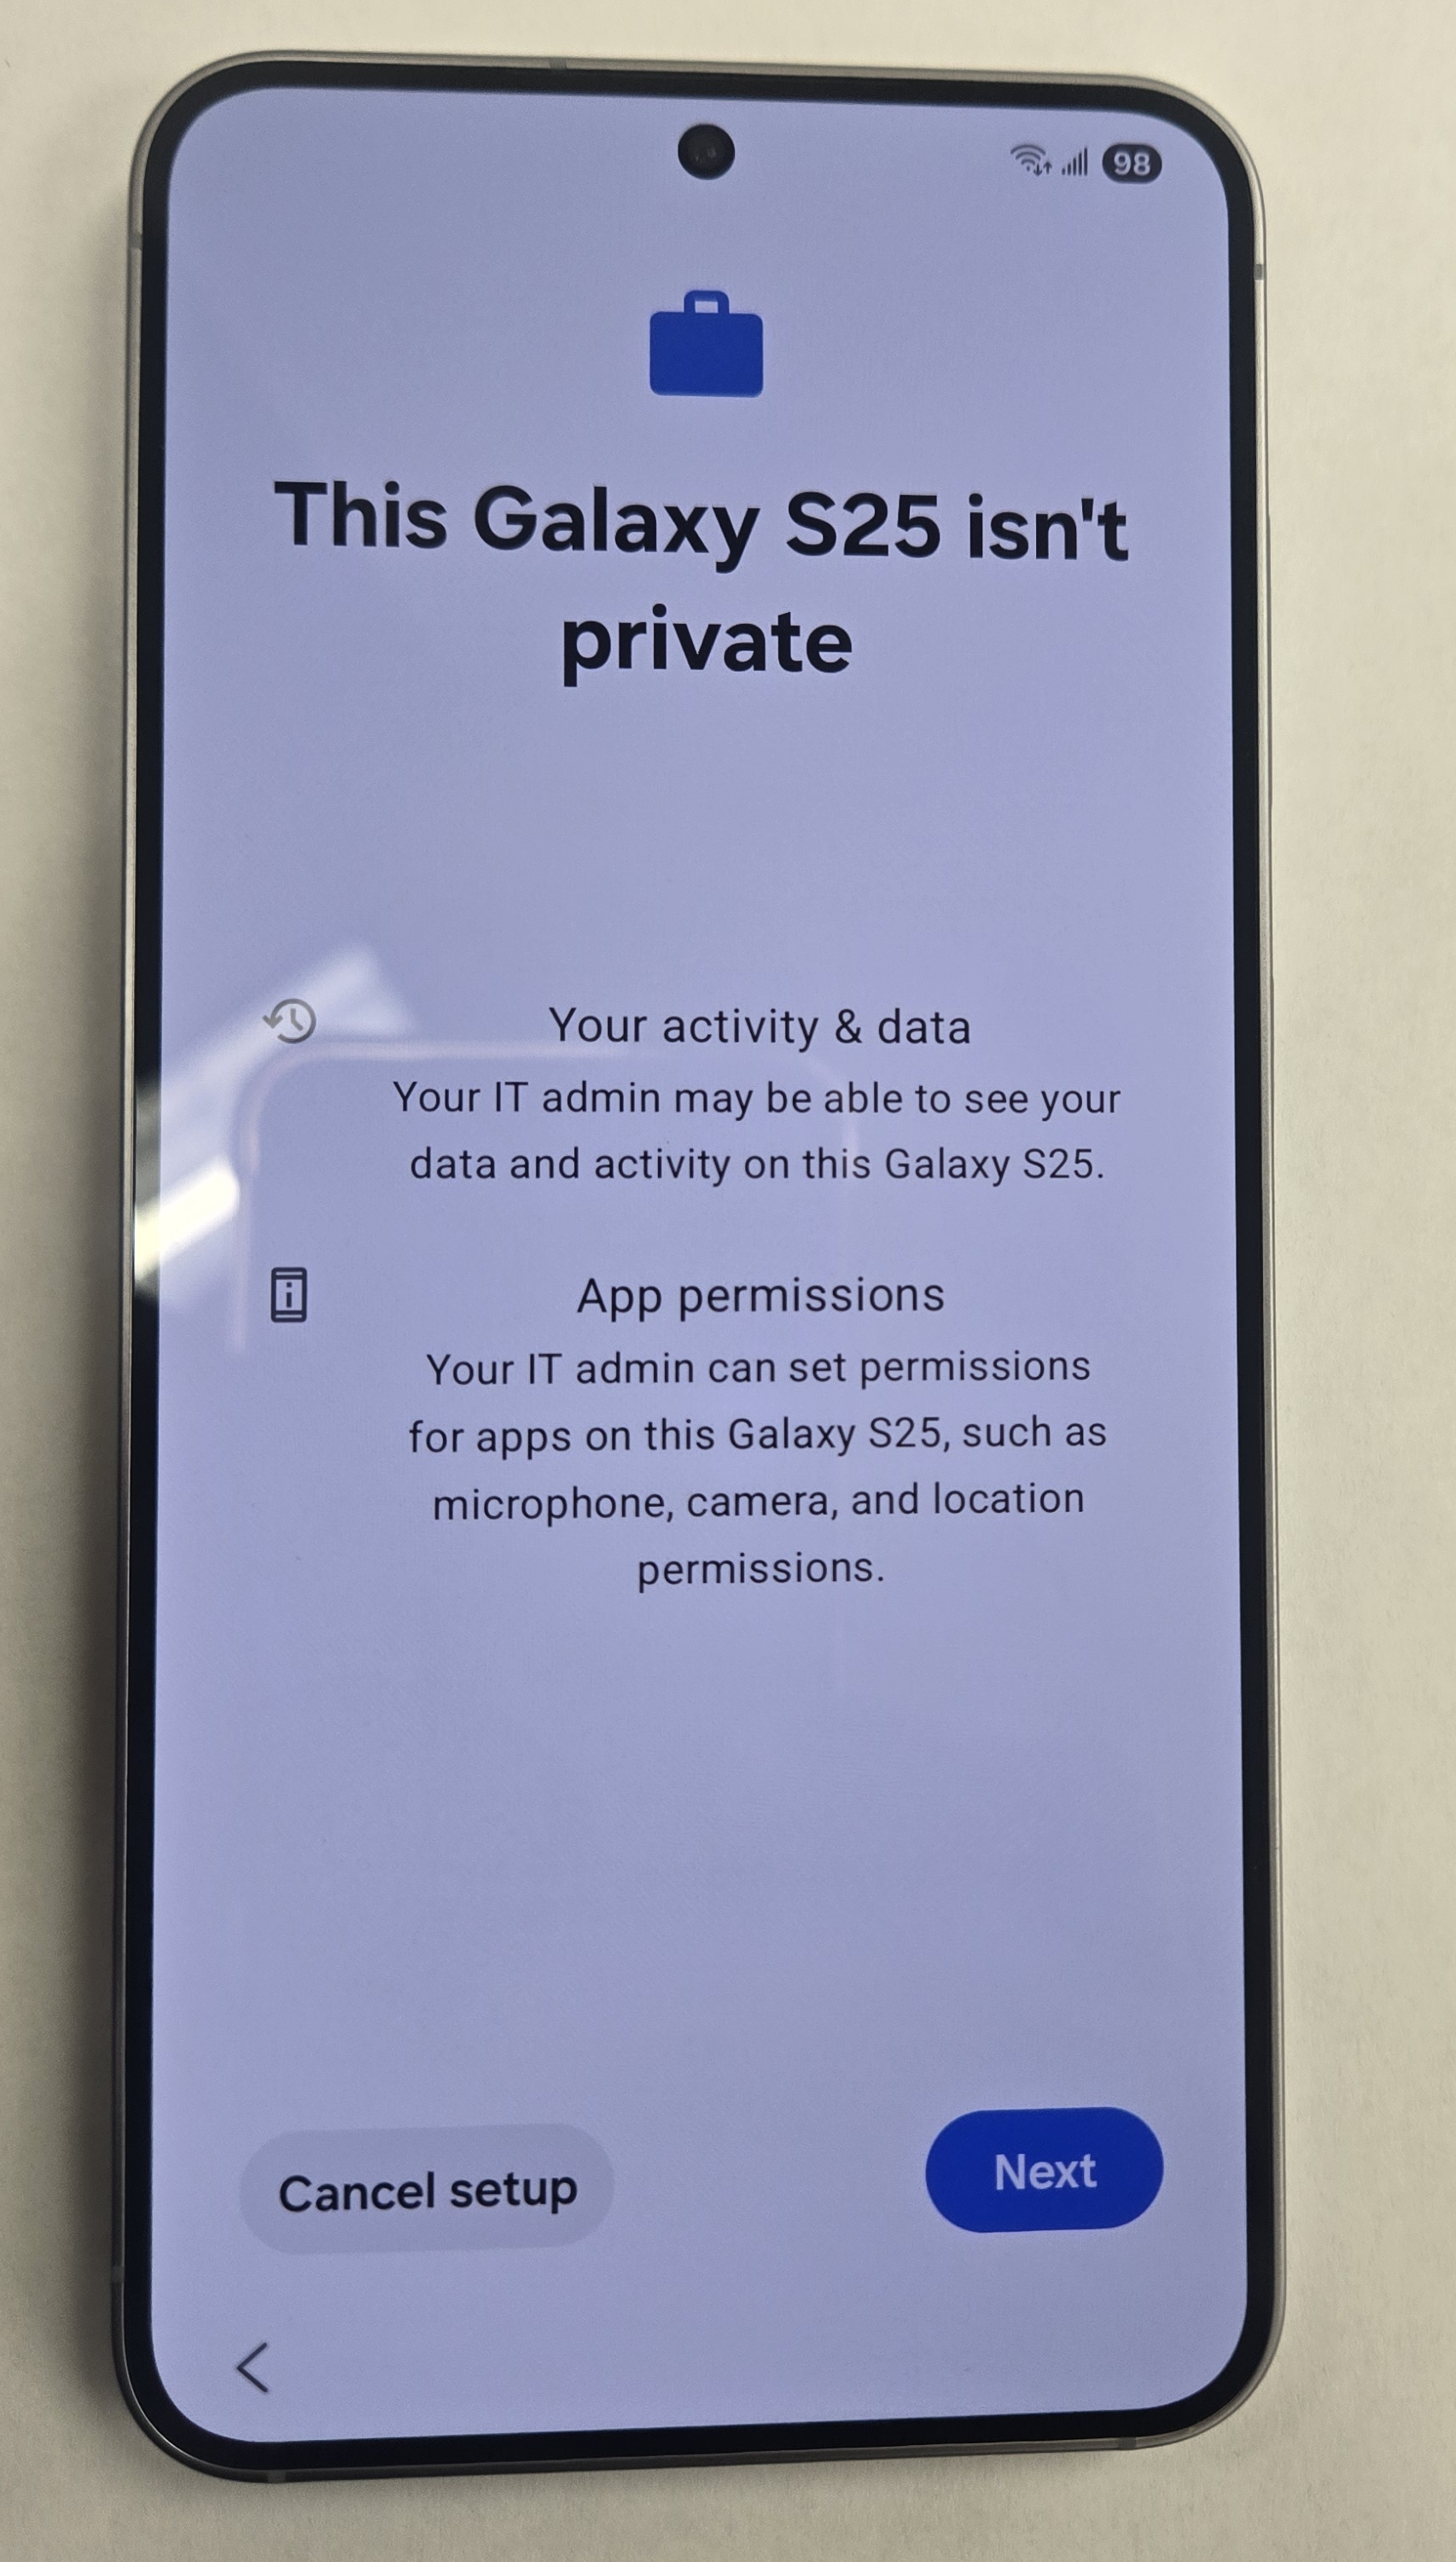
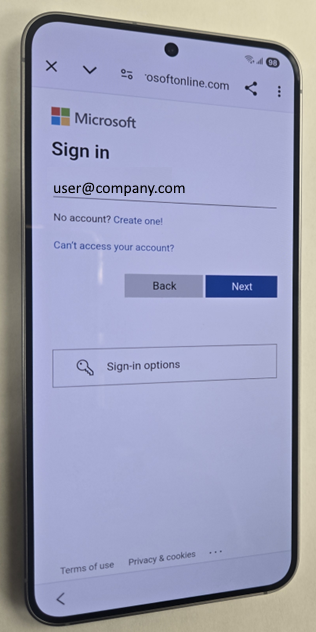
- Sign in with the user’s name and password.
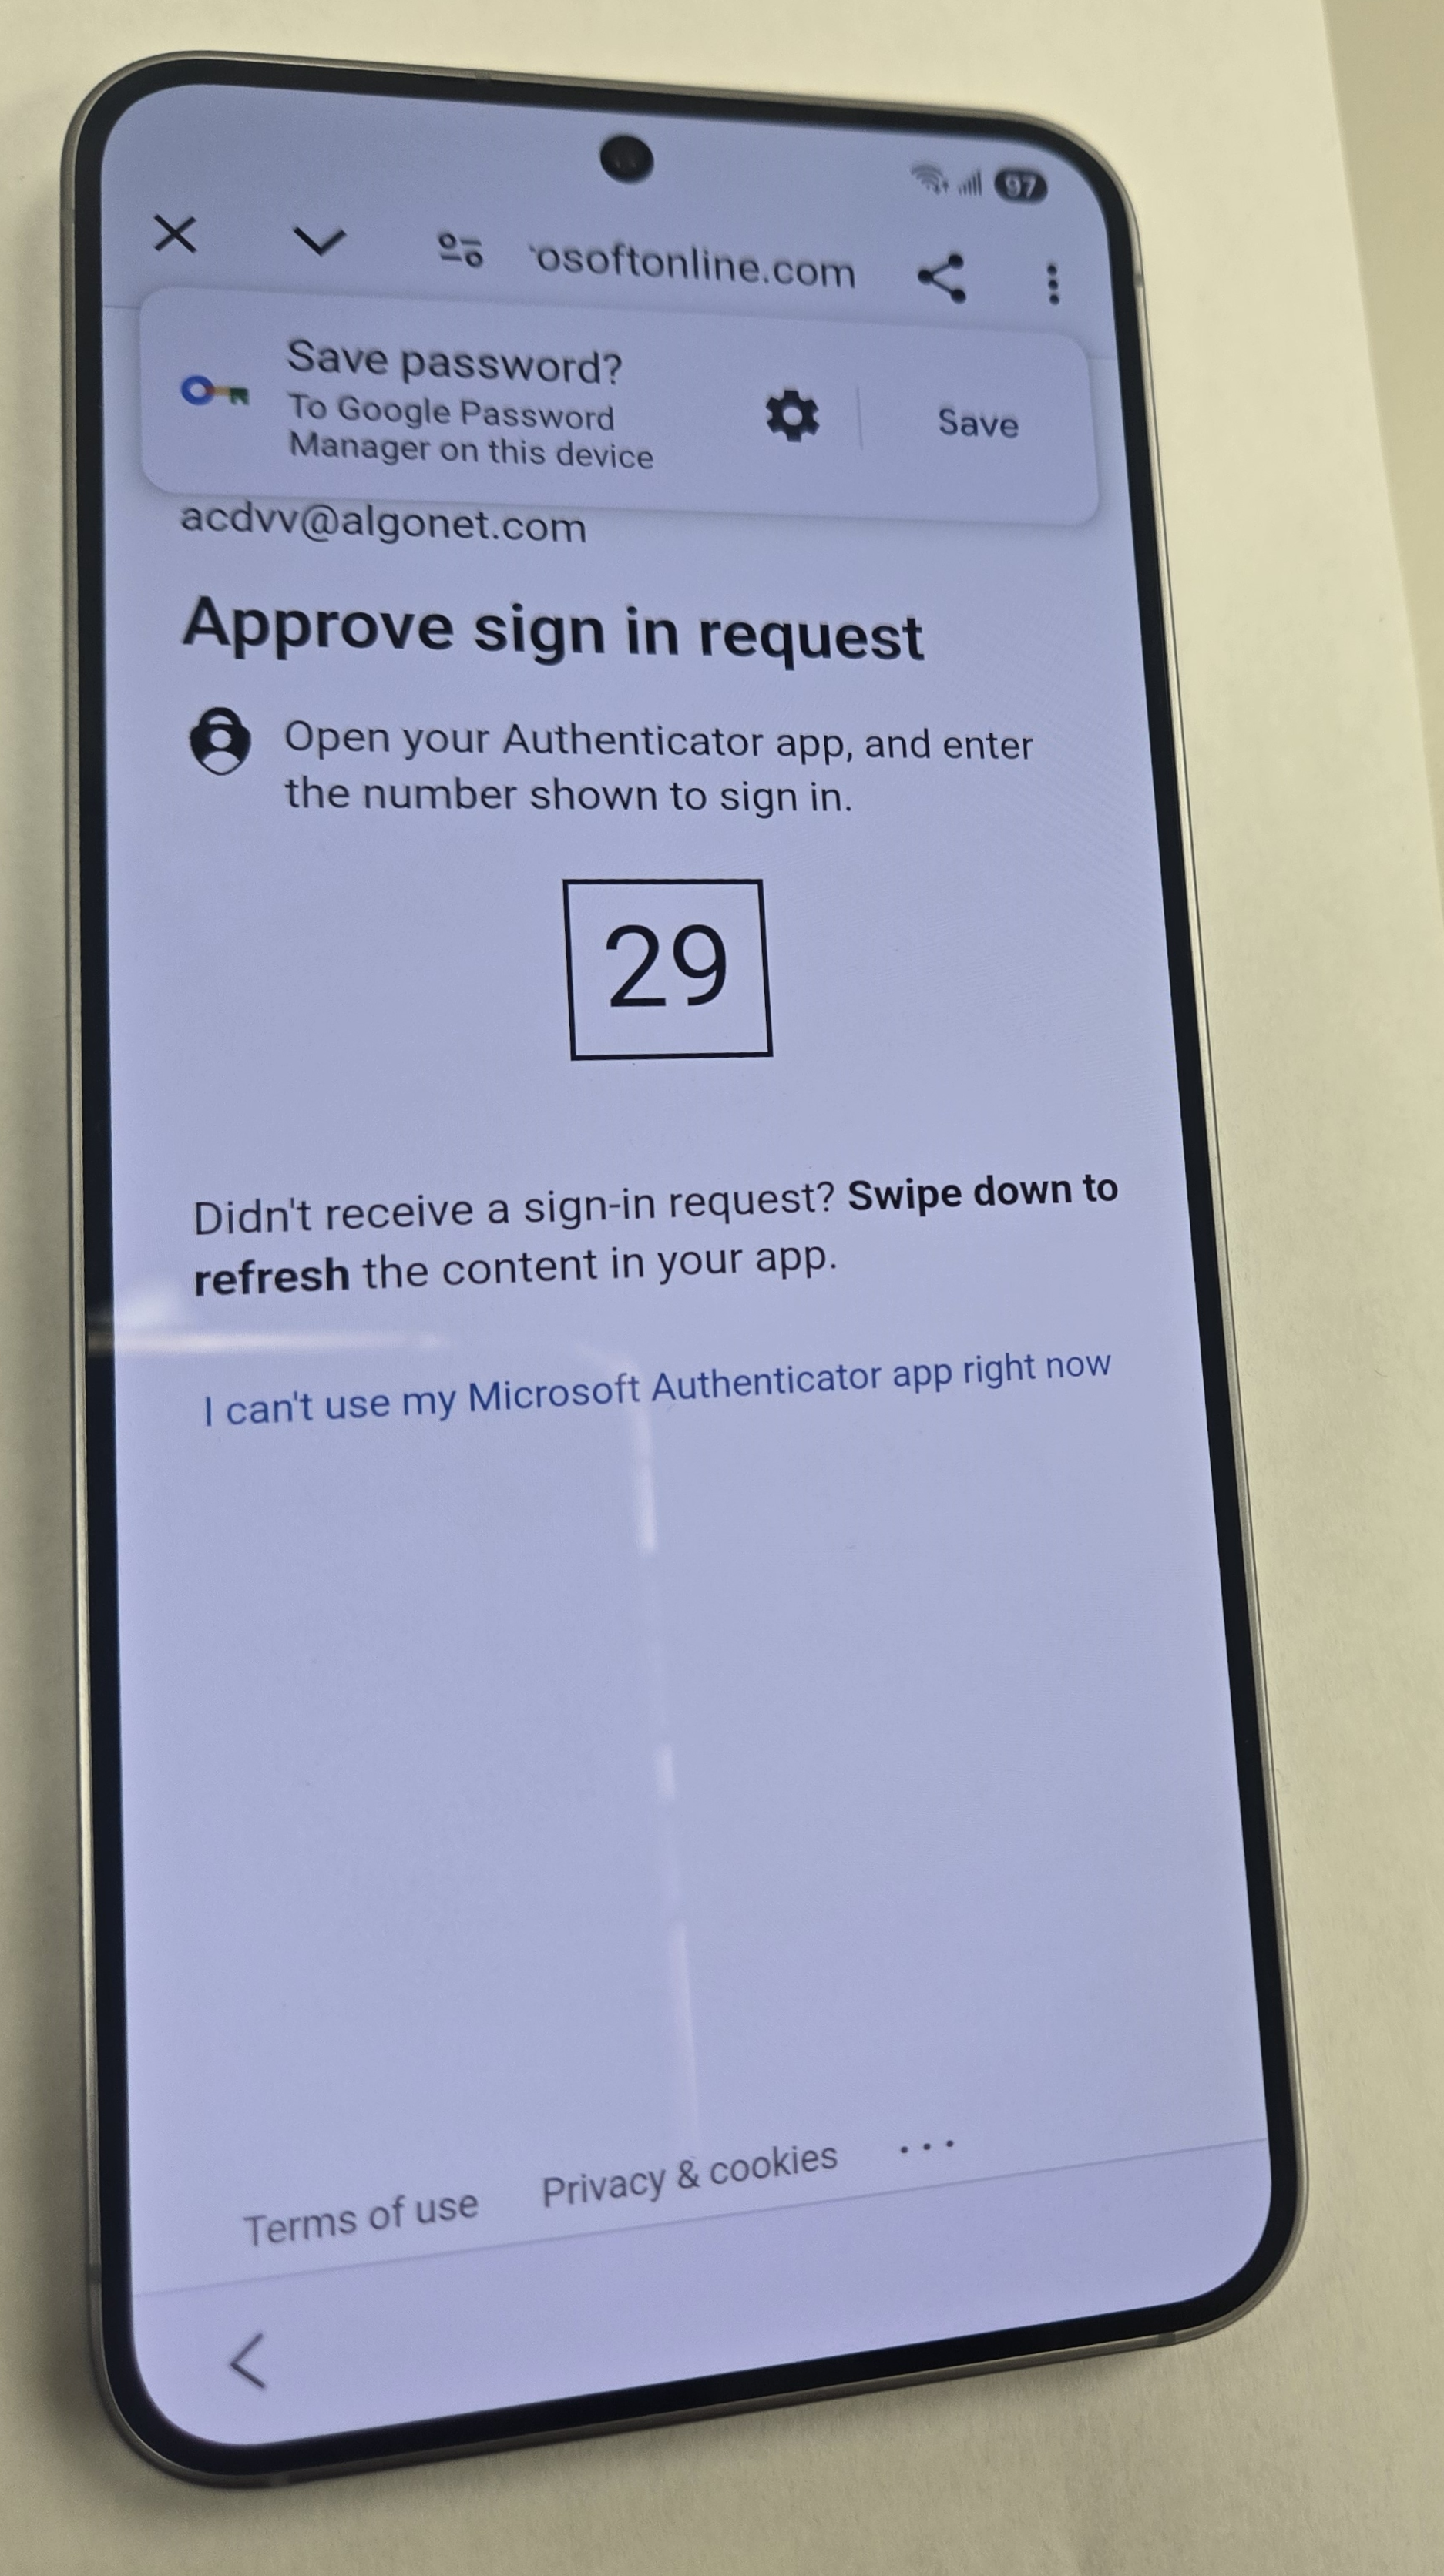
- You will be prompted for MFA. Enter the number into the App either on your phone (new User) or in the user’s old phone (User Upgrade).
- The enrollment process will start.
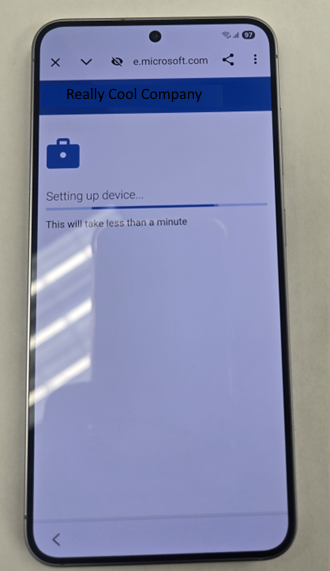
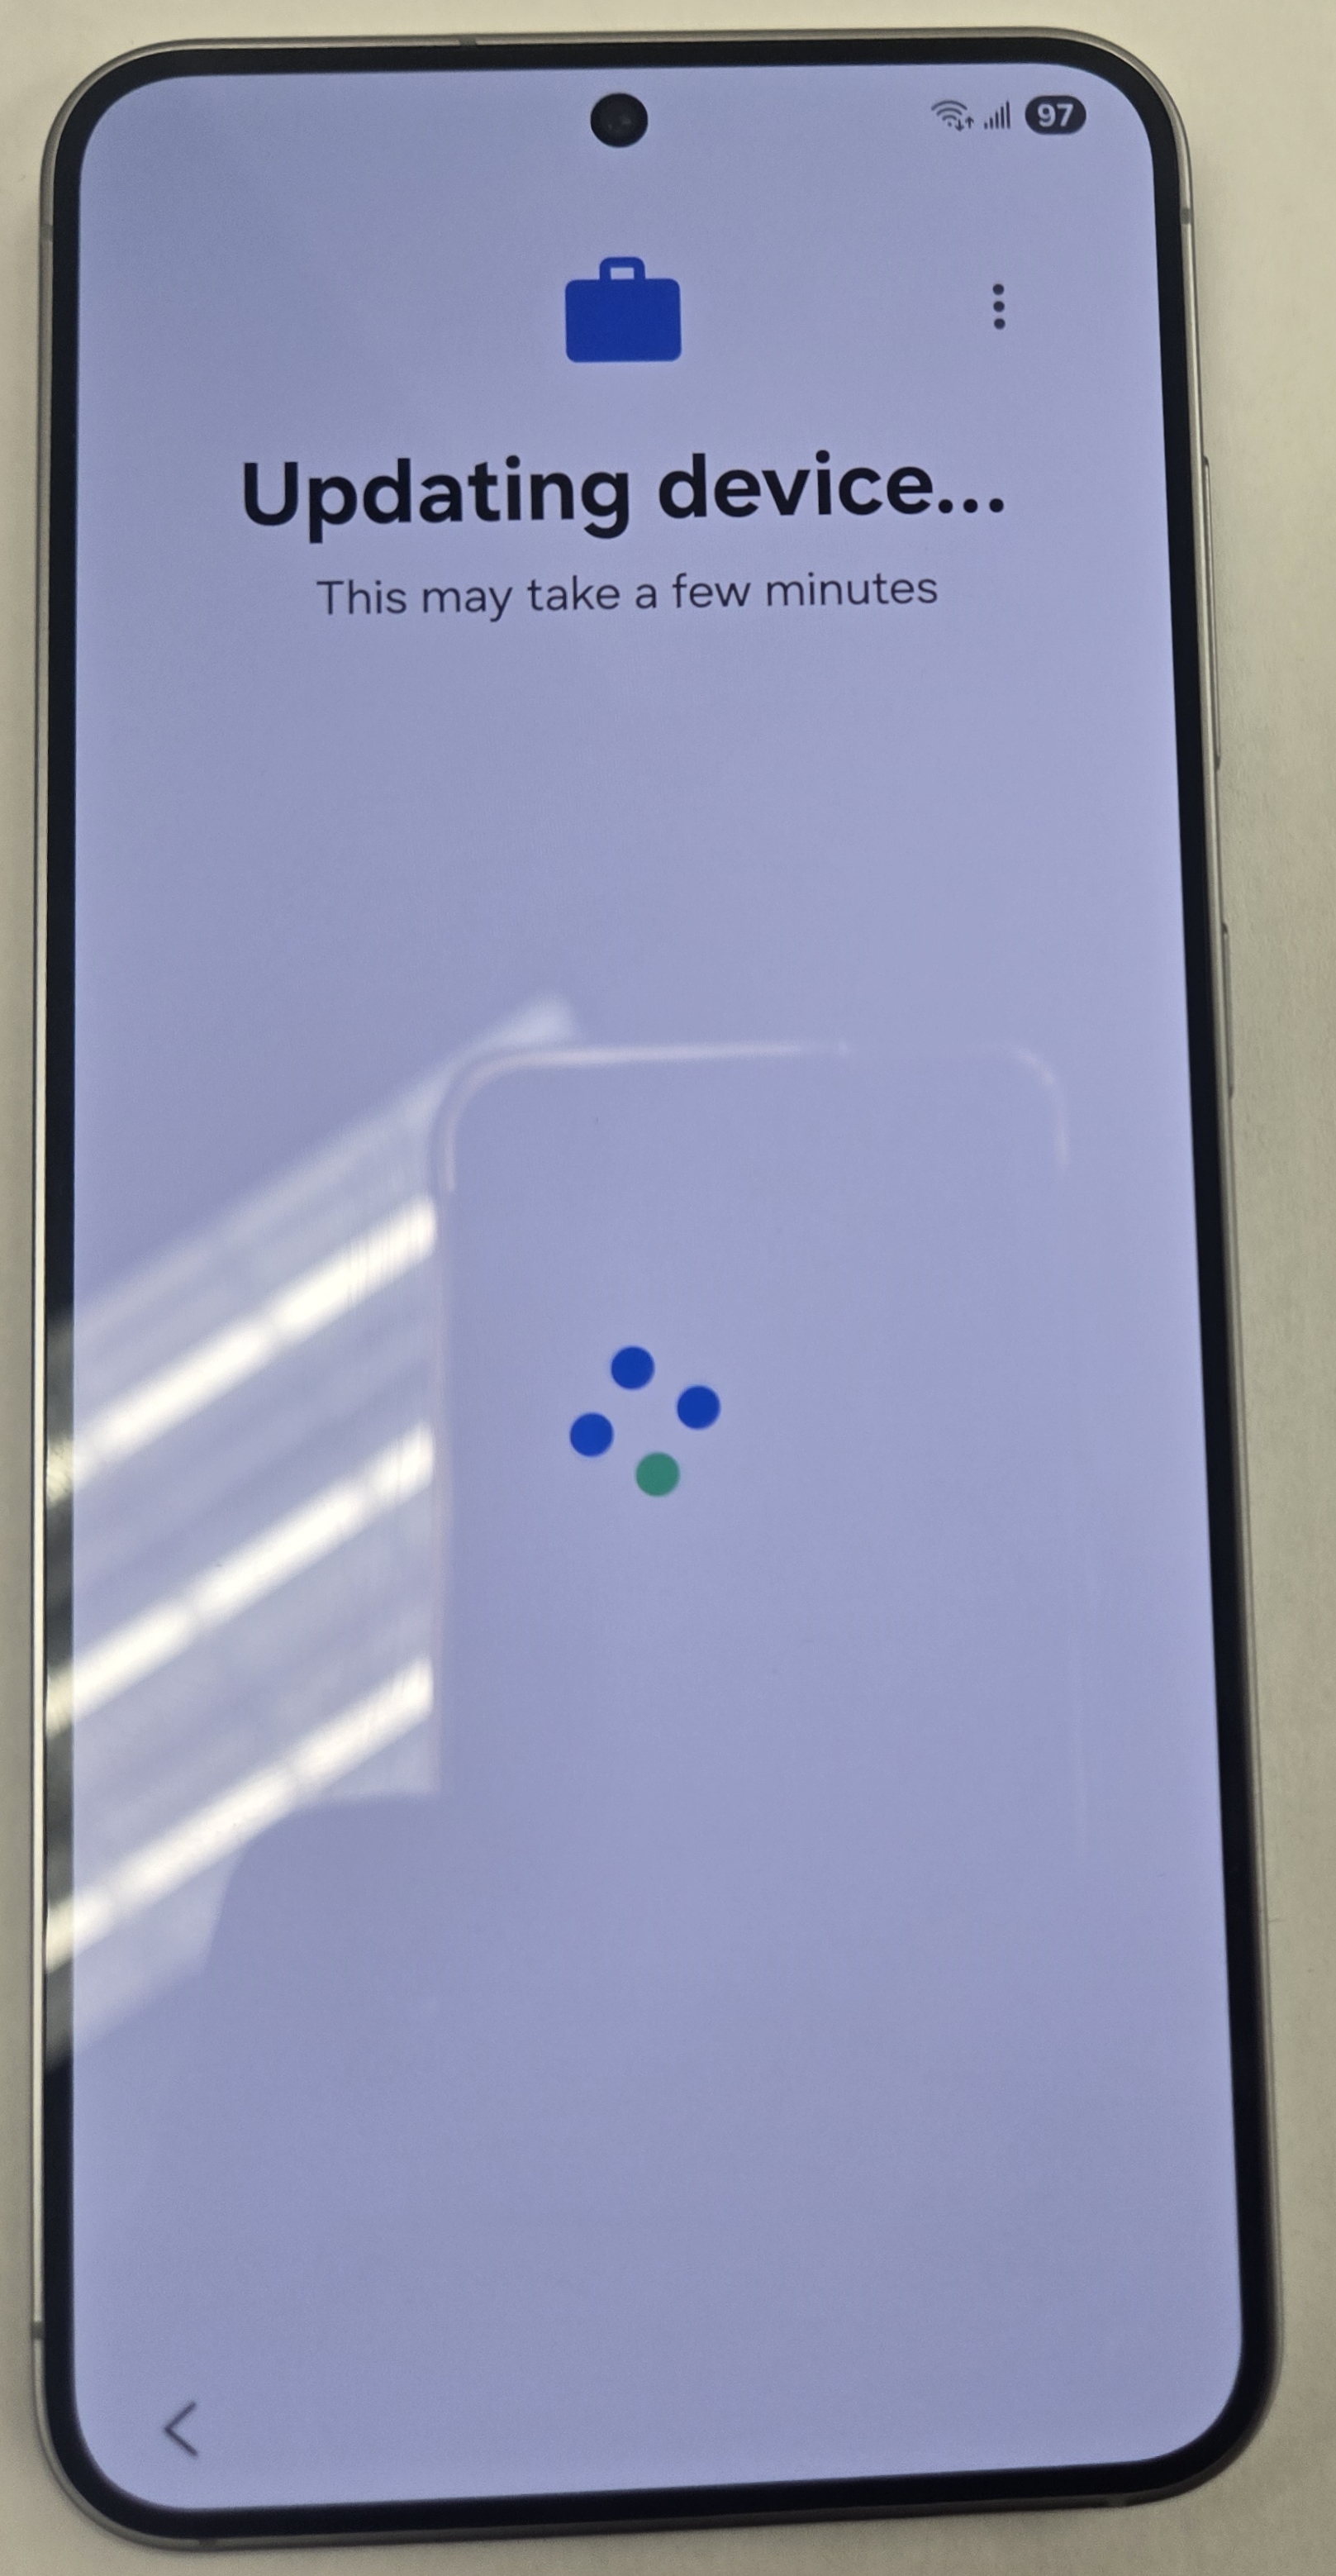
- Tap “Install”.
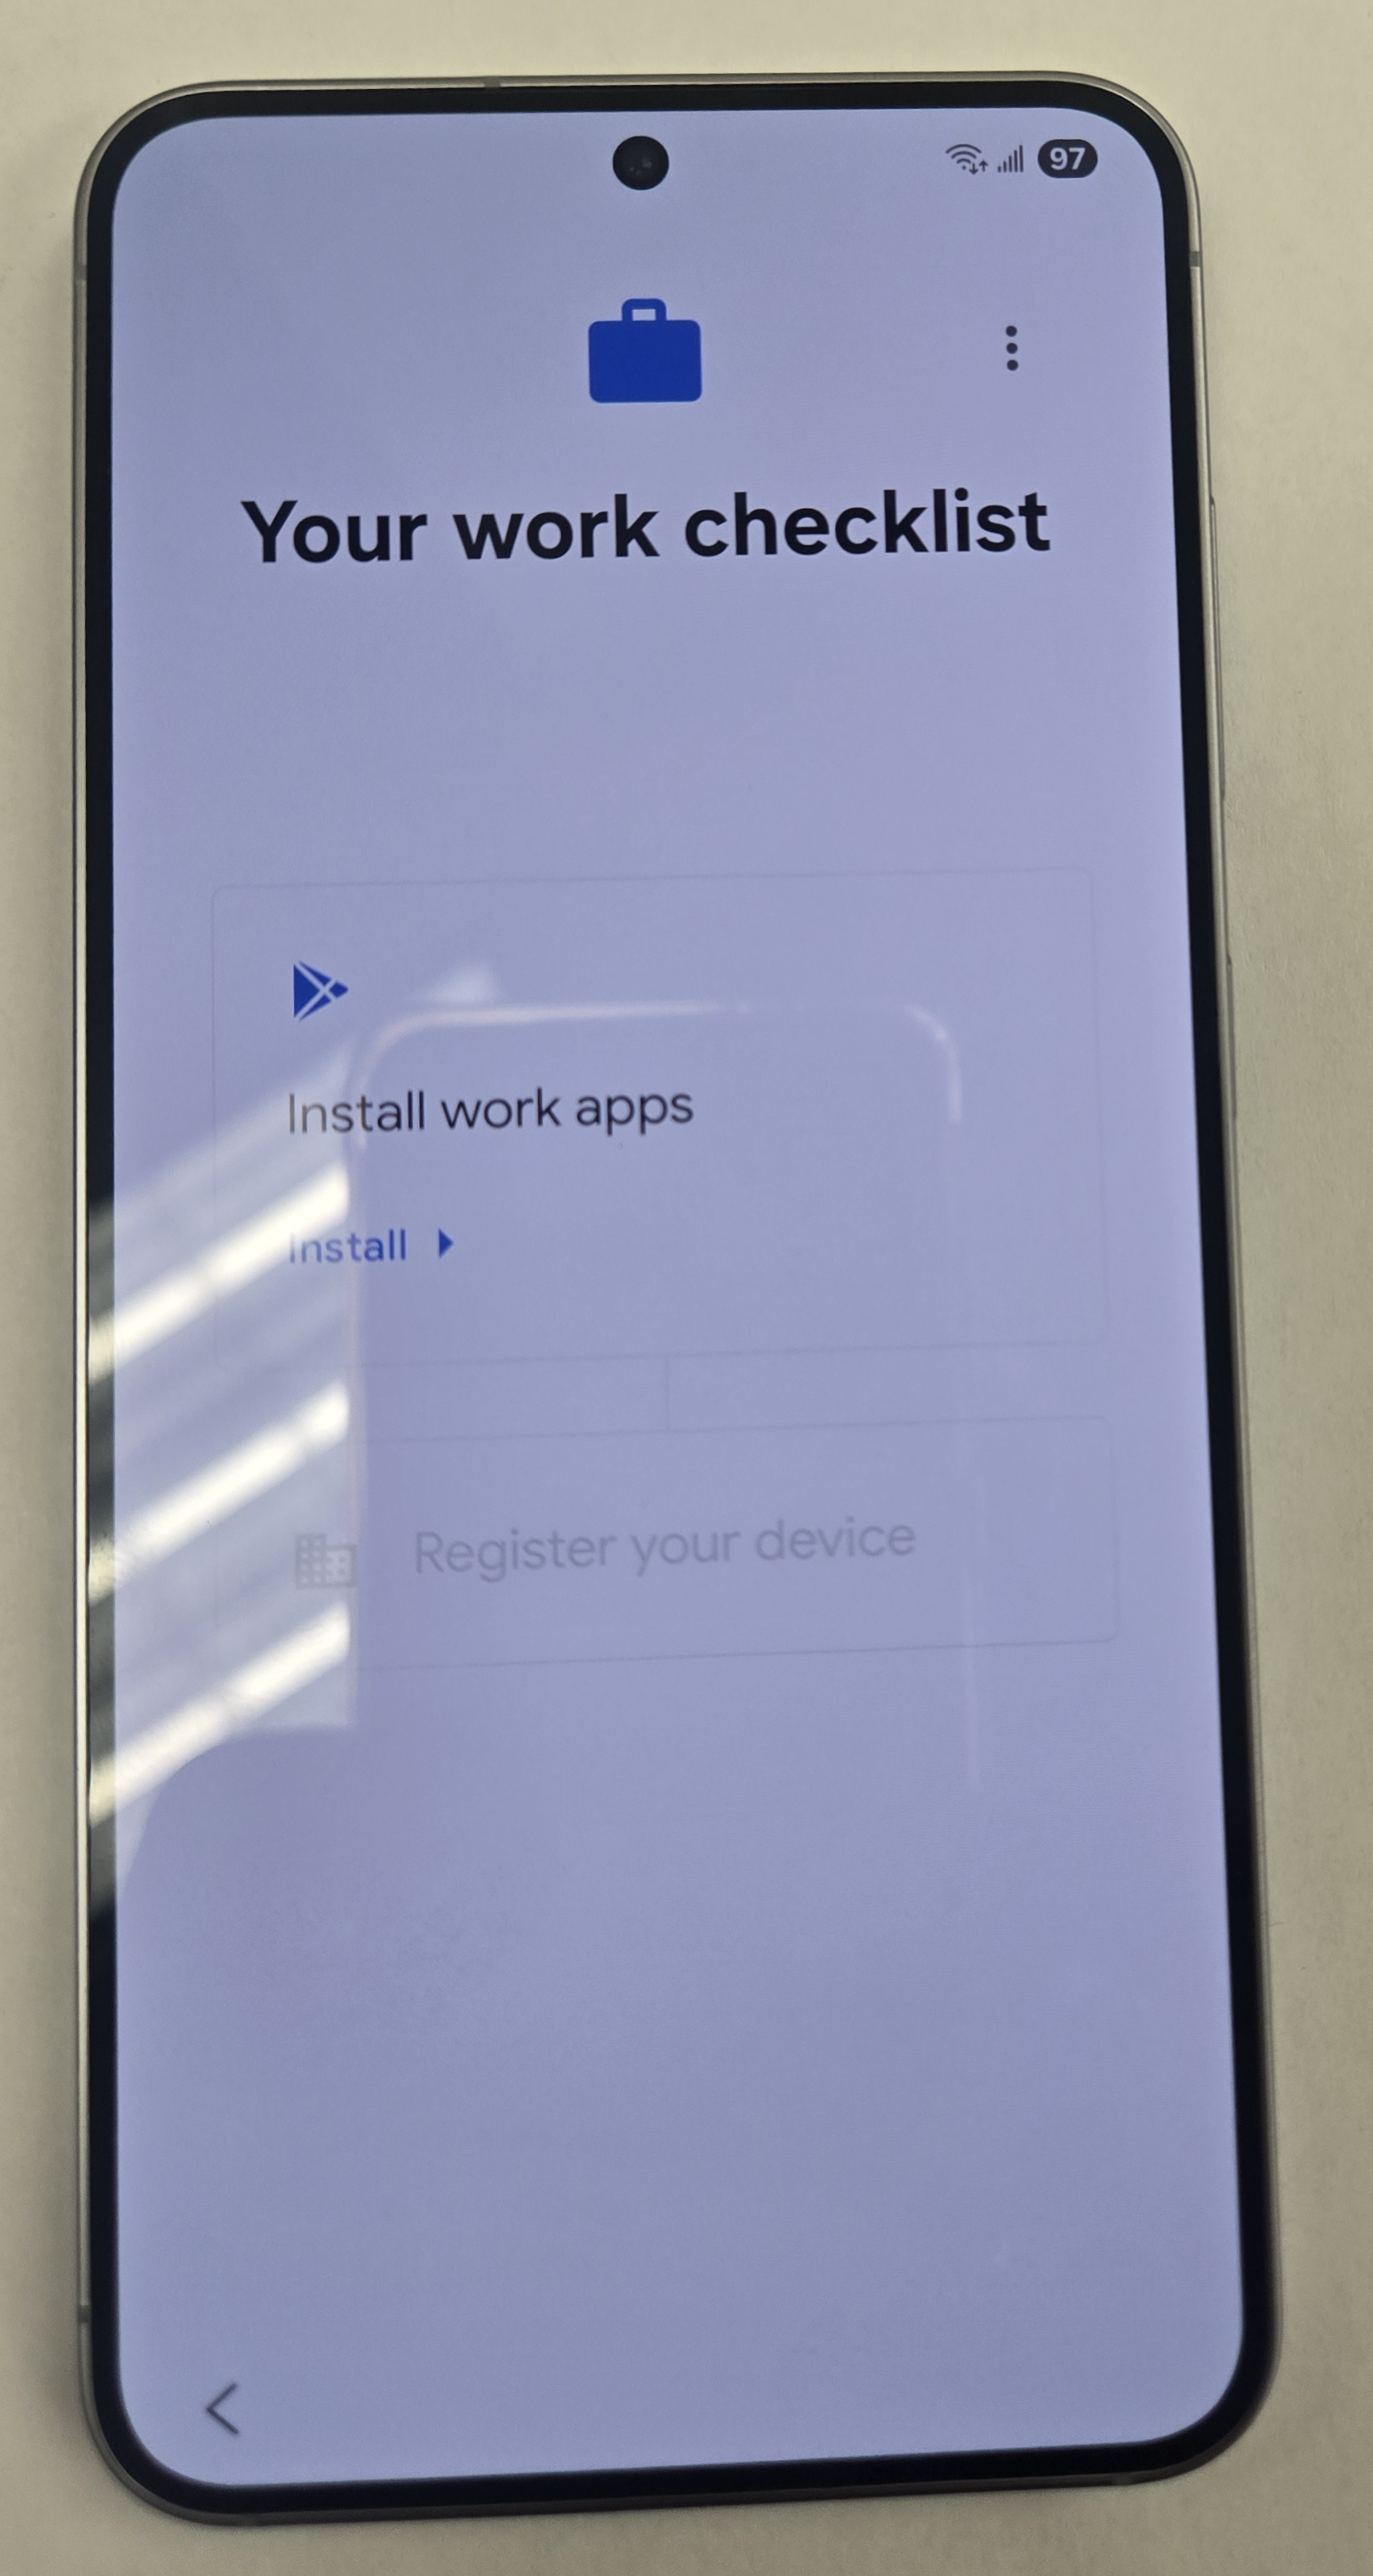
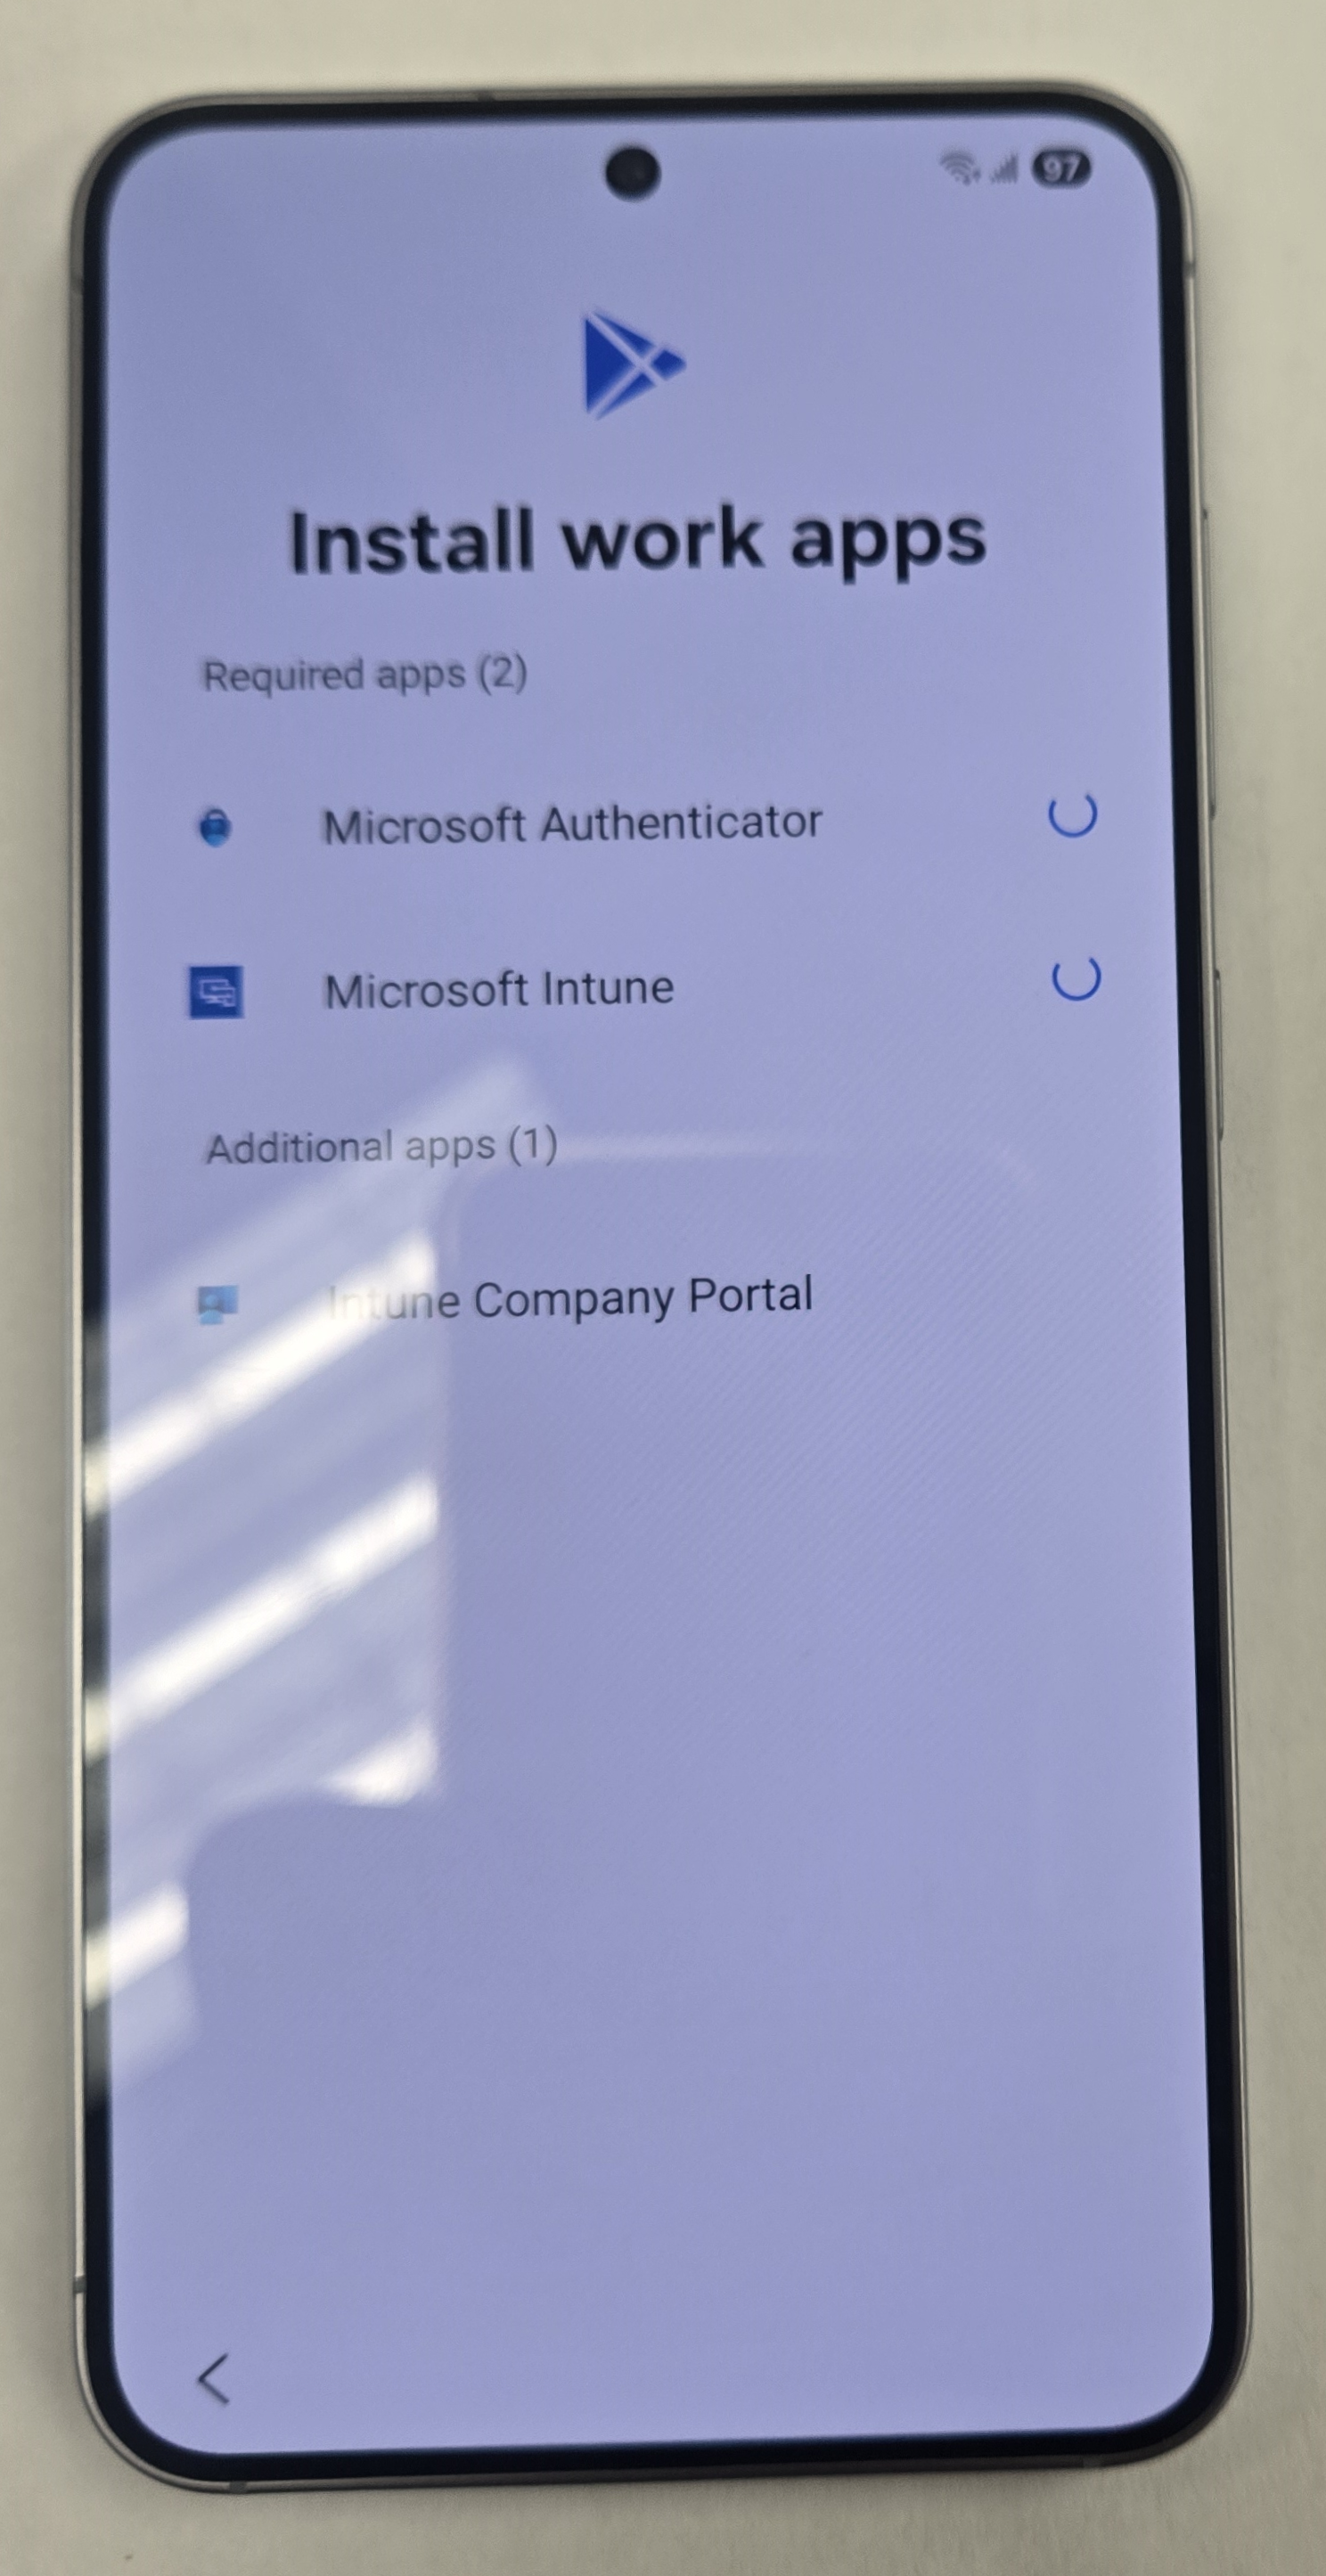
- The following Apps are installed. All the other LOB Apps will be installed after if you have set any up. Tap done.
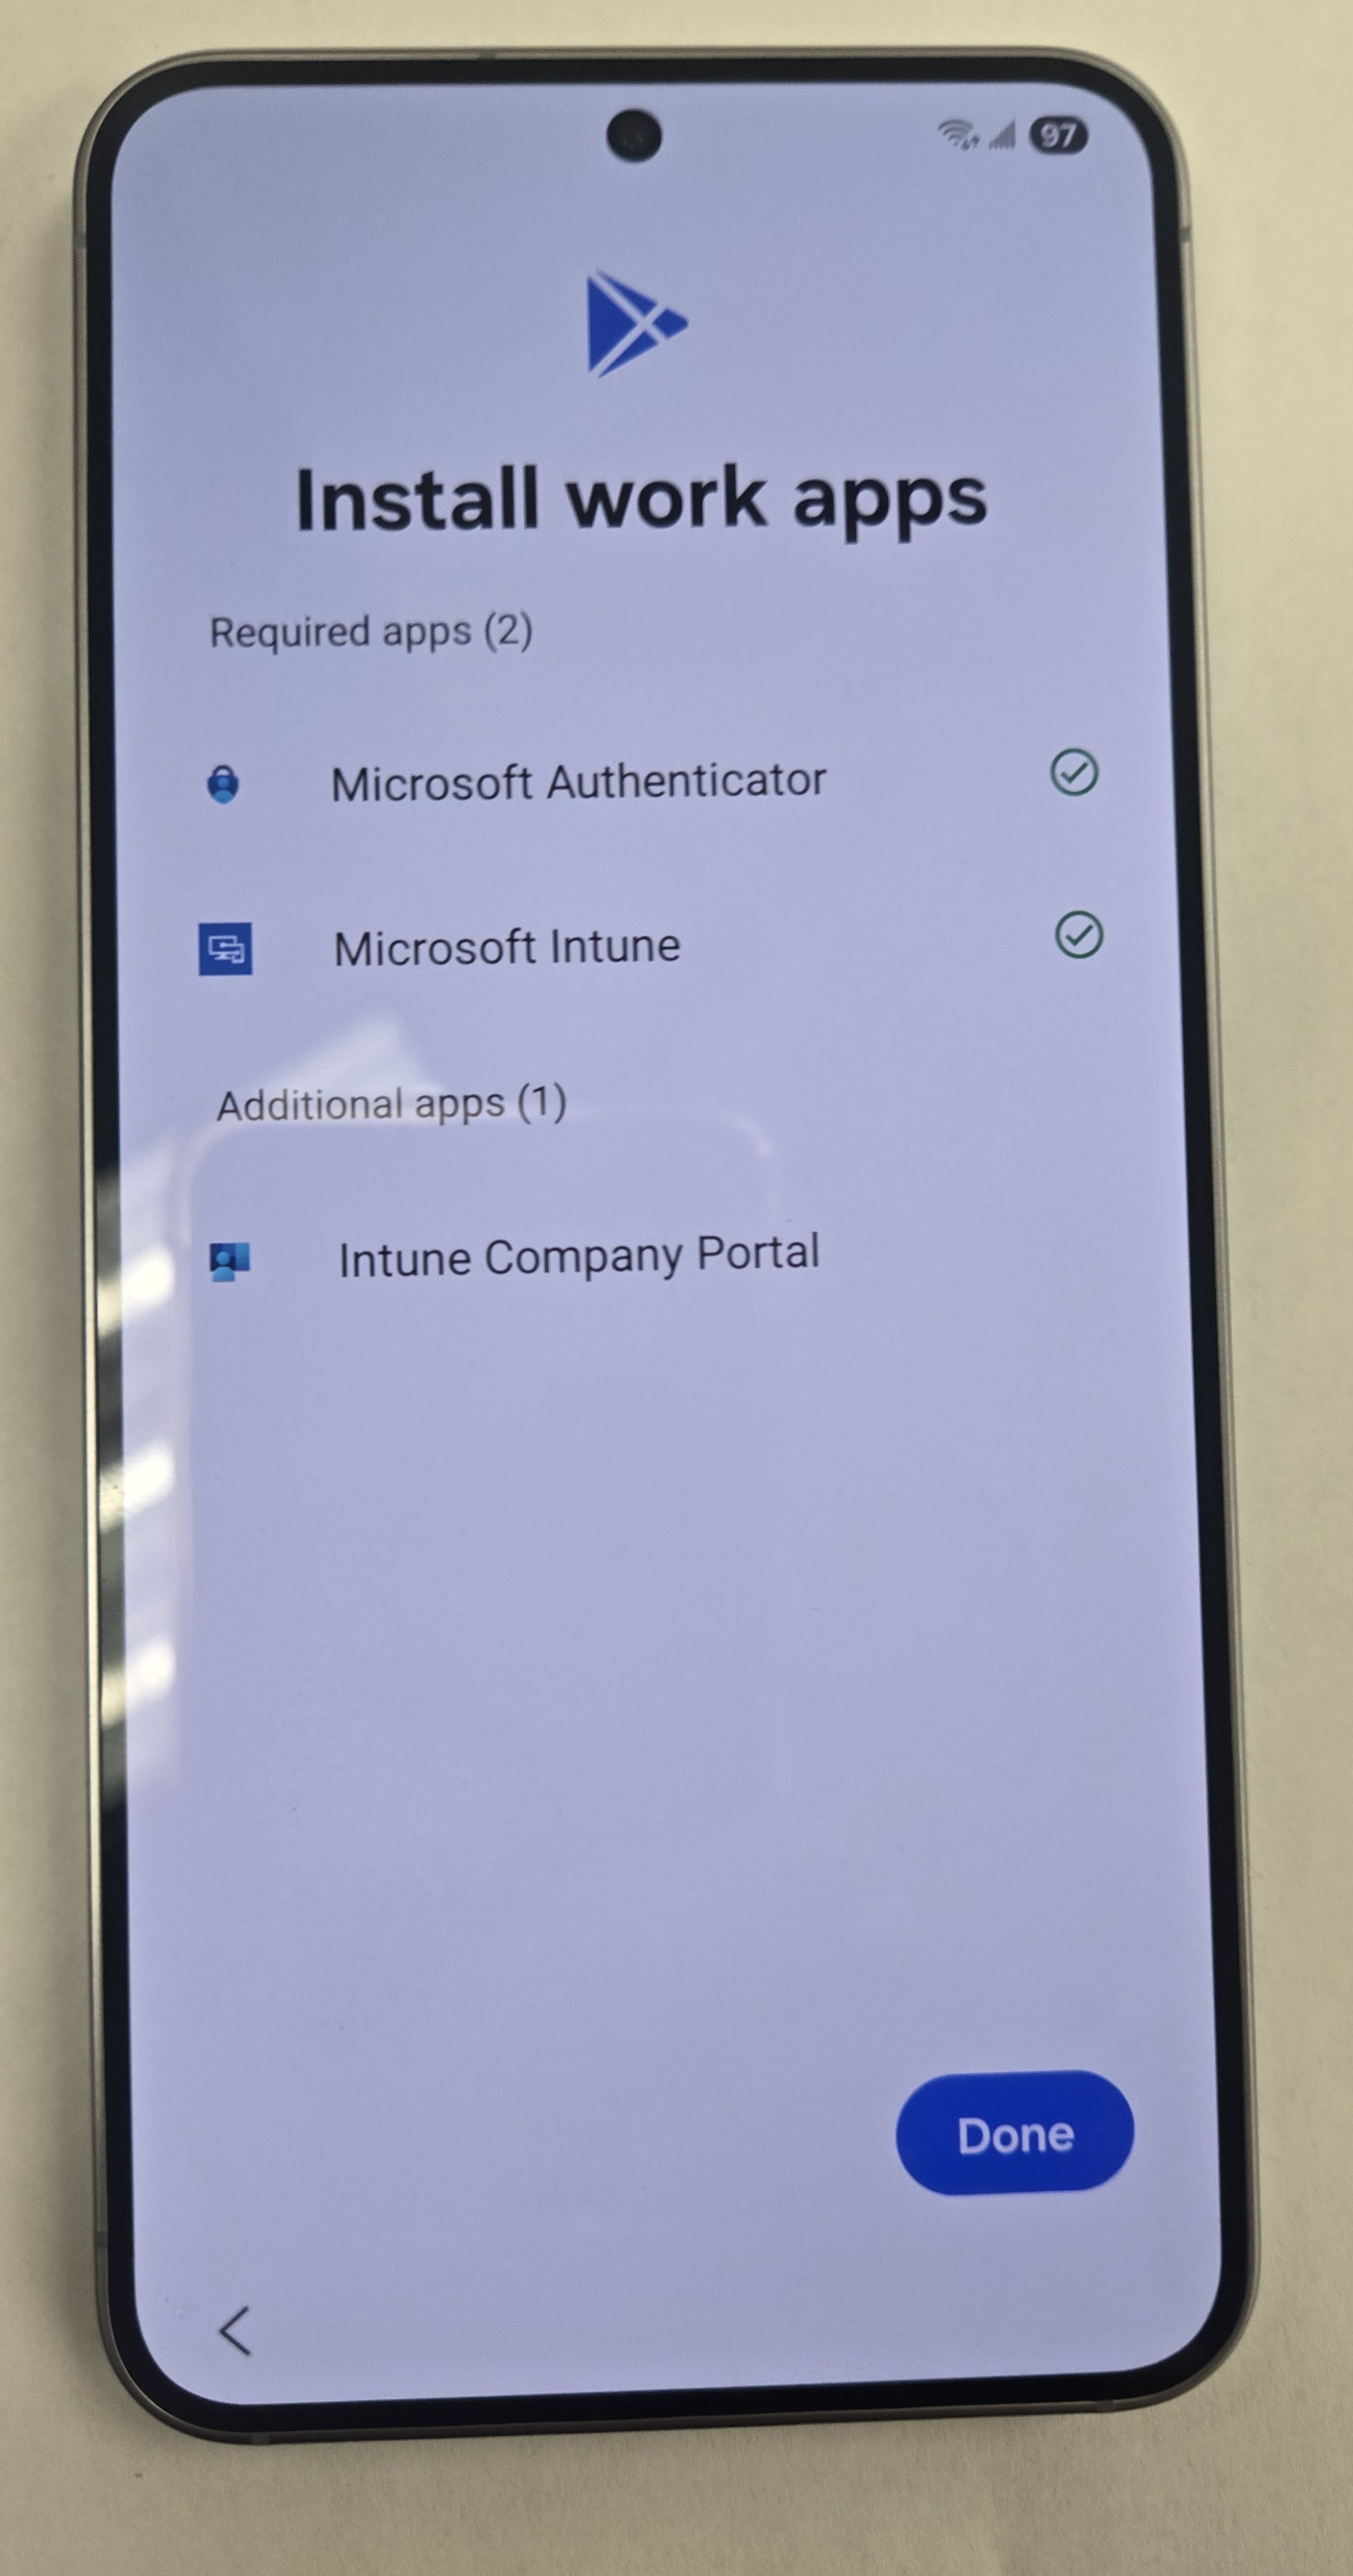
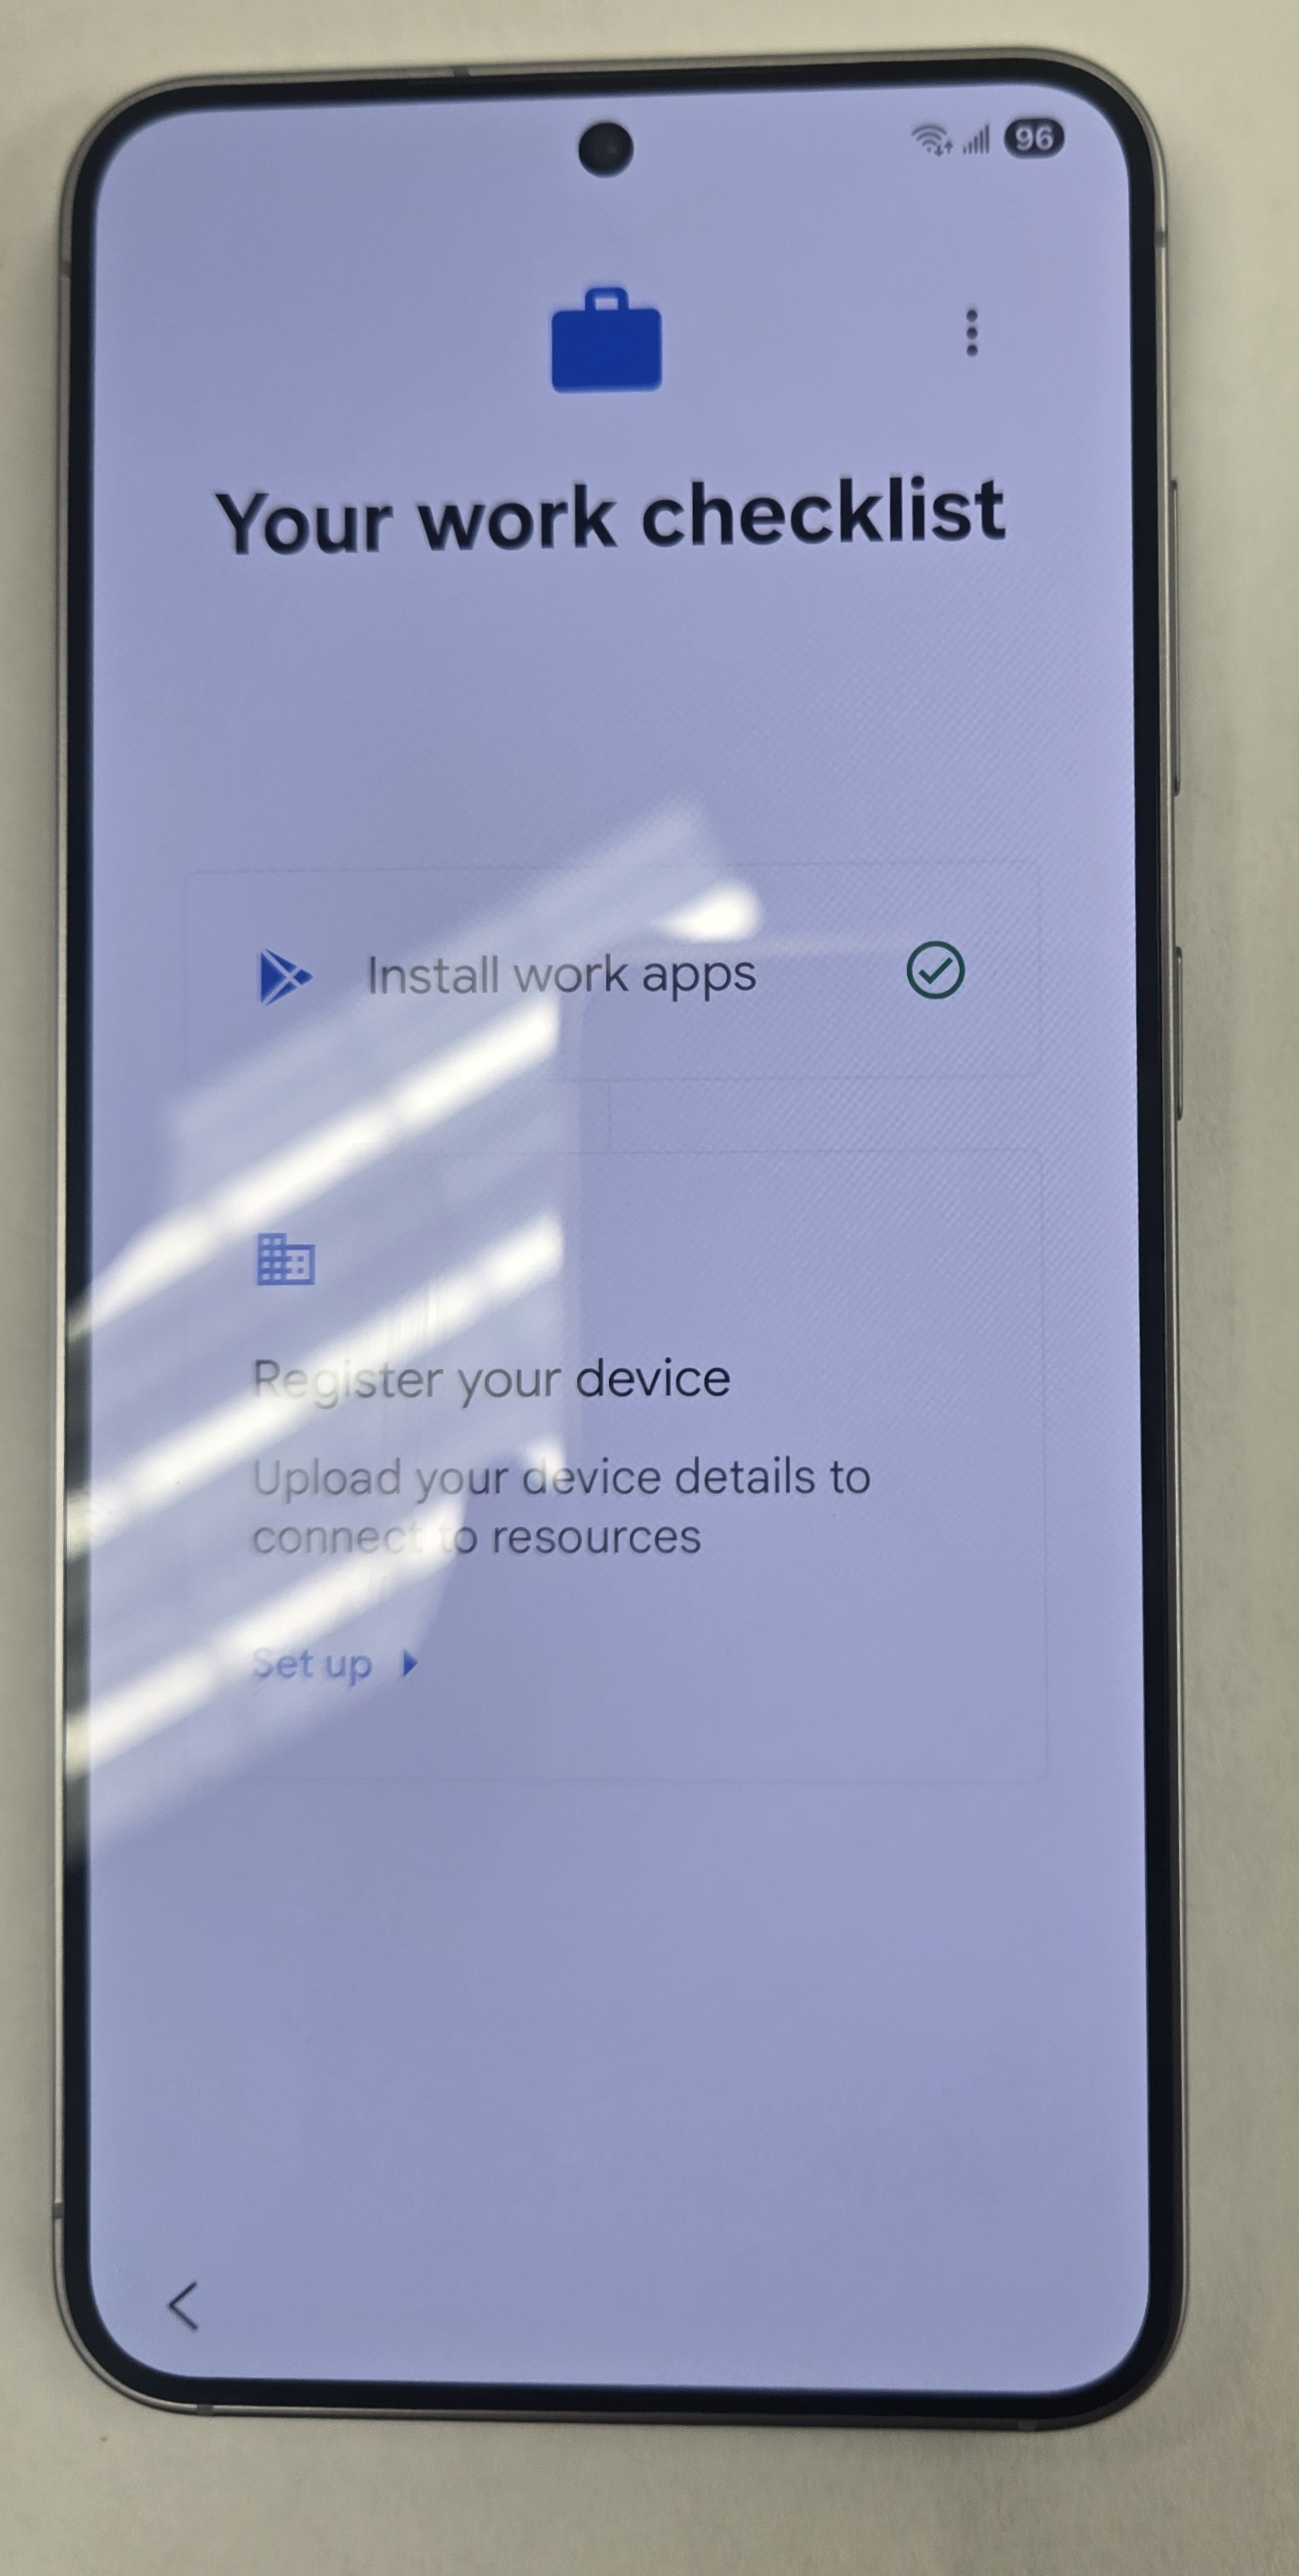
- Tap “setup” to register the device.
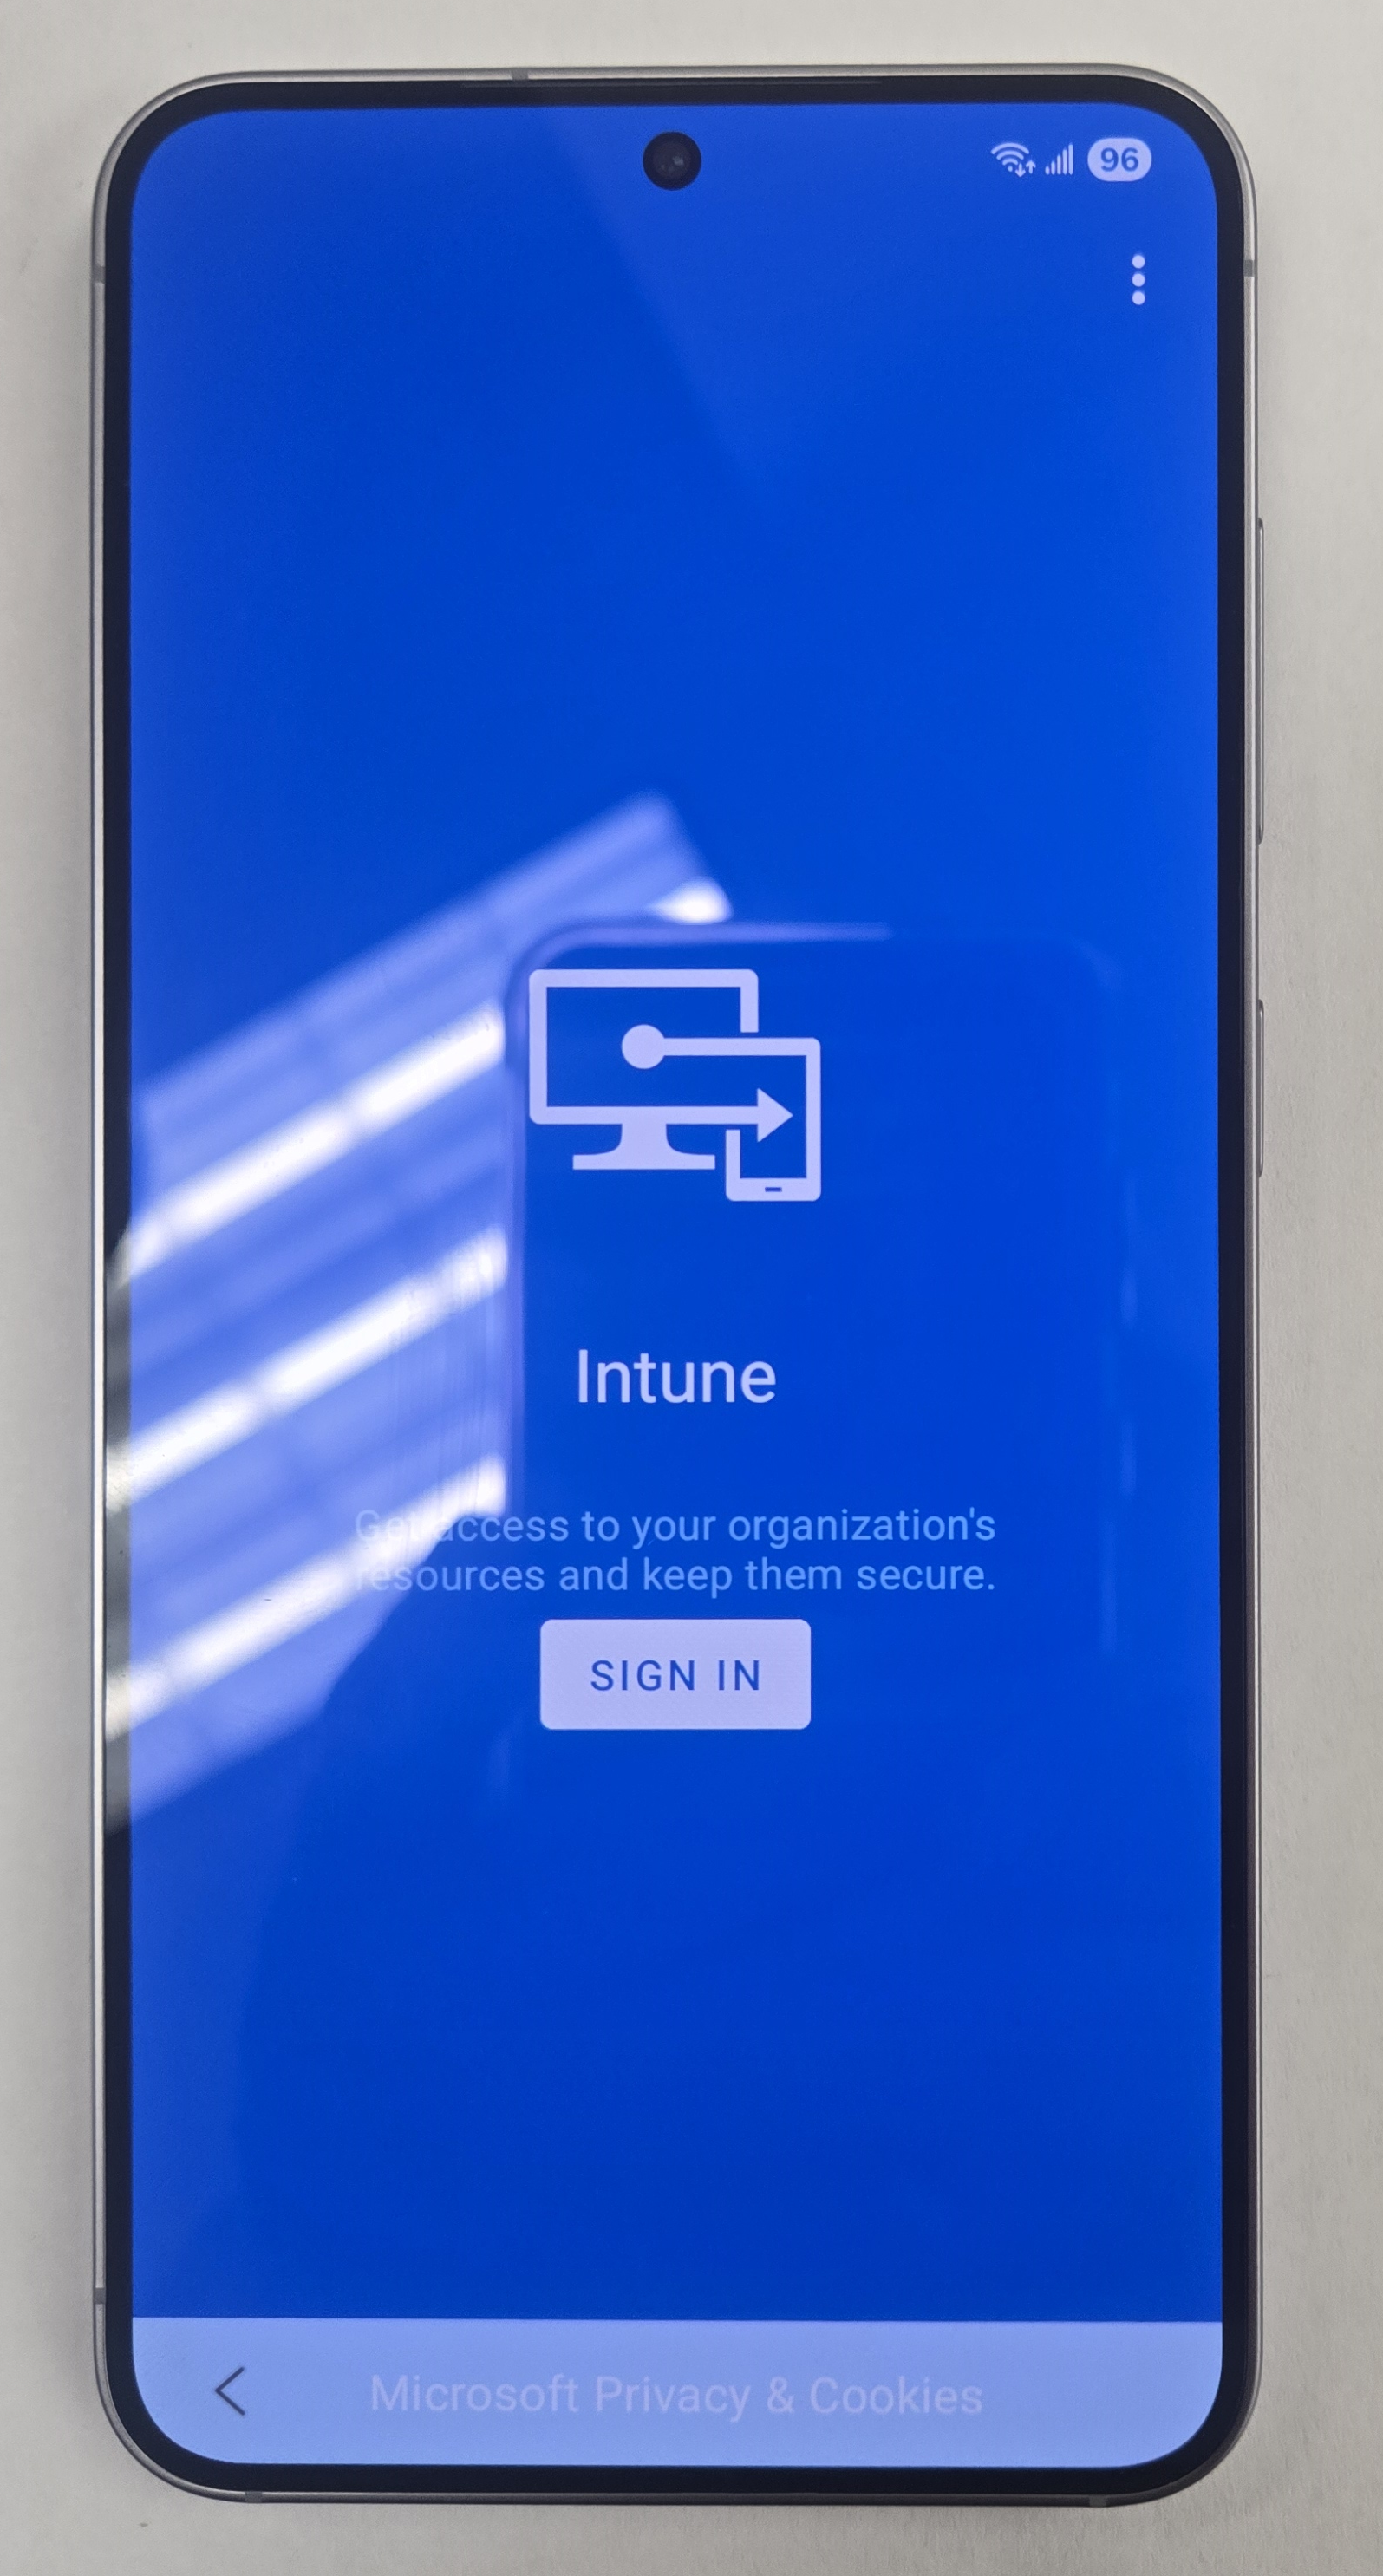
- Tap “sign in” to for Intune.
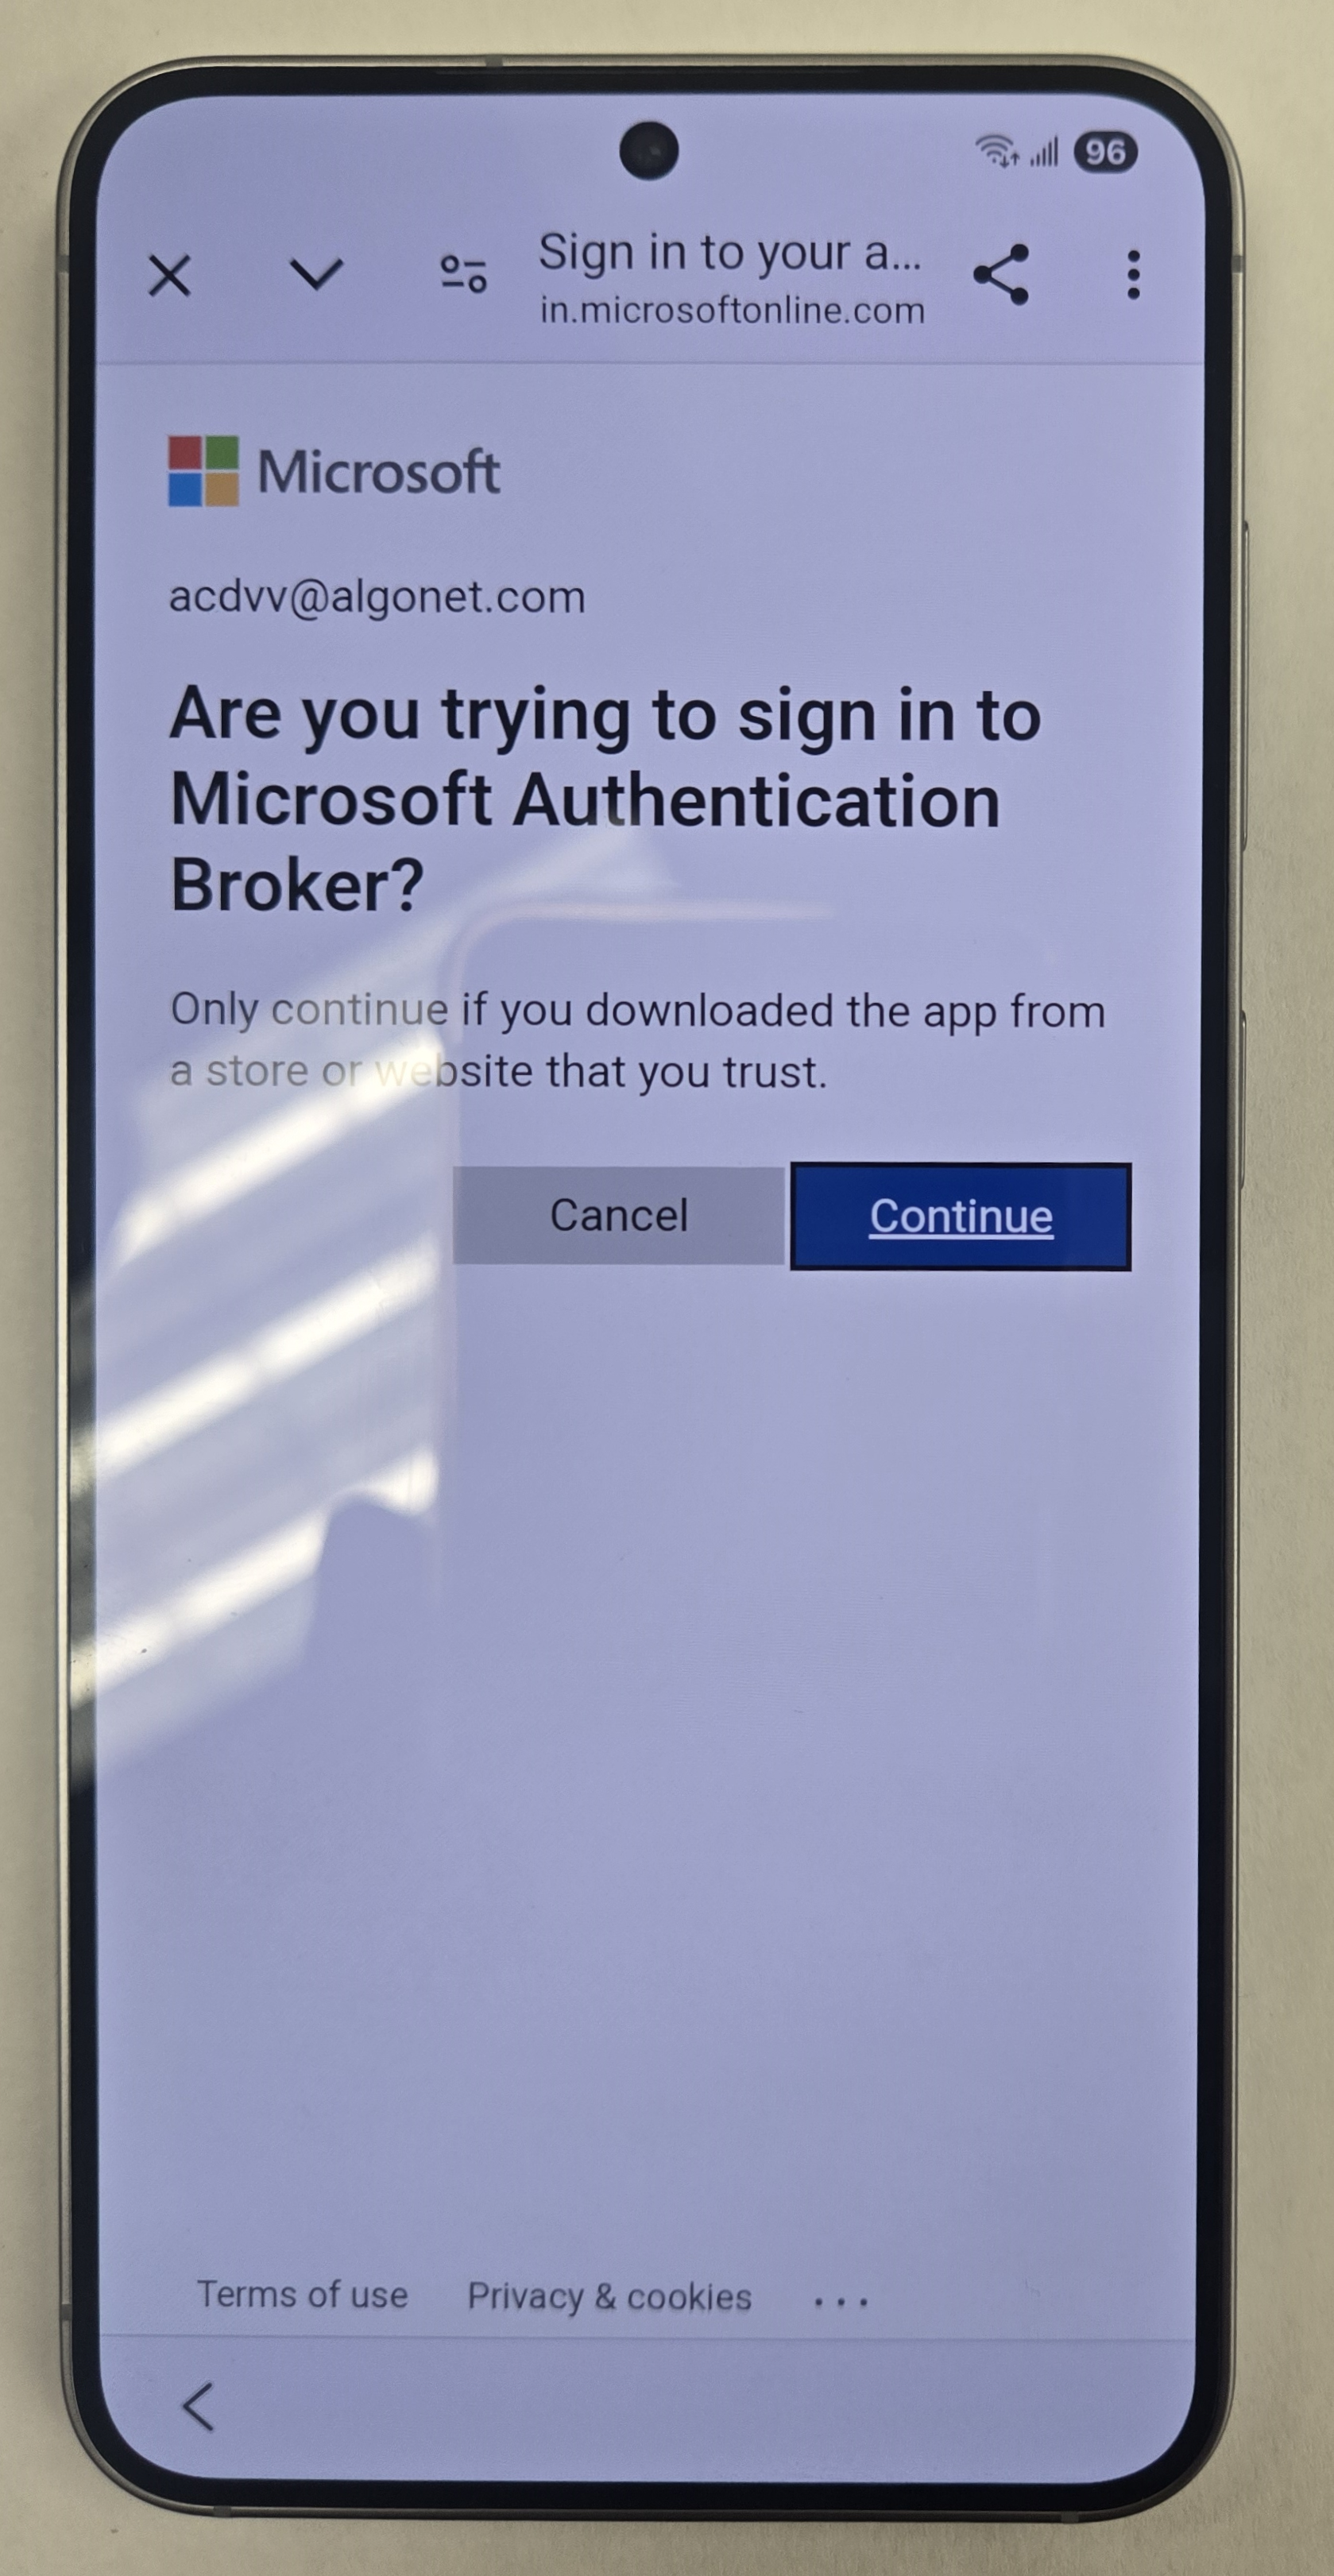
- Tap Continue.
- Tap “Register”.
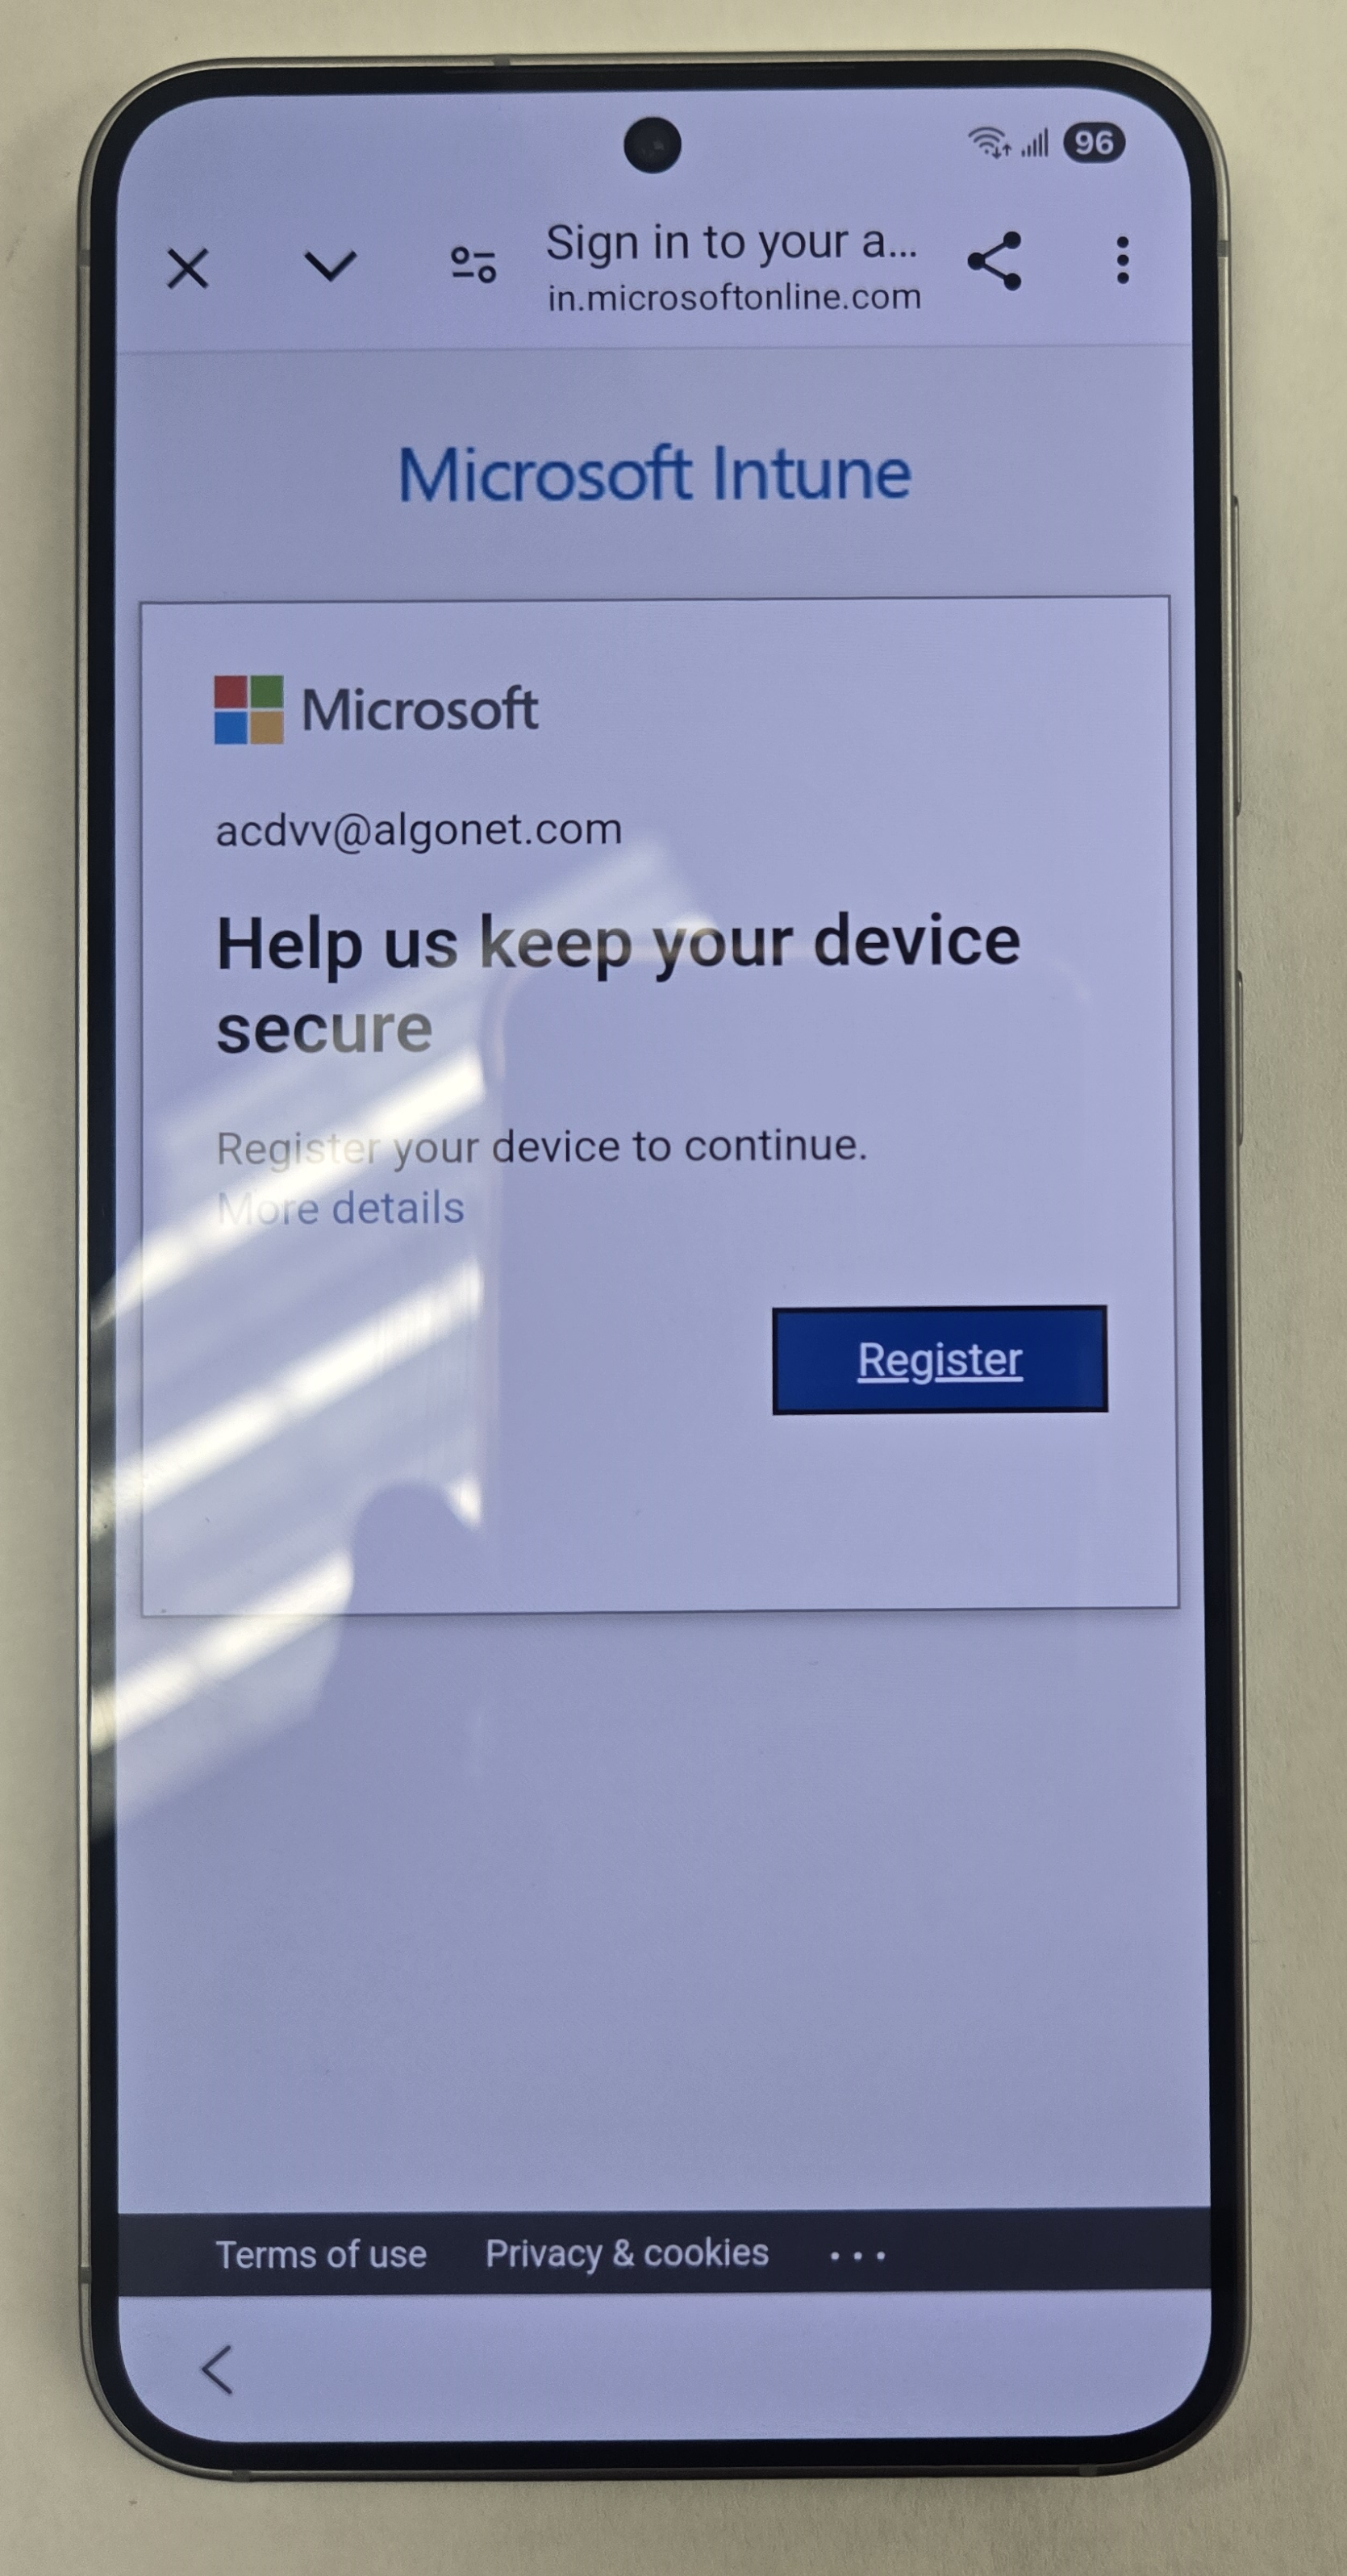
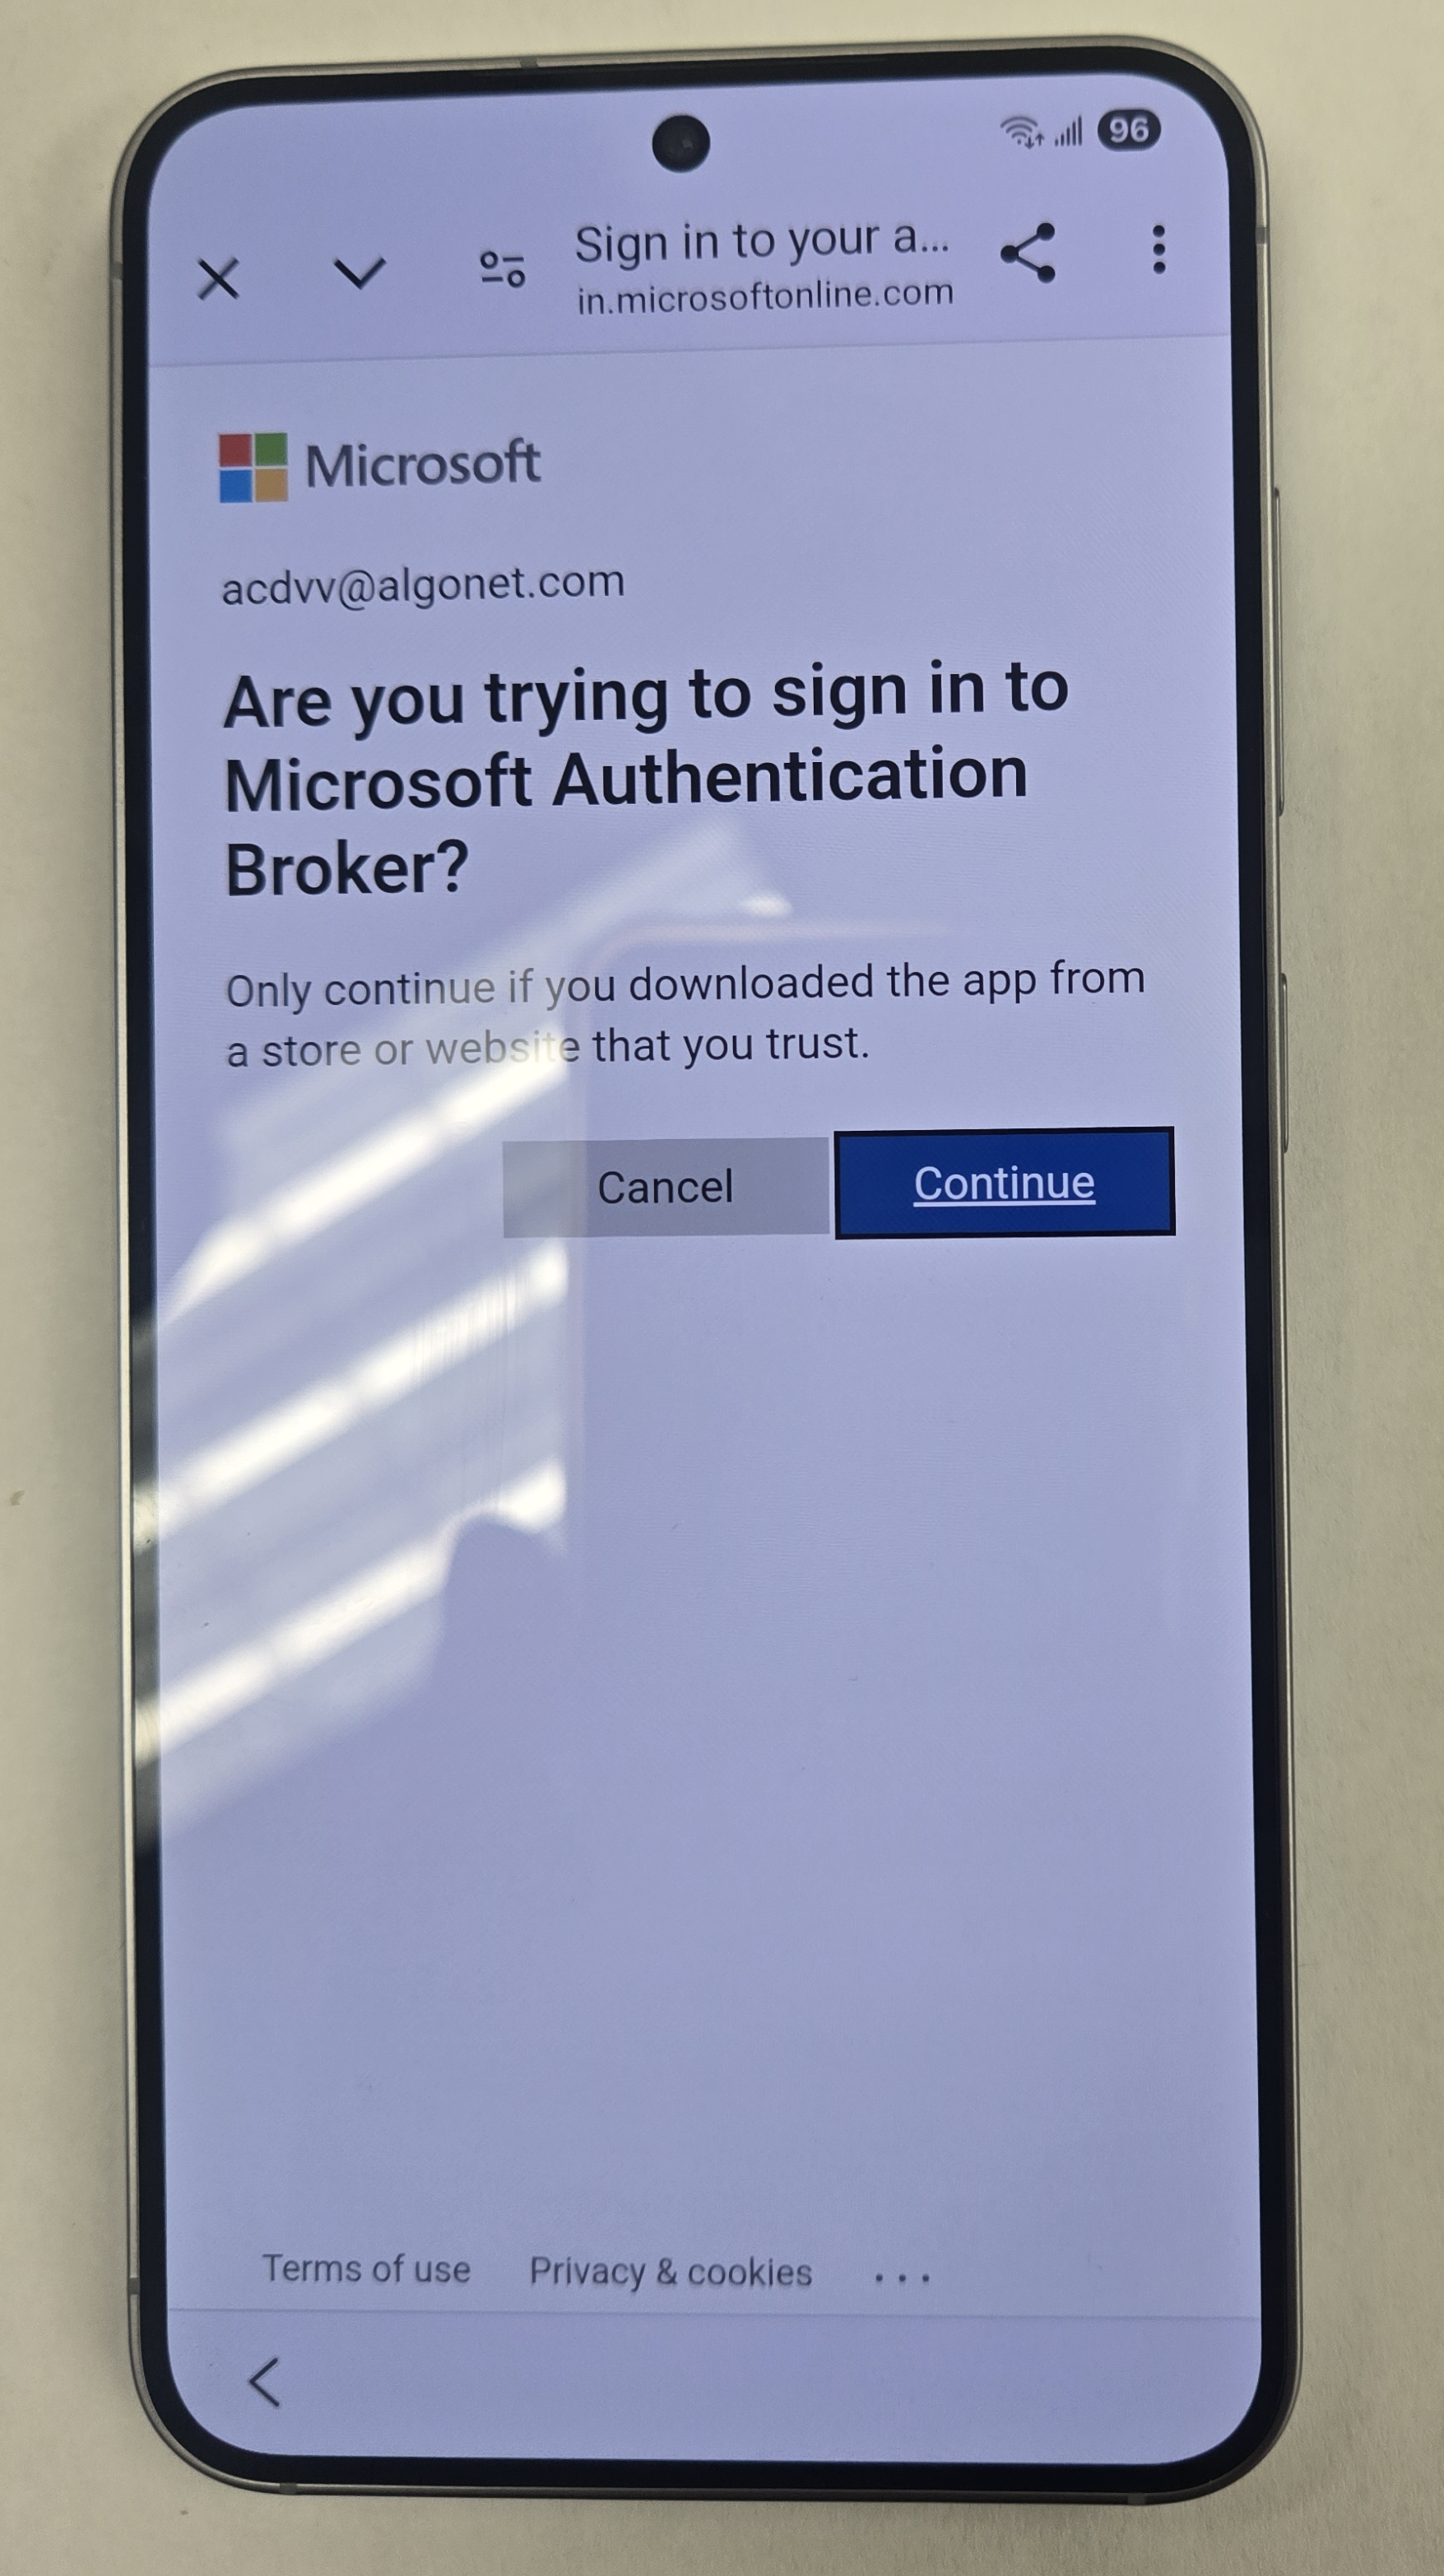
- You may get this screen again. Tap Continue.
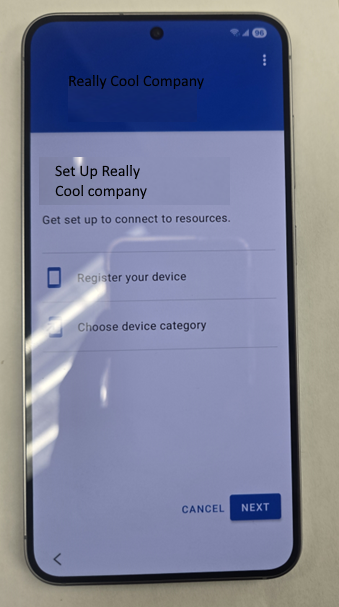
- Tap “Next”.
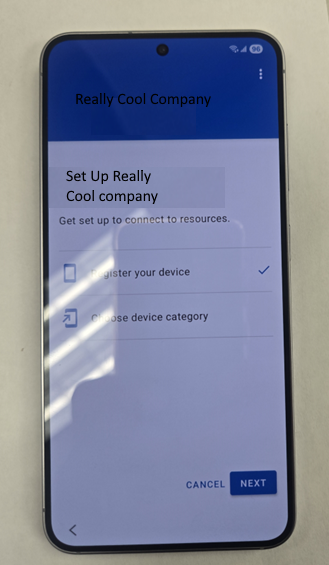
- Tap Next Again.
- You may have set a device category. Pick one and Tap OK.
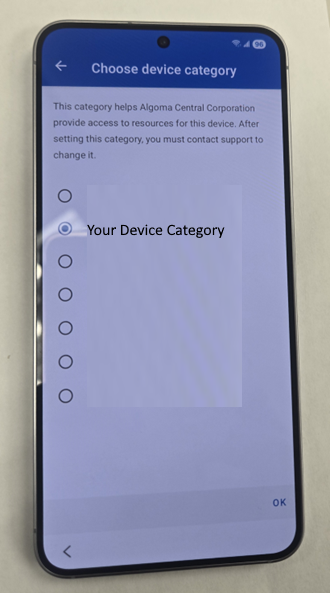
- Tap done.
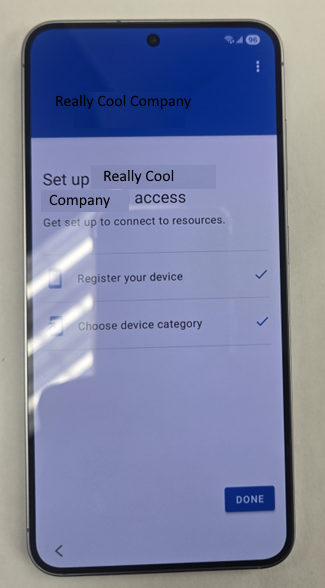
- You will be brought to the home screen of the phone.
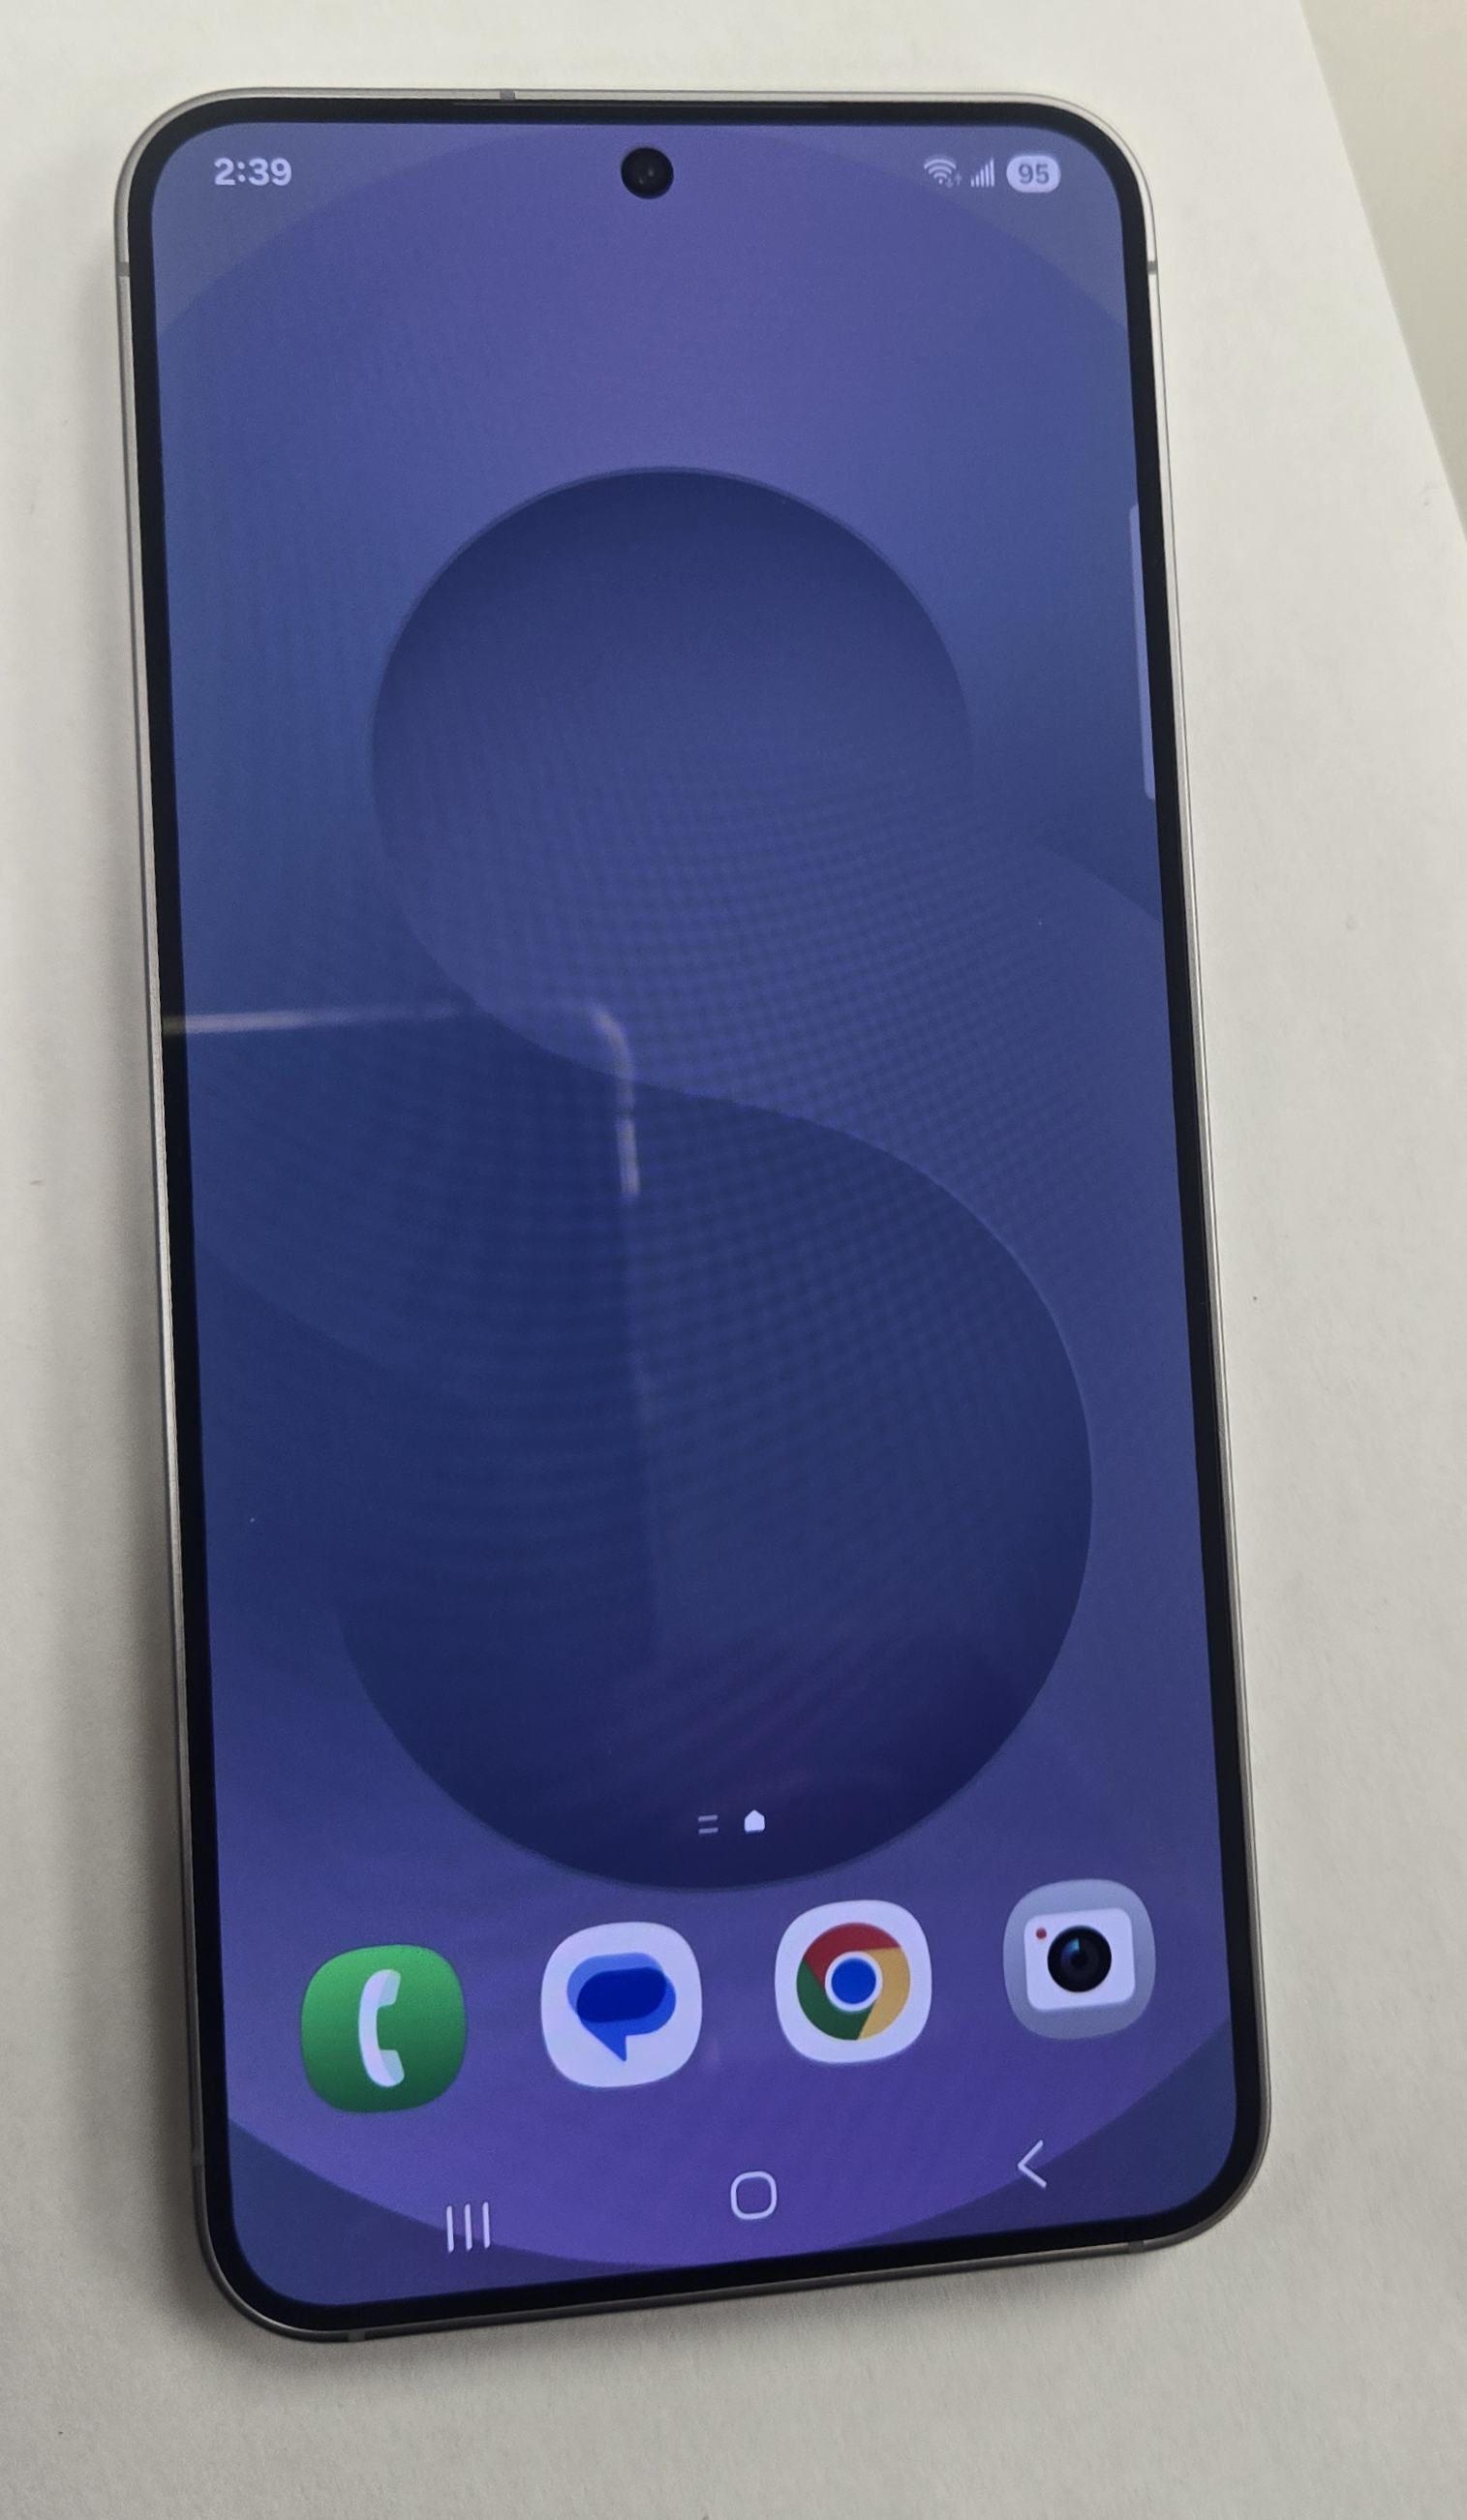
- The phone is enrolled, and it is good practice to rename it in the InTune portal. Please go to https://intune.microsoft.com/ to do so. But it is not 100% necessary.
- At this point, if it is a phone upgrade for an existing user you can use Samsung Smart Switch to Bring over the users’ data from their old phone. If this is a new user, you can skip this step.
- All the LOB Apps (If you do that) should be downloaded to the phone. It takes a few minutes after the phone is enrolled. You will see notifications on the phone while they are downloading and installing. Please remove all unnecessary apps on the phone by long pressing them on the home screen and tapping “Remove”.
- Swipe up to see all app and long press and Tap “Add to Home Screen”.
- Go into each app essential app for the user and configure. Once again, only if you have set this up.
- Please set up their MFA. Use the same steps above that you used to temporarily set up MFA to enroll the phone. MFA is still set up on your phone in case of the new user or you can use the old phone of the upgrade user.
- Don’t forget to add a passcode to the phone. It is just good security.
Why Am I Giving you Info About Enrolling an Android Phone
There are several ways to be Enrolling an Android Phone but at the moment this is by far the fastest a most reliable way to go about Enrolling an Android Phone. Microsoft will inevitably change things. My site is dedicated to giving you useful up to date information so you can get on with administering your M365 tenant. whether you are a small business, MSP or fortune 500 company. This information will save you precious time!
Clean Up Outlook Mail (2 Ways)

If you need to Clean Up Outlook Mail it can be very easy. You just need to do it right. In this article, I can show two ways or steps if you will that can make this process very easy. The thing is you need to do these steps in the correct order to make the most out of your clean up.
I originally wrote a smaller article on this before. But this one is more comprehensive. Let’s begin with the first step on how to Clean Up Outlook Mail…..
Step One – Clean Up Outlook Mail with Mailbox Clean Up
Using this step will be very helpful and prepare you for executing step two. More on that later.
Click File at the top left and then “Mailbox Clean Up”
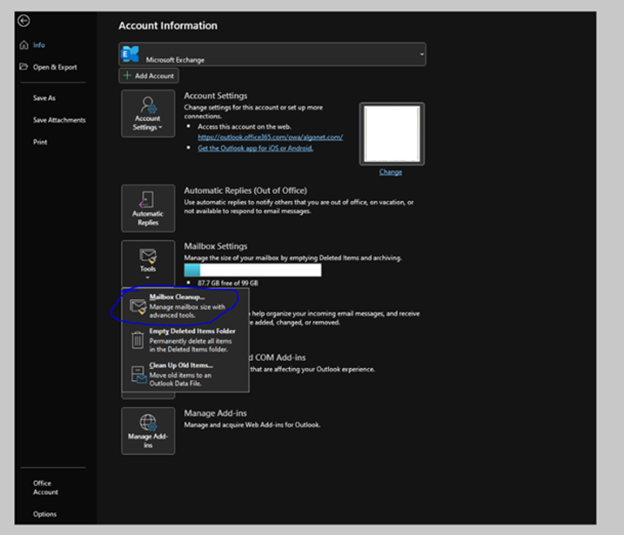
Mailbox Cleanup looks like this:

You can click “Mailbox Size”. It will show the folders in your email and give you a general idea of where items are stored.
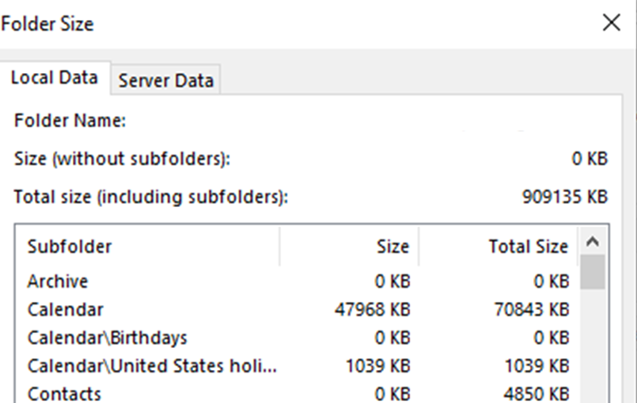
You can look for “items older than” or “items Larger than” you can determine which items you can delete:

Once you have found what you are looking for you can highlight all the items in the result, right click, and choose “delete”:

Once you are done searching and deleting older items by date and / or size, you can empty your deleted items folder:

Now that you are done this you have (known or not) prepared for the next step…Auto-Archiving.
Step Two – Clean Up Outlook Mail with Auto-Archive
- Click File / Options / Advanced / Auto Archive Settings:
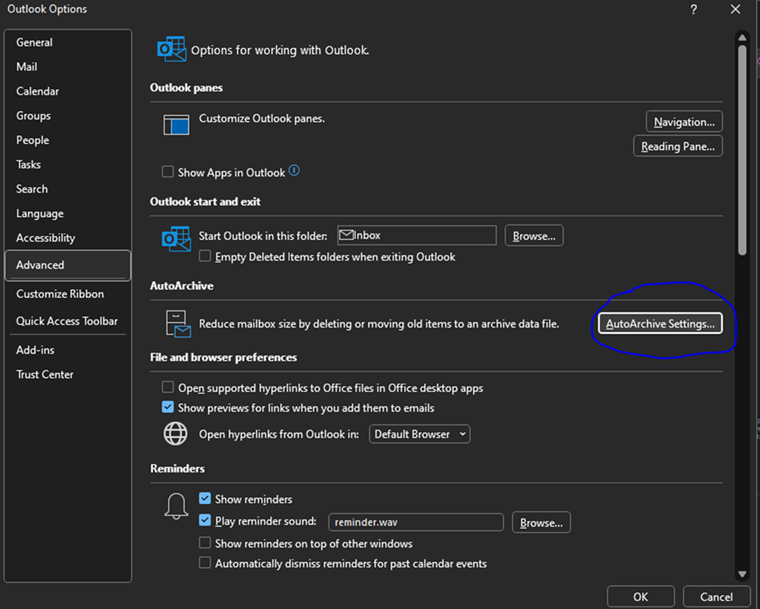
2. Once you have opened Auto-Archive Settings from options, you need to set them:
3. You will need to configure at least 4 settings. They are:
Enable Auto archive – You won’t be able to configure any other settings until you check this box.
Frequency – specify in Days how often you would like archive to run (in days).
Date to Start Auto Archive – When auto Archive runs it checks for items older than you specify and adds them to the archive. You can specify Months / Weeks / Days, or you can choose to permanently delete old items. I wouldn’t recommend this unless you are an advanced user and know how to work with .ost files.
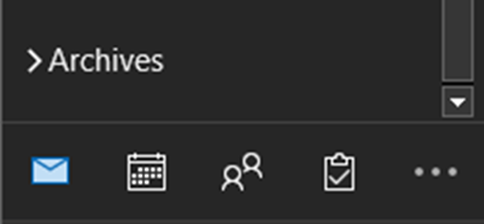
Once Auto-Archive runs once you will see it in your Outlook underneath your inbox as a searchable mail store:
Depending on the plan you have with Exchange Online, you will have limits to how much data you can store. Online it is between 50GB and 100GB (depending on how you are licensed). The Size of your Auto-Archive file can only be up to 1.5 TB. I would figure if you have that much mail you might be using your email account for more than just email storage. Maybe time to move some of that to OneDrive!