
Active Teams Users in Phone Directory – 2 Steps

So, do you have users complain that when they dial for a name in your team’s main auto-attendant, they get more than Active Teams Users in Phone Directory? Maybe a user that hasn’t worked for years in the company and their name is still an option…. not really. I will explain why.
Why It Appears Like Active Teams Users in Phone Directory
I have written several articles on Teams Administration. This is just another stop on an otherwise long journey! You can do everything to rid the user of the system. You can block their sign-in, you can remove the team’s number, heck you can even take all their licenses away. But why are they still showing up in the Teams Phone Directory of your main Auto-Attendant? I will tell you why and how to remedy it in 2 steps.
Why is this happening?
Since M365 has several systems cobbled together over the years, not all aspects of information update automatically or are related to each other. MS Teams is a great example of this since it was really developed separate from the rest of M365 and shoe-horned in. I will show you later in the article how to use what is called a “dial – scope” in Teams Admin. Here are the Steps to fix this.
Create an Entra Group of Users You Want in the Directory
You can do this manually or through Dynamic Membership Rules to keep only Active Teams Users in Phone Directory. An example of a dynamic membership rule could be one based on licensing. Typically, when a user is offboarded by the organization the user is un-licensed from Teams. This would effectively remove them from the group and the directory:

But I am getting ahead of myself. On to the next step.
Create a Dial Scope for Active Teams Users in Phone Directory
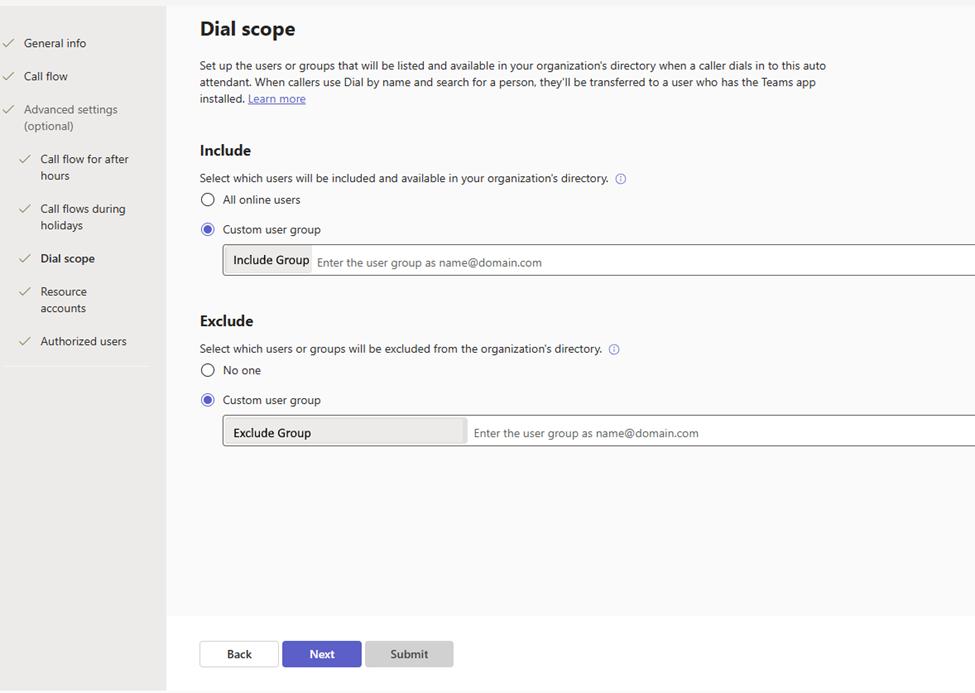
I have a great article on how to set up an Auto-Attendant in Teams. This shows you how to set up an Auto-Attendant but there is a section called a Dial Scope. In this section it allows you to put a group into the dial scope. So, when the Auto-Attendant asks you to dial by name only those who are licensed for teams (and therefore active) can be searched. You can add a group to include in the search and if you want to fine tune a little bit, you can also have an “exclude” group:
Android Fully Managed Devices and Samsung Smart Sync in InTune
A challenge with Android Enterprise managed devices is the lack of ability to restore data from an old device to a new device. You want to use Android fully managed devices and Samsung Smart Sync. Other than that, there really isn’t anything else for back in the Android Enterprise. The Samsung Smart Switch is a great solution for personal devices so why not Intune enrolled devices?
It can be, but this only works out of the box for the Personally Owned Devices with Work and Corporate Owned Devices With Work Profile (the Samsung Smart Switch app is only supported in the personal profile) enrollments.
The Samsung Smart Switch app is not designed for enterprise environments and will be restricted by default.
It can be done with the more restrictive Corporate-owned Fully Managed User Devices but there are 2 steps involved. Thats what this post is about.
Android Fully Managed Devices and Samsung Smart Sync App Distribution
When looking at using the Samsung Smart Switch app on Android Enterprise fully managed devices, the app should be distributed by using Microsoft Intune. That will make sure that the backup and restore functionality will be available. The distribution of the Samsung Smart Switch app can be achieved by going through the seven steps below.
- Open the Microsoft Endpoint Manager admin center portal navigate to Apps > All apps > Android
- On the Android | Android apps blade, click Add to open the Select app type page
- On the Select “app type” page, select Managed Google Play app as App type and click Select
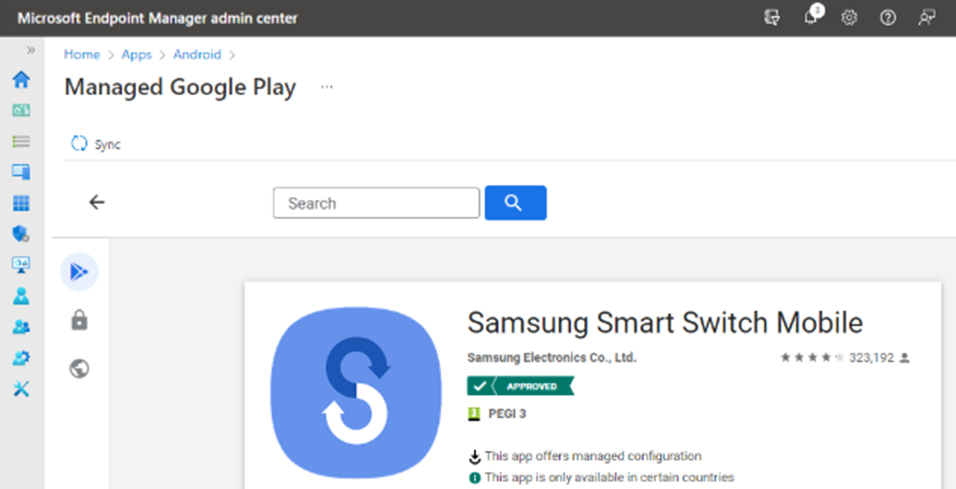
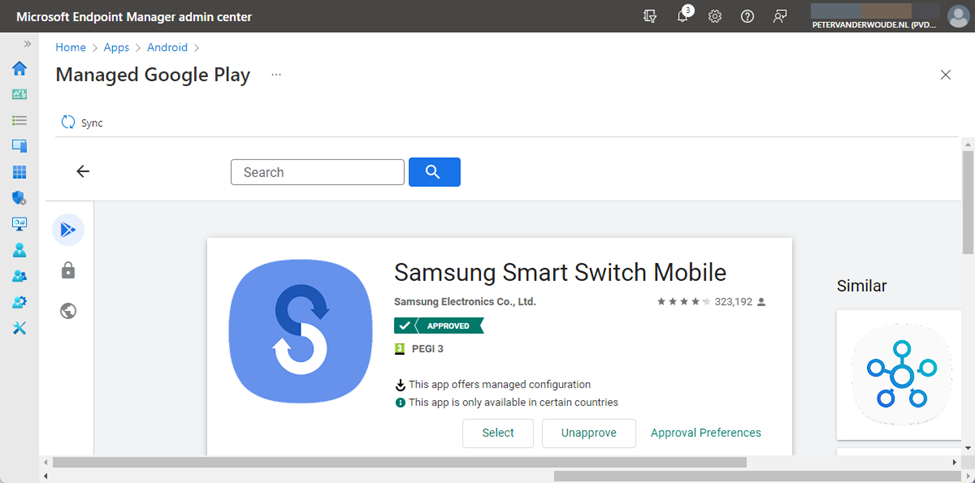
- On the Managed Google Play page, search for the Samsung Smart Switch Mobile app, select the app and click Approve
- On the Permissions dialog, click Approve
- On the Approval settings dialog, select Keep approved when app requests new permissions click Done
- Click Sync (as shown below in Figure 1) to synchronize the “approved app” to Microsoft Intune:
Configuration of the Samsung Smart Switch app
After distributing the Samsung Smart Switch app to Android Enterprise fully managed devices, the app must be configured by using Microsoft Intune. That configuration is the Allow SmartSwitch Run (allow_run) configuration key that can be enabled to make sure that the app can be used on Android Enterprise fully managed devices. The configuration of the Samsung Smart Switch app can be achieved by going through the seven steps below.
- Open the Microsoft Endpoint Manager admin center portal navigate to Apps > App configuration profiles
- On the Apps | App configuration policies blade, click Add > Managed devices
- On the Basics page, provide the following information and click Next
- Name: Provide a valid name for the app configuration policy
- Description: (Optional) Provide a valid name for the app configuration policy
- Device enrollment type: (Grayed out) Managed devices
- Platform: Select Android Enterprise
- Profile Type: Select All Profile Types, Fully Managed, Dedicated, and Corporate-Owned Work Profile Only or Personally Owned Work Profile Only depending on the devices that should get this policy assigned
- Targeted app: Select Samsung Smart Switch Mobile
- On the Settings page, provide at least the following information (as shown below in Figure 2) and click Next:
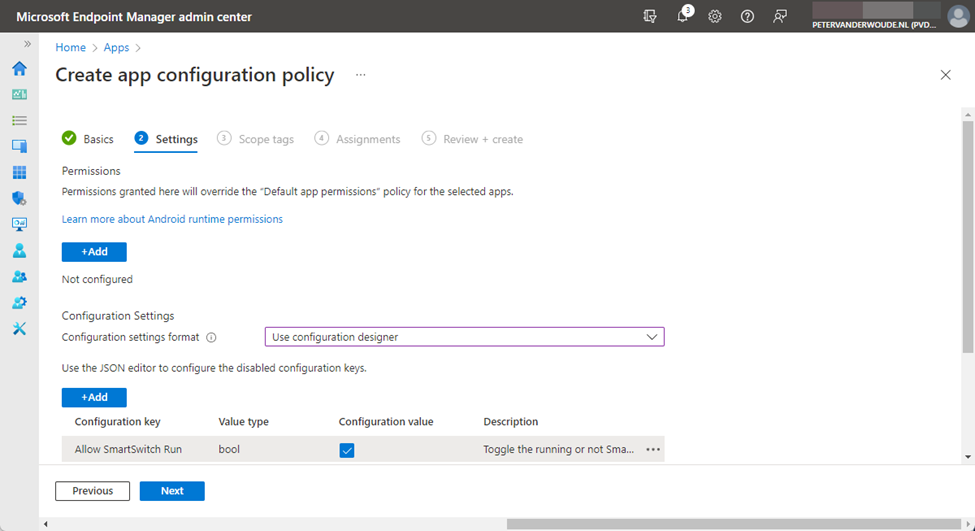

- Configuration Settings format: Select Use configuration designer
- Click Add to add the Allow SmartSwitch Run configuration key and check the box with the configuration value
- On the Scope tags page, configure the applicable scope tags and click Next
- On the Assignments page, configure the assignment by selecting the applicable group and click Next
- On the Review + create page, review the configuration and click Create
User experience with the Samsung Smart Switch app
When Android fully managed devices and Samsung Smart Sync are used together, the user experience can be simply verified by opening the app. When the configuration was not successfully applied, the message Security policy restricts use of Smart Switch will show as shown below in Figure 3, and when the configuration was successfully applied, the app will open as shown below in Figure 4. Before the user gets to that screen, many permissions must be approved to make sure that the data can be restored. After that the user can choose how to transfer data to the device. Simply walk through the app and select the device that is sending the data, or connect the device to PC
More information on Android fully managed devices and Samsung Smart Sync
For more information about Samsung Smart Switch and the configuration, refer to the following docs.
Automate FTP with PowerShell

Automate FTP with PowerShell
So, you want to Automate FTP with PowerShell? Well, you have come to the right place. FTP is not dead . In fact, it is still quite widely used. If all you need is files to be transferred from one place to another, it is the best choice.
Why would you need to Automate FTP with PowerShell
There are several reasons you would need to automate FTP with PowerShell. One is compatibility. Batch files are still around but to get them to automate FTP, you must call on third party programs that may or may not be kept up to date. As OSes start to update the third party application may fall behind. This leads me to my second point….
Security with PowerShell
You can be more granular with security and PowerShell. It is baked into M365 and local AD so you can be sure that only the users you require can run the script to Automate FTP with PowerShell.
Prerequisites to the Script
You will need the following before you can run the script to Automate FTP with PowerShell.
WinSCP Automation
The script calls on WinSCP FTP Automation to load a DLL so it can connect to your required FTP Server and transfer files. You need to register the DLL in the Directory it is going to be called from. The documentation is a bit confusing but simply put, extract the DLL to the same folder as the script. Then drop to CMD prompt and navigate to that folder and then register the DLL:
%WINDIR%\Microsoft.NET\Framework64\<version>\RegAsm.exe WinSCPnet.dll /codebase /tlb Make sure the version of .NET you are using is specified in <version>. I used v4.0.30319
So, my command looked like this:
%WINDIR%\Microsoft.NET\Framework64 v4.0.30319\RegAsm.exe WinSCPnet.dll /codebase /tlb If Running the Script on a Server
You need to make sure the Above DLL is registered for the user account running the script. You also need Full Control file security on the folder that houses the script. The reason for this is you need to be able to rename and move files in and around the file structure which otherwise require admin access. Without this, the script will not run.
If Connecting to SFTP
You will need to get the SSHHost Key If connecting with a password or both the SSHHost Key and SSHKeyPath file (if not using a password) and point to where it is stored (Preferable in the same folder as everything else).
But if you connect manually to these servers, you already have this information. If not, reach out to the vendor or organization you need to connect to. My example only needs the SSH Host Key.
Bonus: If You Plan to Notify of Completion or Errors via Email
If you plan To Send Mail In PowerShell , you will need to create an App Registration in Entra with the correct permission to send mail and then have that account give consent to allow it to be used to send mail through API (like PowerShell). I have written an article about it. You should check it out. It will help Automate FTP with PowerShell.
The Script
This is an example of a PowerShell Script to Automate FTP with PowerShell by downloading a file, renaming it and then moving it:
try
{
# Load WinSCP .NET assembly
Add-Type -Path “C:\Path\To\WinSCP\Automation\WinSCPnet.dll” ## https://winscp.net/download/WinSCP-5.19.6-Automation.zip
# Setup session options
$sessionOptions = New-Object WinSCP.SessionOptions -Property @{
Protocol = [WinSCP.Protocol]::Sftp # Port 22 Sftp | FTP Port: 21
HostName = “<ip address>” #IP TO FTP/SFTP
UserName = “<username>” #USERNAME
Password = <password>!” #PASSWORD LEAVE EMPTY IF YOU USE PRIVATE KEY LIKE THIS( Password = “” )
SshHostKeyFingerprint = “ssh-ed25519 255 UINj1Jc5jKcADtEwF0dd0tUjjk4KNp3JN6EyQf5G7ns”
#SshPrivateKeyPath= “C:\Users\Admin\private.ppk” #If you use password make “SshPrivateKeyPath” to a comment or delete the line!
}
$session = New-Object WinSCP.Session
try
{
# Connect
$session.Open($sessionOptions)
$transferOptions = New-Object WinSCP.TransferOptions
$transferOptions.TransferMode = [WinSCP.TransferMode]::Binary
$transferResult =
$session.GetFiles(“/incoming/Sample.csv”, “C:\Path\To\File\Upload\”, $False, $transferOptions) #Get files from incoming to upload
# Use $session.PutFiles(LocalPath, RemotePath) instead If you are wanting to send files to the SFTP/FTP Server.
# Throw on any error
$transferResult.Check()
# Print results
foreach ($transfer in $transferResult.Transfers)
{
Write-Host “Download of $($transfer.FileName) to $localPath succeeded”
$transferResult.Transfers
}
}
finally
{
# Disconnect, clean up (Session.Close to exit the session!)
$session.Close()
}
#exit 0
}
catch
{
Write-Host “Error: $($_.Exception.Message)”
.\NotifyMailFailed.ps1
exit 1
}
$Exist = Test-Path “C:\Path\To\File\Upload\”, Sample.csv” -PathType Leaf
$IsTrue = $Exist
if ($IsTrue) {
# rename file and move to Archive Folder
# Write file is there
$time = Get-Date -Format “MM-dd-yyyy”
Rename-Item -Path ” C:\Path\To\File\Upload\Sample.csv” -NewName Sample_$time.CSV
Move-Item -Path ” C:\Path\To\File\Upload\*.csv” -Destination ” C:\Path\To\File\Upload\saved”
## Notifying Via Email Upload is Complete
#refer to https://quickm365tips.com/the-correct-way-to-send-mail-in-powershell/
.\NotifyMail.ps1
} else {
# Write file is NOT there
## Notifying Via Email Upload is Complete
#refer to https://quickm365tips.com/the-correct-way-to-send-mail-in-powershell/
.\NotifyMailFailed.ps1
}
Benefits When You Automate FTP with PowerShell
When you can automate any process that is normally done manually, it is a benefit. It saves you time from performing several steps and concentrates on what you need to do most. Probably analyzing the data (Not retrieving it)!
Another Benefit is if you must automate several FTP services all you have to do is copy the script and change the particulars. You will be up and running in no time 😊
A Simple Script for M365 Licenses

You need to juggle M365 Licenses, but you need to see who has them first? It seems simple, it is, and you can write a Script for M365 Licenses, but you will need to do a little preparation first.
Why Would you Need a Script for M365 Licenses
That is a very good question. A good example is that you are switch licensing vendors and you would like to see how many licenses you need to switch out. Once you know who has this license you can get a list and then switch them out.
I can give you a piece of advice. Add new licenses first and make sure they work before you remove the old licenses! Even if the old licenses sit expired, the new ones must be added first. I will write an article in the future of what happens if you do it backwards LOL.
A script for M365 licenses will help with this.
What you Need to Write the Script
You will need 4 Things.
- A csv file with the group of users you would like to check. This CSV will include three columns labelled UPName, DisplayName and Object ID
- The SKU ID of the Microsoft product you want to Check
- A PowerShell script to check the SKU
- A PowerShell script to deal with the SKU (in this case, remove)
Create a CSV for Your Script for M365 Licenses

This is an example CSV that you would use for your script. Name it Sample.csv so it is the same file that is referenced in the script.
To get this information, you will need to go to your Entra Portal and under all users, click download users:

You can use this info to create your sample.csv.
Get the SKU ID of the M365 License you Want to Query
You will need to connect to Microsoft Graph and run the command Get-MgSubscribedSku:
Connect-Graph -Scopes Organization.Read.All

Get-MgSubscribedSku | Select -Property Sku*, ConsumedUnits -ExpandProperty PrepaidUnits | Format-List
You will get a listing of all licensed products in your tenant. From there you can get the SkuId:
SkuId : 06ebc4ee-1bb5-47dd-8120-11324bc54e06
SkuPartNumber : SPE_E5
In this example, we are querying the SkuID for the now discontinued E5 licensing. It has been happening for awhile but it might be hitting you now because your current agreement needs to be renewed. You will now need to copy the ID into a Script for M365 Licenses. Now that you have your CSV and License to query, it is now time for the Script for M365 Licenses.
Script to Check for the SKU
# Connect to Microsoft 365

Connect-MgGraph -Scopes User.Read.All, Organization.Read.All


#Path to UPN File #


$CSVPathUPN = ".\sample.csv"


##Run Script##


##Try import UPN CSV file##


Write-Host Importing CSV


try {

    $UPNUsers = import-csv $CSVPathUPN -ErrorAction stop
}

catch {

    throw "Error importing CSV: $($_.Exception.Message)"

    break

}


foreach ($UPNUser in $UPNUsers) {


$Uname = $UPNUser.UPName

$Dname = $UPNUser.displayName

$ObjID = $UPNUser.ObjectID


# Checks if they have SPE5


# Define the license SKU you're checking for (e.g., "E5" or the SKU ID)

$Sku = "06ebc4ee-1bb5-47dd-8120-11324bc54e06"


# Get the user's license details

$CurrentLicenses = Get-MgUserLicenseDetail -UserId $Uname | Select-Object -ExpandProperty SkuId


# Check if the specified license is assigned

if ($Sku -in $CurrentLicenses) {

    Write-Host "User '$Dname' has license: $Sku"

} else {

    Write-Host "User '$Dname does not have license: $Sku"

}


}

Write-Host All done


The script will cycle through each user and tell you whether that user has that license.
Script to Remove for the SKU
Now that you know which user(s) have the licenses, you can compile your CSV above and run the following script to remove the them:
##Connect to Azure and MSGraph modules##

Connect-MgGraph -Scopes User.ReadWrite.All, Organization.Read.All


#Path to UPN File #


$CSVPathUPN = ".\sample.csv"


##Run Script##


##Try import UPN CSV file##


Write-Host Importing CSV


try {

    $UPNUsers = import-csv $CSVPathUPN -ErrorAction stop

}

catch {

    throw "Error importing CSV: $($_.Exception.Message)"

    break

}


$f1Sku = Get-MgSubscribedSku -All | Where SkuPartNumber -eq 'SPE_E5'


foreach ($UPNUser in $UPNUsers) {


$Uname = $UPNUser.UPName

$Dname = $UPNUser.displayName

$ObjID = $UPNUser.ObjectID


# Remove SPE5


Set-MgUserLicense -UserId $Uname -RemoveLicenses @($f1Sku.SkuId) -AddLicenses @() -ErrorAction Stop


Write-Host Remove Legacy E5 Licensing for $Dname ....


}


Write-Host All done
This is a good way to write a Script for M365 Licenses!
Managing Calendar Permissions with PowerShell
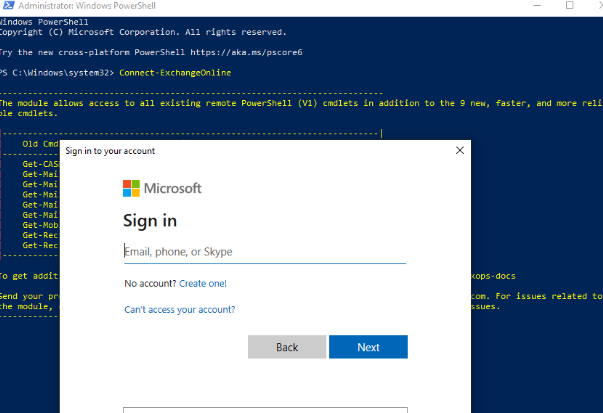
Managing calendar permissions with PowerShell on Microsoft 365 / Exchange Online will often require you to use PowerShell a bit. I can explain how to perform typical day-to-day admin tasks involving calendar permissions, using PowerShell.
Before managing permissions, you need to connect to Exchange Online through PowerShell. Once connected, you can view existing calendar permissions, add new permissions, edit existing calendar permissions, and remove calendar permissions.
Connect to Exchange Online via PowerShell
Connecting to Exchange Online via PowerShell requires just a few commands. Follow the instructions below to connect to Exchange Online from your PowerShell prompt.
- Launch PowerShell from Workstation
- Run the Following Four Commands in Order:
Set-ExecutionPolicy RemoteSigned -Force
$UserCredential = Get-Credential
$Session = New-PSSession -ConfigurationName Microsoft.Exchange -ConnectionUri https://outlook.office365.com/powershell-liveid/ -Credential $UserCredential -Authentication Basic -AllowRedirection
Import-PSSession $Session
The above script will prompt you for O365 credentials. When prompted, supply your credentials for the O365 tenant you are trying to manage.
If you know how to use PowerShell, you can easily write a script to automate this.
Viewing Calendar Permissions with PowerShell
Before setting / updating / removing permissions from an O365 calendar, it is a good idea to see what permissions currently exist on it so they can be set back to their original permissions if you make a mistake. To list the permissions on a calendar using PowerShell, run the Get-MailboxFolderPermission command in PowerShell after you have connected to Exchange Online.
Get-MailboxFolderPermission -Identity <user@company.com>:\Calendar
You would obviously replace john@contoso.com with the user whose calendar permissions you want to view. If you prefer, you can pipe the output to a CSV file as well by appending | Export-CSV c:\filepath\filename.csv to the command:
Get-MailboxFolderPermission -Identity <user@company.com>:\Calendar | Export-CSV c:\filepath\filename.csv
Replace filepath with the path to the file you are creating and filename with the name you want to give the CSV file.
Removing Calendar Permissions with PowerShell
Removing existing permissions from a calendar in O365 with PowerShell requires just a single command (Remove-MailboxFolderPermission). To run it, make sure you have connected to Exchange Online via PowerShell and then run the command below. In the example below, we are removing John’s access from Jen’s calendar:
Remove-MailboxFolderPermission -Identity <user@company.com>:\Calendar -User john@contoso.com
Adding Permissions to a Calendar with PowerShell
The Add-MailboxFolderpermission PowerShell command is used to add permissions to a calendar. You can only ADD permissions to a calendar for a user if there are not already permissions configured. If you need to UPDATE permissions that already exist, you would use the Set-MailboxFolderPermission command.
To clarify, let’s use the following example:
Jimmy is a new hire at Contoso. He has not yet been given any permissions to User’s calendar and now needs “Reviewer” access. Since he currently has no permissions to Jen’s calendar, you would use the command below to add his permissions to Jen’s calendar:
Add-MailboxFolderPermission -Identity <user@company.com>:\calendar -user <jimmy@company.com> -AccessRights Reviewer
If Jimmy already had permissions (i.e. Editor, Author, etc) to User’s calendar, running the Add-MailboxFolderPermission command would have generated an error indicating permissions already exist. In that case, you would use the Set-MailboxFolderPermission command instead (see below).
Changing Permissions on a Calendar in O365 with PowerShell
Changing permissions that already exist on the calendar in O365 requires a different command. Instead of running the Add-MailboxFolderPermission PowerShell command, you should run the Set-MailboxFolderPermission command when you need to update pre-existing permissions.
For example, if John already has Reviewer access to Jen’s calendar, you will use the command below to change the permissions to Editor:
Set-MailboxFolderPermission -Identity user@company.com:\Calendar -User jimmy@ company.com -AccessRights Editor
If you try to run the command above, it will fail if existing permissions are not already in place.
Available Calendar Permissions with PowerShell
There are 10 available roles that you can set on calendars. They are:
- Owner. Allows read, create, modify and delete all items and folders. Also allows managing items permissions
- PublishingEditor. Allows read, create, modify and delete items/subfolders.
- Editor. Allows read, create, modify and delete items.
- PublishingAuthor. Allows read, create all items/subfolders. You can modify and delete only items you create.
- Author. Allows create and read items; edit and delete own items.
- NonEditingAuthor. Allows full read access and create items. You can delete only your own items.
- Reviewer. Read only.
- Contributor. Allows create items and folders.
- AvailabilityOnly. Allows read free/busy information from calendar
- LimitedDetails. Allows view of the subject and location.
- None. No permission to access folder and files.
You may use any of the above roles when setting permissions on calendars in O365 with PowerShell.
Summary or Calendar Permissions with PowerShell
Managing calendars in M365 with PowerShell requires familiarity with four commands:
The Get-MailboxFolderPermission command is used to view existing permissions.
The Remove-MailboxFolderPermission is used to remove existing permissions.
Add-MailboxFolderPermission is used to add NEW permissions to a calendar and
Set-MailboxFolderPermission is used to modify EXISTING permissions on the calendar.
New Outlook vs Classic Outlook (4 differences)

If you are a larger organization, you are probably still running Classic Outlook or just Outlook as we like to call it. Now you need to evaluate New Outlook vs Classic Outlook because Microsoft is mandating that you do….
It is better to go eyes wide open into this. Changing the toggle to evaluate New Outlook is one thing but if you don’t know the changes (translation: features they have changed or taken away) you are in for a big surprise. When it comes default on all M365 installations. At least they left the toggle visible and business customers have support until 2029.
I have compared both versions and here are 4 features I have found that might leave you scrambling after the switch if you are not careful….
New Outlook vs Classic Outlook – Public Folders
I will start with what night be the most detrimental change for some organizations. No, public folders are not dead but they are on life support. In true Microsoft fashion, instead of just saying “This feature will be retired by X Date” they transition functionality from Good to Bad to Worse to Non-existent and that’s precisely what they are doing now.
I would say it is the worse stage now. The only way I could get access to Public folders in New Outlook was to not use it. I had to go to Outlook on the web and then jump through hurdles to configure viewing it. Try getting a normal user to do this. They will tell you to “go pound salt”.
Signatures
I have already posted about this one. This change is also using Microsoft’s “slight of hand”. To get users to transition in newer versions of Classic outlook, they added a dropdown box allowing you to still store signatures locally in the app but also choose to put a signature in the cloud (available to all devices that login to Outlook). I suggested manually copying and pasting you signature from local to cloud. Once you switch to New Outlook the ability to do this will be gone.
PST Files
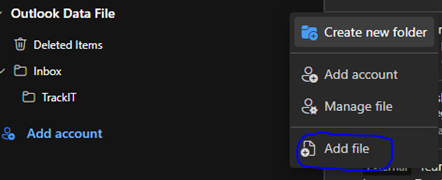
To discourage users from continuing to use PST files they make it difficult to mount them. What happens is after the switch your PST file get disconnected and you will have to re-mount them. Maybe Microsoft was hoping you would forget about them LOL. You will have to jump through some hoops to get them mounted after you switch.
Shared Tasks
It can be done but is now done through “To-Do”. The behavior is different than the old, shared tasks. I am not sure if old shared tasks are transferred without issue during the switch. My testing so far shows that shared tasks will need to be recreated. This will be a problem for uses who live and die with this feature.
Verdict of New Outlook vs Classic Outlook
It will be like any switch to any newer version of software when comparing New Outlook vs Classic Outlook. There will be a core group of users who will bemoan the change. To them, it is a major disruption of their work flow. But to most it will primarily go unnoticed. They will just notice the shiny new look of the screens and buttons. Ignorance might be bliss for most users but not for IT support!
Set-MgUserLicense Not Working
You have used this command many times before but Set-MgUserLicense Not Working? Why? There could be many reasons why but I am here to tell you of one particular reason in my travels with PowerShell.
Why Use Set-MgUserLicense Not Working
Set-MgUserLicense is very helpful when assigning or un-assigning licenses to several users. The portal does not make it very easy to do this. Sure, if you have a handful of licenses to deal with it is not a problem. But what if you have to work with hundreds or thousands of users at once? PowerShell is the way to go but what if it is not working?
Don’t Use Connect-MsolService to do this
It is now depreciated and you will either get an error message saying so or even worse, it will look like it ran but nothing has happened. If you are trying to re-assign a bunch of licenses from a new provider and you thought it worked but then on Monday your helpdesk lights up like a Christmas Tree, you know it didn’t work and you have a huge problem on your hands.
One big Tip to Prevent Set-MgUserLicense Not Working
Check the version of the Microsoft.Graph Module you are running:
Get-InstalledModule

Version              Name                                Repository           Description
-------              ----                                ----------           -----------
 Authentication Module.
2.24.0               Microsoft.Graph.BackupRestore       PSGallery            Microsoft Graph PowerShell Cmdlets
2.24.0               Microsoft.Graph.Bookings            PSGallery            Microsoft Graph PowerShell Cmdlets
2.24.0               Microsoft.Graph.Calendar            PSGallery            Microsoft Graph PowerShell Cmdlets
2.24.0               Microsoft.Graph.ChangeNotifications PSGallery            Microsoft Graph PowerShell Cmdlets
2.24.0               Microsoft.Graph.CloudCommunications PSGallery            Microsoft Graph PowerShell Cmdlets
2.24.0               Microsoft.Graph.Compliance          PSGallery            Microsoft Graph PowerShell Cmdlets
2.24.0               Microsoft.Graph.CrossDeviceExper... PSGallery            Microsoft Graph PowerShell Cmdlets
2.24.0               Microsoft.Graph.DeviceManagement    PSGallery            Microsoft Graph PowerShell
This is just a snapshot of the many Graph modules but as you can see here, I have version 2.24.0 of the Microsoft.Graph Module installed. The problem occurred when I was at a higher version (name 2.26.0). Downgrading did the trick.
Uninstall-Module -Name Microsoft.Graph -AllVersions

Install-Module Microsoft.Graph -Scope CurrentUser -Repository PSGallery -Force -RequiredVersion 2.24.0
Do this and you will solve Set-MgUserLicense Not Working
To Schedule a Teams Meeting Make Sure You’re Signed in to Teams
Teams Meeting Make Sure You’re Signed in (two ways to Fix)
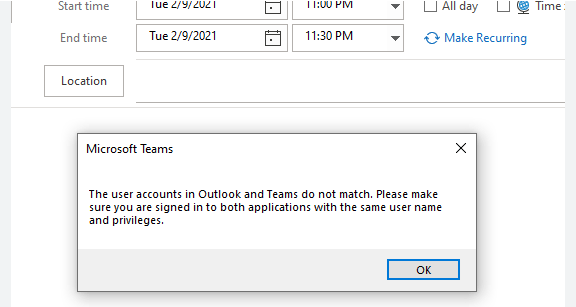
You see the dreaded “To schedule a Teams meeting, make sure you’re signed in to Teams”, But you are you say!! If you are still using classic teams this is an issue. It shouldn’t be after July 2025 so you better upgrade.
There are a myriad of ways to fix it but ultimately it is an issue with the add-in needing to be re-loaded. If you must resort to the link above, there is a lot more going on with not just Teams but Outlook too.
The Good news is the new Outlook does not need the Teams Add-in so eventually it won’t be problem. There are two ways we can tackle this. One if you are a regular user or an admin with only a few users or two or an admin who has a lot of users!
Fix Teams Meeting Make Sure You’re Signed in for Only a Few Users
It is very simple, you need to:
- Close Outlook.
- Sign out of Teams
- Sign back into Teams.
- Open Outlook
If that doesn’t work, then:
- Close Outlook
- To resolve the add-in issue, you can uninstall the Teams add-in completely. Then reinstall it. Go to Add or remove programs in System settings.

- Uninstall Microsoft Teams Add-in for Outlook.
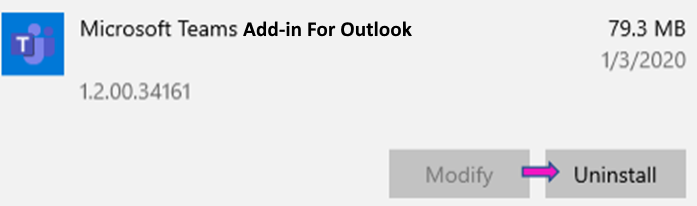
- When you start Outlook, it will reinstall the Add-in
Admin Fix Teams Meeting Make Sure You’re Signed in for A lot of Users
I hope you like batch files! If you have never used them before, here is a good tutorial. They are good for a lot of things, even Teams. You can create a batch file that performs the first sub step above and you can put it somewhere on your on-prem file server and get them to run it when they get the error message.
First create a folder to hold the batch files. Name it something like “ReinstallTeamsAddin” or something. The folder will hold three files. A main file that runs the commands necessary to execute the batch and two sub batch files that are called from the main batch file.
Main Batch File
REM ***BATCH FILE BEGINS...***

taskkill /im OUTLOOK.exe

start /min CallTeams.bat

timeout /t 35 /nobreak

taskkill /im TEAMS.exe

start /min CallOutlook.bat

Exit
Call Teams Batch File
cd "C:\Program Files (x86)\Microsoft\Teams\current\" – You need to make sure this is the right path

teams.exe

Exit
Call Outlook File
cd "C:\Program Files (x86)\Microsoft Office\root\Office16" – You need to make sure this is the right path

start OUTLOOK.EXE

Exit
What Teams Meeting Make Sure You’re Signed in Batch Does
If Outlook is Open, it closes it (since it needs to be closed to reload the add-in). Teams will open. One of three things will happen (one, it will load the main window, two, it will ask you to log in or three, it will tell you there was an error. Click “sign out and sign back in. Do not restart Teams, it does work).
The batch file gives you 35 seconds to do this. You can set whatever time you want but it must be enough for the user to reload teams.
Teams will close after the time expires and Outlook will reopen allowing the add-in to reload.
Easy Peasy….